


Updated on 2 April, 2026
How to integrate WP Activity Log with Slack for instant notifications
WP Activity Log can be configured to send activity notifications to Slack. Activity log notifications work through a Bot Token while mirroring through Webhooks. This difference exists because notifications are time-sensitive while mirroring and storage typically contain more information per request, and as such they use the action scheduler for data transfer. In this guide we will be configuring notifications. For information on mirroring, refer to this guide here.
Table of contents
Step 1: Creating the Slack app
We first need to create the Slack channel where we want to receive notifications. This needs to be done from your Slack management portal.
Next, we need to create a Slack app. This can be done from the Slack API website, which you can find here.
Log in and then click on the Create an App button as shown in the screenshot below.

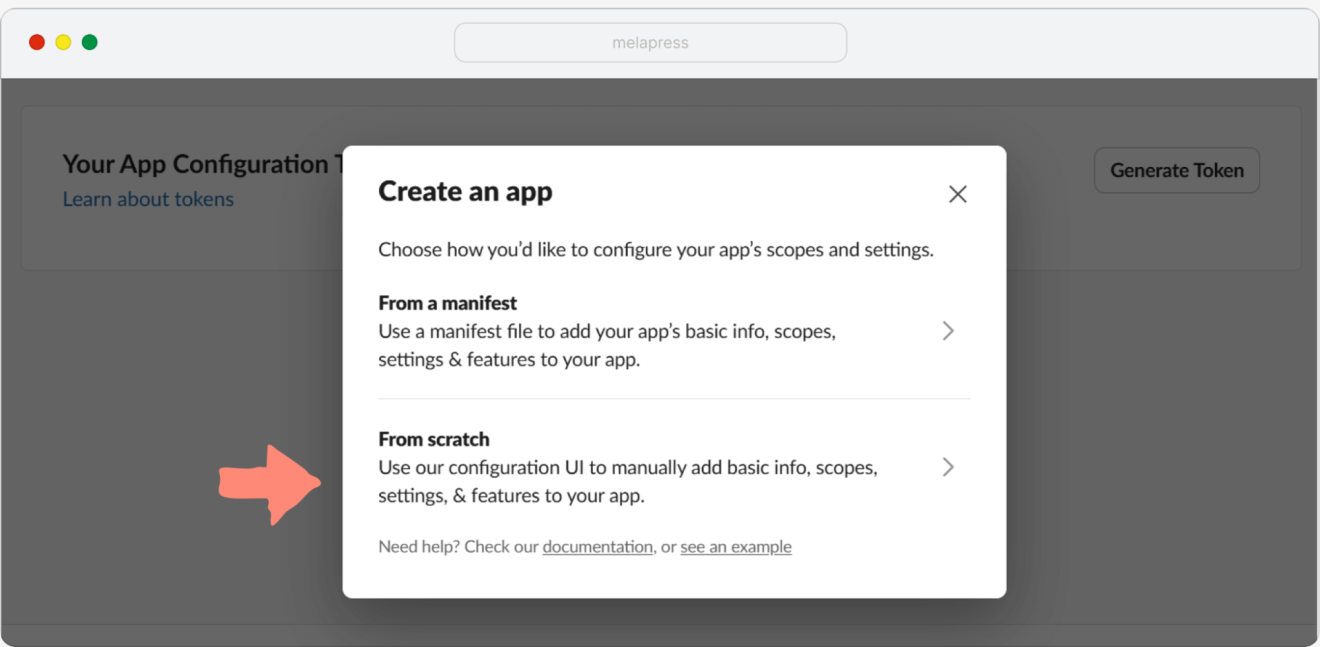
In the first screen of the wizard, choose the From scratch option.
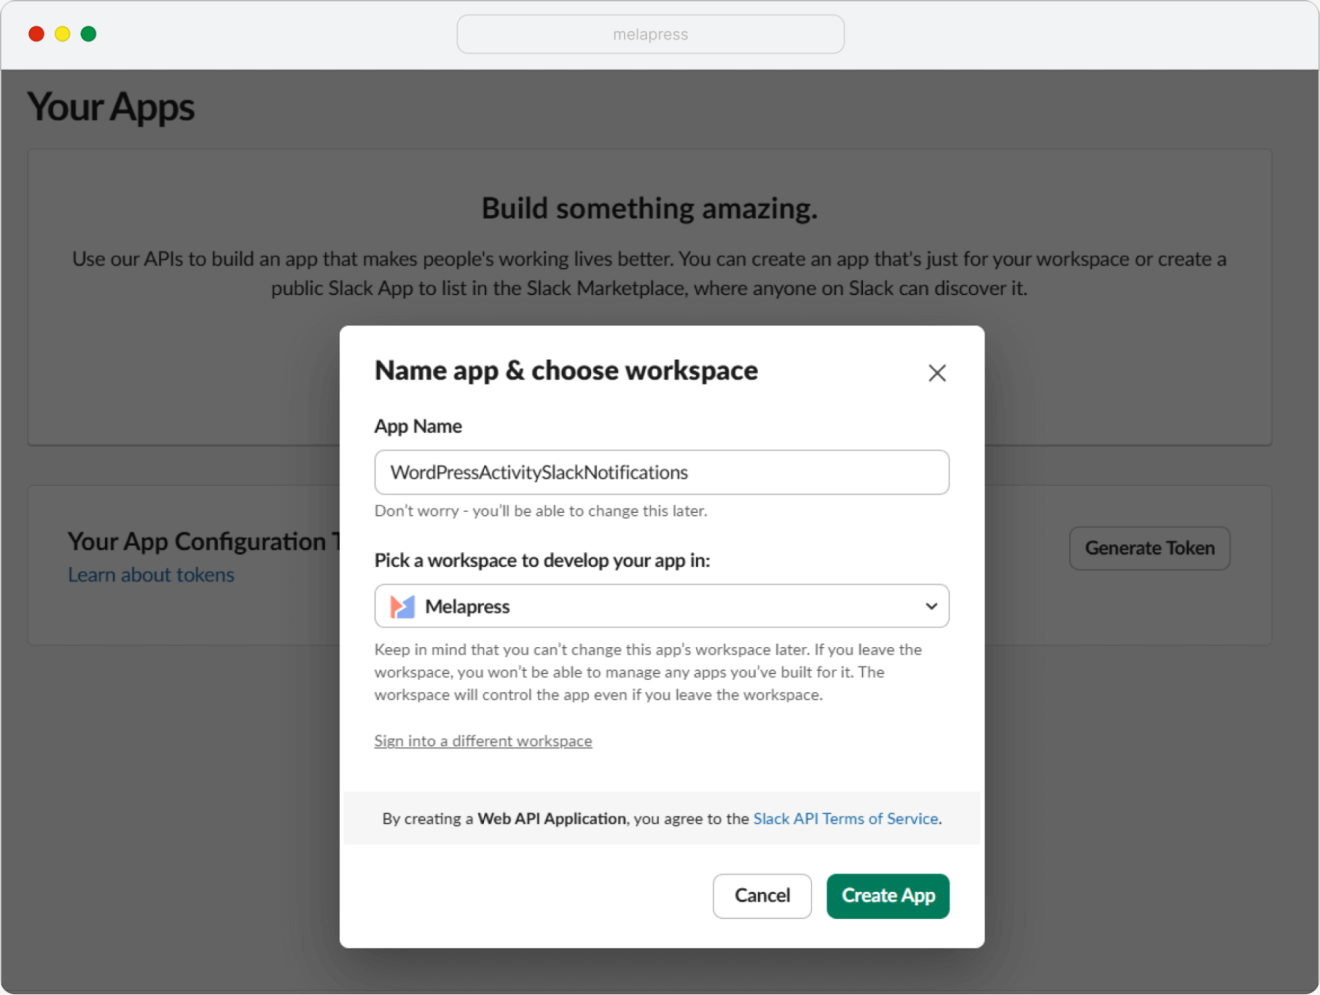
Next, give the App a name by filling in the App Name field. Choose a name that makes the App easily identifiable. Once that is done, choose the workspace that will control the app. Keep in mind that this cannot be changed later.
Once ready, click on the Create App button.
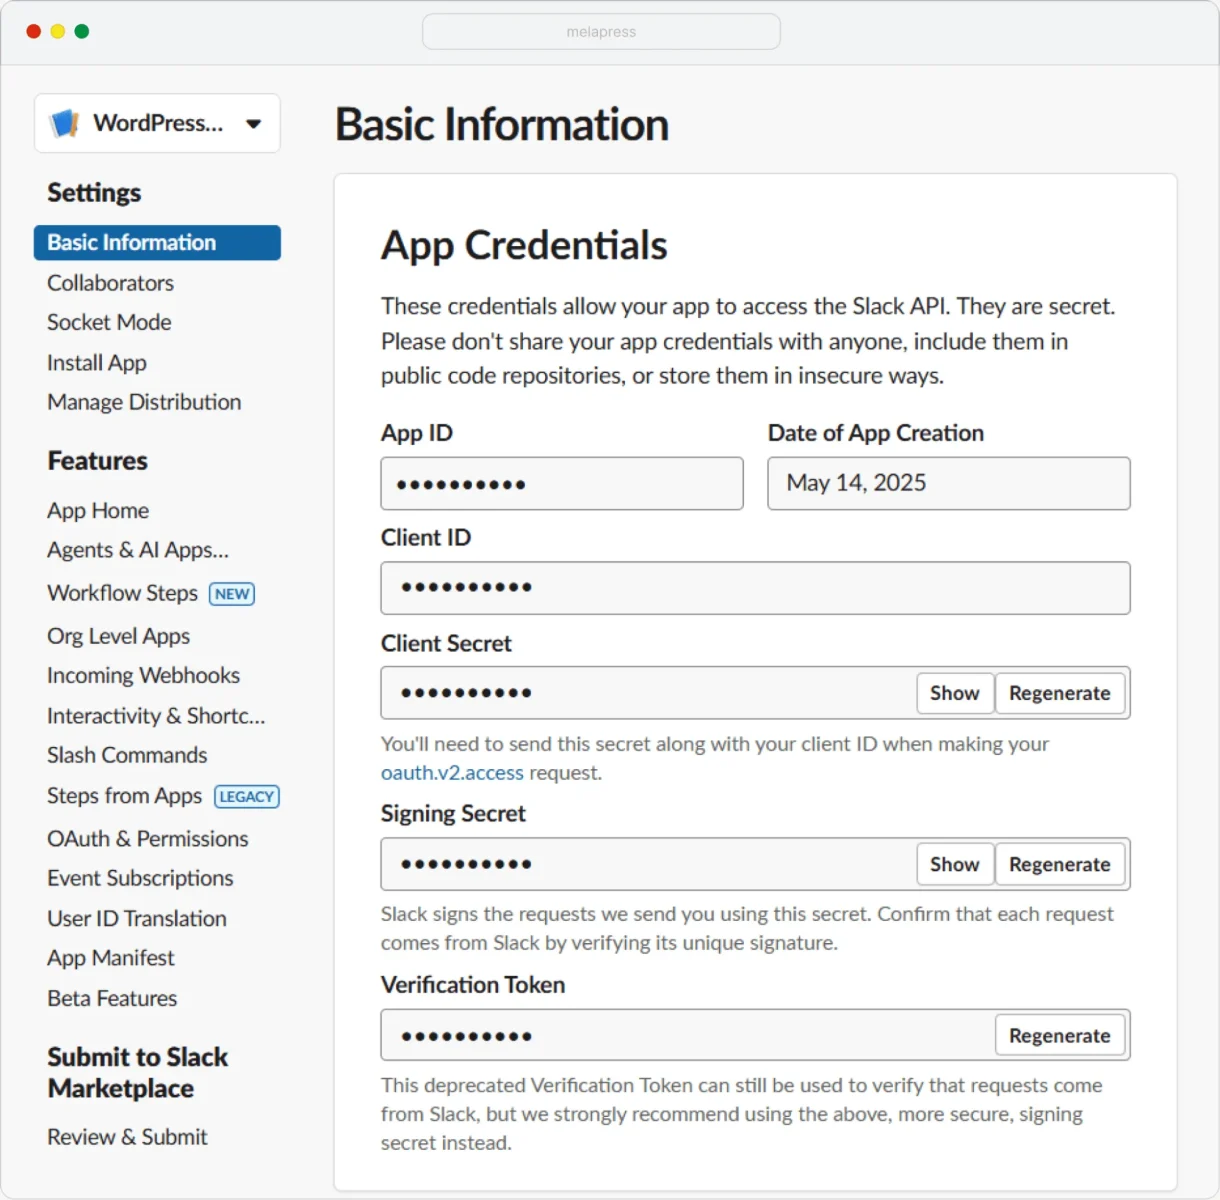
Once you click on the Create App button, the app will be created, and you will be redirected to the Basic Information page.
Scope request
Now that the app has been created, we need to request a scope. Scopes are how apps gain permission to perform actions such as writing to channels. For the purposes of integrating WP Activity Log and Slack, we need to assign the incoming-webhook and chat:write permissions to the scope.
- From the side menu, click on OAuth & Permissions and then scroll down to Scopes
- Click the Add an OAuth Scope button located in the Bot Token Scopes section
- Add the chat:write and incoming-webhook permissions.

Now that the permissions have been added, we can go ahead and install the app.
Step 2: App installation and authorization
Next, we need to install and authorize the app. Do keep in mind that you need to be signed in as a user of the workspace you want to install the app in.
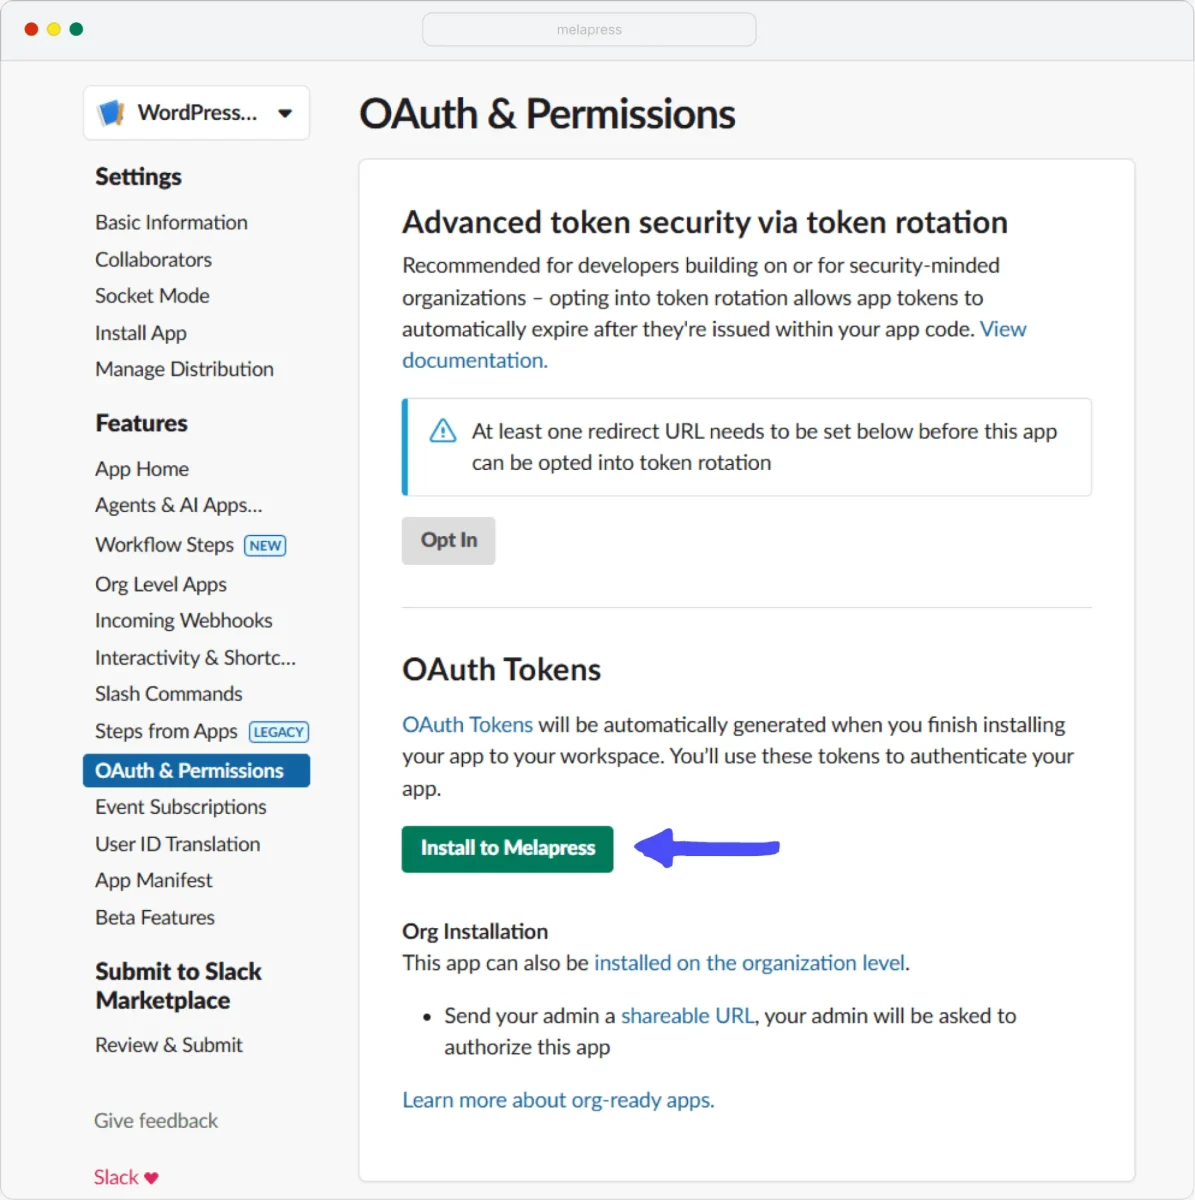
Navigate to OAuth & Permissions and click on the green install button in the OAuth Tokens section.
In the verification screen, confirm the details and click on the green Allow button.

That’s it! The app has been created and duly authorized. Before we head back to the WordPress site, grab the Bot User Auth Token from OAuth & Permissions since we’ll need to configure this in WordPress.
Step 3: Adding the app to the Slack Channel
Head to Slack and find the channel we created at the beginning of this tutorial. This is the channel where we want to receive notifications.
In the message box, type /app and then click on the Add apps to this channel option.
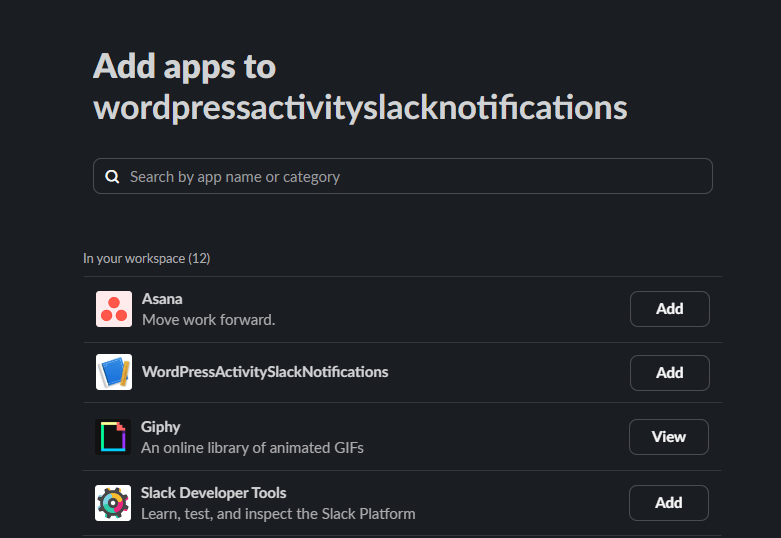
Next, find the app from the list of available options and click on Add.
Step 4: Configuring Notification Settings in the plugin
There are two ways to configure this integration: via the plugin interface or by defining constants in your website’s wp-config.php file.
When configured through the plugin interface, the Bot Token is stored in the WordPress database. Alternatively, you can define this as a constant in the wp-config.php file. In this case, the token is not stored in the database, reducing the risk of exposure in the event of a database breach.
Important: when a constant is defined in the wp-config.php, it takes priority over the value stored in the database (configured via the plugin’s interface).
Configuring the integration via the plugin’s interface
From your WordPress dashboard, head to WP Activity Log > Notifications > Settings. Next, enter the Default channel name where you want to receive notifications and the Bot token we copied in the previous step, as shown in the screenshot below.
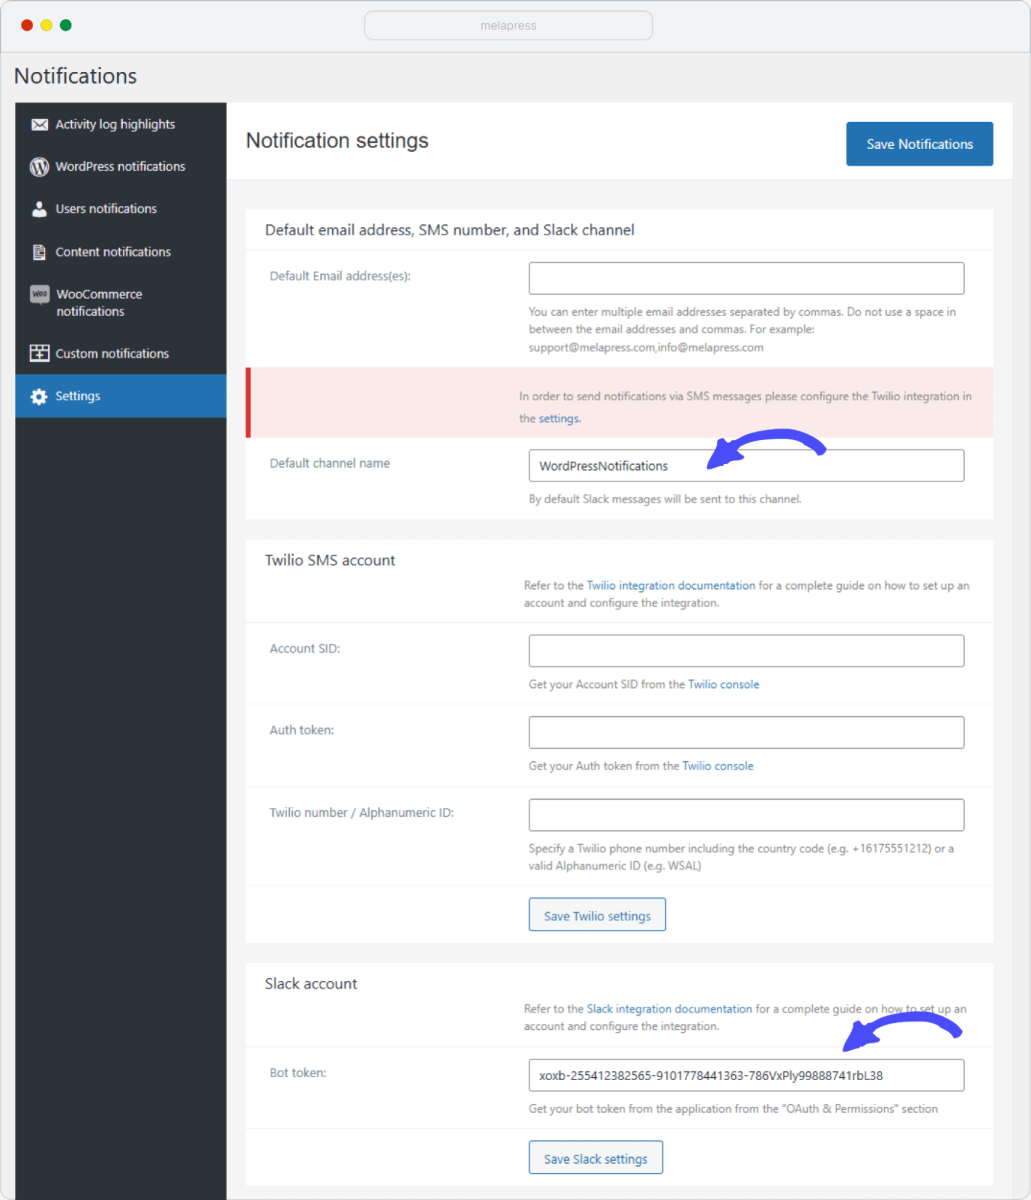
Remember to save your changes, and your Slack notifications integration is now complete.
Configuring the integration in wp-config.php
Add the below constant to the wp-config.php file to set up the integration, and replace the value with your token:
define('WSAL_SLACK_AUTH_TOKEN', 'xoxb-your-token');
Once defined, navigate to WP Activity Log > Notifications > Settings to confirm that the constant are being read correctly. This will be confirmed in the plugin’s interface.

