


Updated on 10 February, 2026
How to give users temporary WordPress access with Melapress Login Security
Melapress Login Security enables you to set up WordPress users with temporary logins. These accounts automatically expire once the set criteria are met, which can be defined in the settings.
How to create temporary logins
To create a temporary login, start by navigating to Login Security > Temporary Logins and click on Create temporary login.
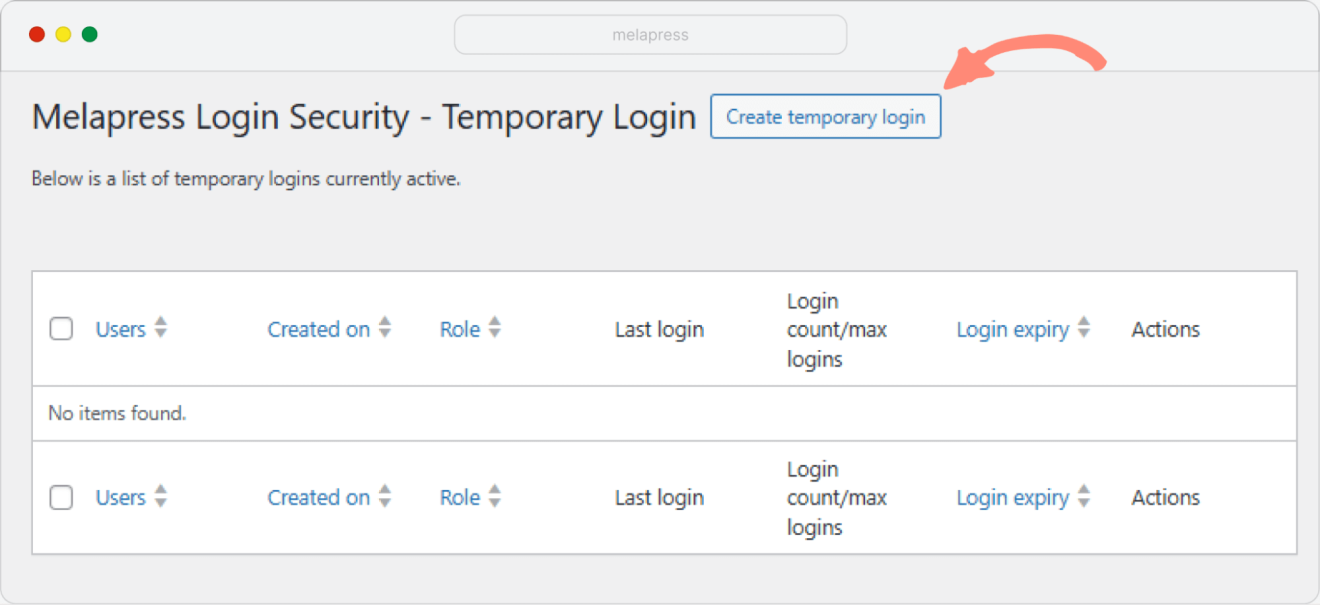
Next, fill in the following information:
- Email address: The email address of the user we will be granting temporary login access to
- First name: The user’s first name
- Last name: The user’s last name
- Role: The role we want to assign to the user
- Redirect after login: Choose where to redirect the user once they’ve logged in.
- Login Expiry: Choose when the login will expire. Available options include:
- Set the login to expire after a number of hours/days/weeks/months from temporary login creation
- Set the login to expire after a number of hours/days/weeks/months from first login
- Set the login to expire on a specific date and time
- Max logins: The maximum number of times the user can log in before login expires
- Language: The user’s WordPress language
- Send email: Tick this checkbox to automatically send the user an email with login details
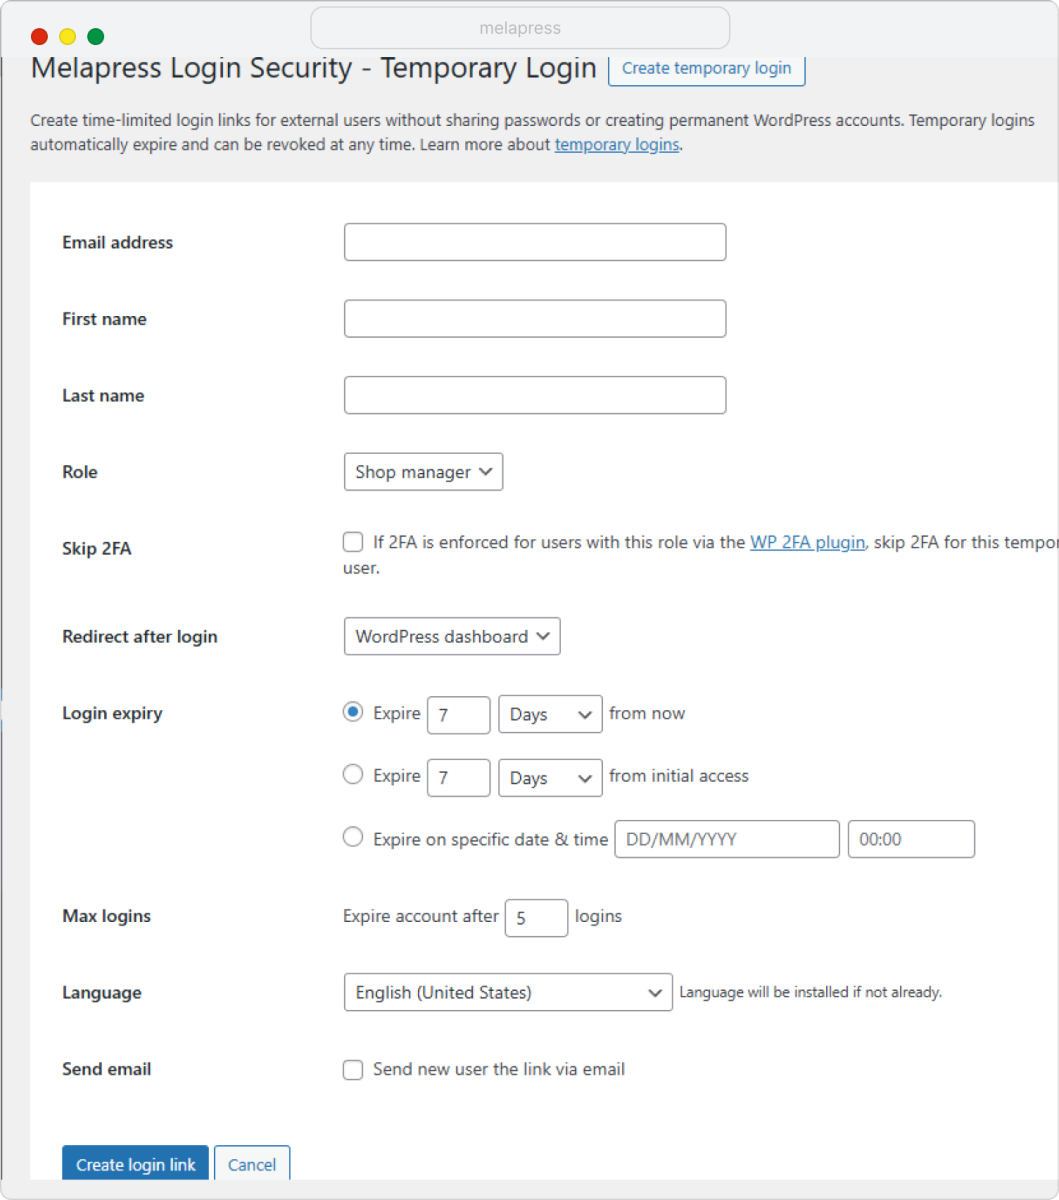
Once ready, click on Create login link.
Bypassing 2FA requirements for temporary logins
If you’re using the WP 2FA plugin alongside Melapress Login Security, temporary login users are subject to your site’s 2FA enforcement policies by default. This means if you have 2FA enforced for certain roles, temporary users assigned those roles will need to configure 2FA before they can access your site.
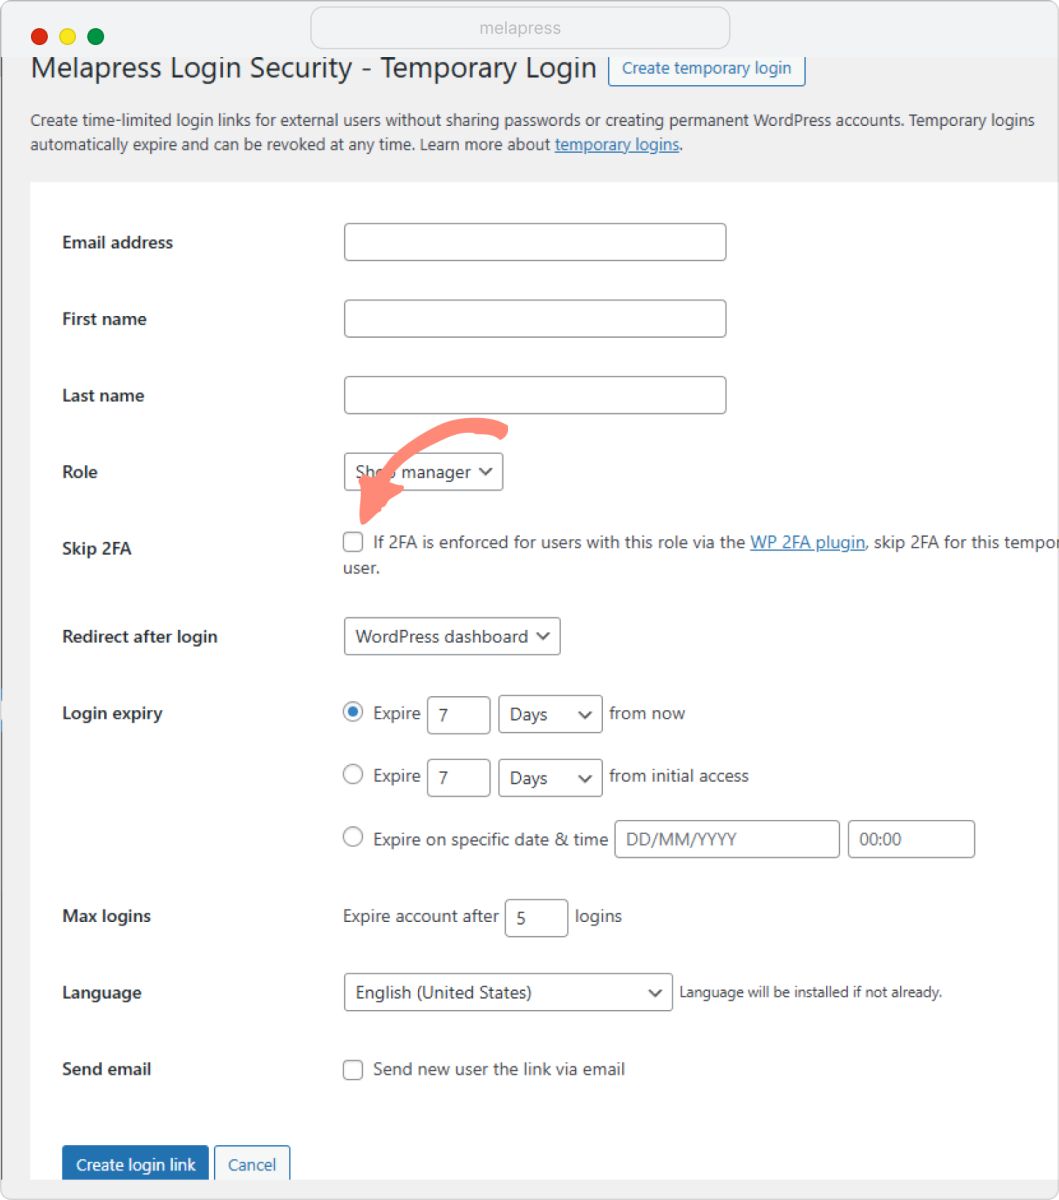
To allow temporary login users to bypass 2FA requirements, enable the Skip 2FA setting when creating the temporary login:
When this option is enabled, temporary users will be able to log in and access your WordPress site without being prompted to set up two-factor authentication, even if 2FA is enforced for their assigned role via the WP 2FA plugin.
Note: This setting only functions when our WP 2FA plugin is active on your site and it does not bypass any other custom or third-party 2FA solution
Managing temporary logins
Once a temporary login has been created, it can easily be managed by navigating to Login Security > Temporary Logins. Here you’ll find all temporary logins, including important information such as:
- Users: The user with temporary login access
- Created on: The date and time on which the temporary login was created
- Role: The role assigned to the temporary login user
- Last login: The date and time the user last logged in.
- Login count/max logins: The number of times the user logged in and the total number of logins configured
- Login expiry: The date and time on which the temporary login will expire
- Actions: The following actions are available:
- Copy the login link to your local clipboard
- Sent the user an email with the login link
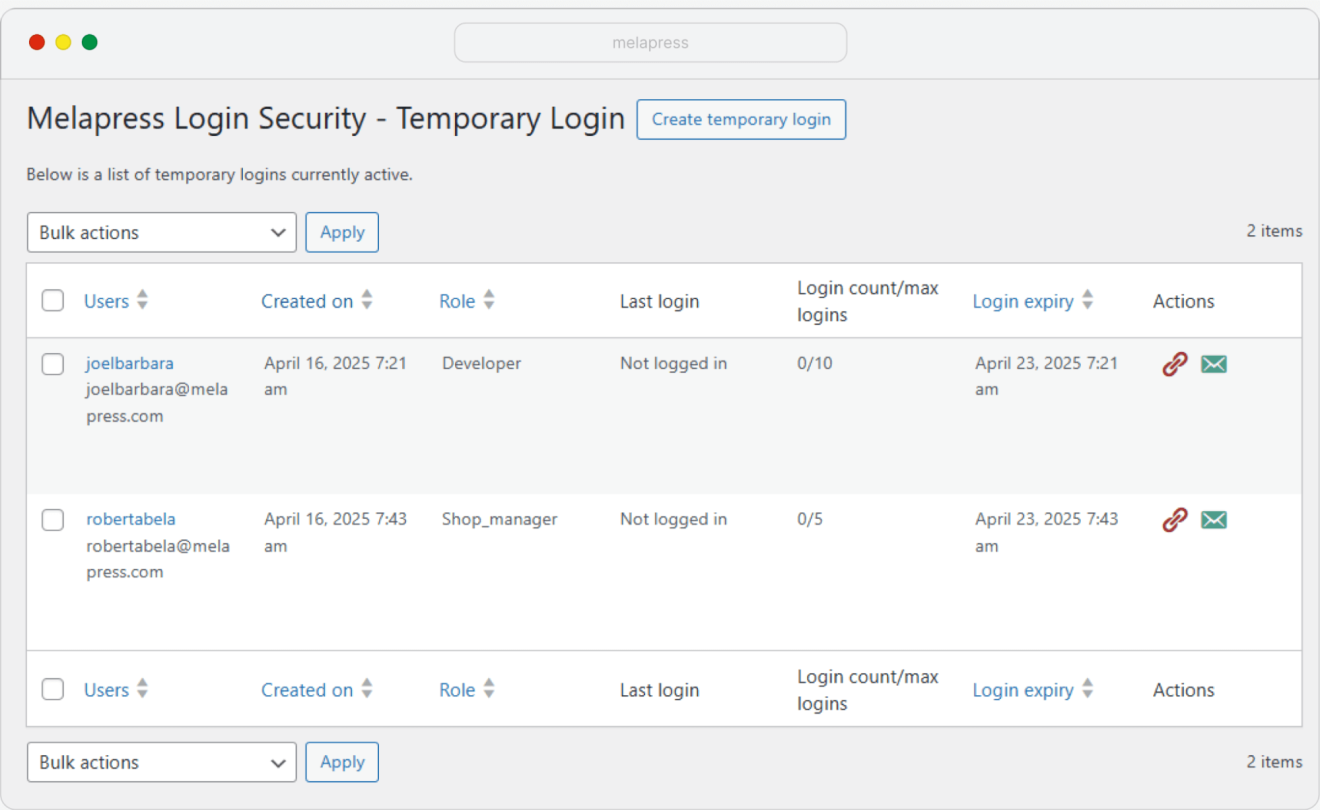
By hovering over the temporary login entry, you’ll also find the following actions underneath the username:
- Disable: Disable the temporary login
- Delete: Delete the temporary login
- Edit: Edit the temporary login
