Updated on 7 October, 2026
How to allow users to configure 2FA from a custom website page
Some WordPress websites do not give users access to the WordPress dashboard. This is common on WooCommerce stores, membership websites, and websites with a custom user dashboard.
WP 2FA lets these users configure and manage two-factor authentication (2FA) from the frontend of your website.
You can do this in two ways:
- Create a dedicated 2FA settings page with WP 2FA. Use this option if you want the plugin to create the page for you.
- Add the 2FA setup form to an existing page. Use this option if you already have a profile, account, or membership page where you want users to manage 2FA.
Table of contents
Create a frontend 2FA settings page
WP 2FA can automatically create a page where users can configure and manage their 2FA settings.
To enable it:
- Go to WP 2FA > 2FA Policies > Sitewide 2FA policies > User Access Settings tab.
- Scroll down to the Frontend settings page section
- Turn on Enable frontend 2FA settings page.
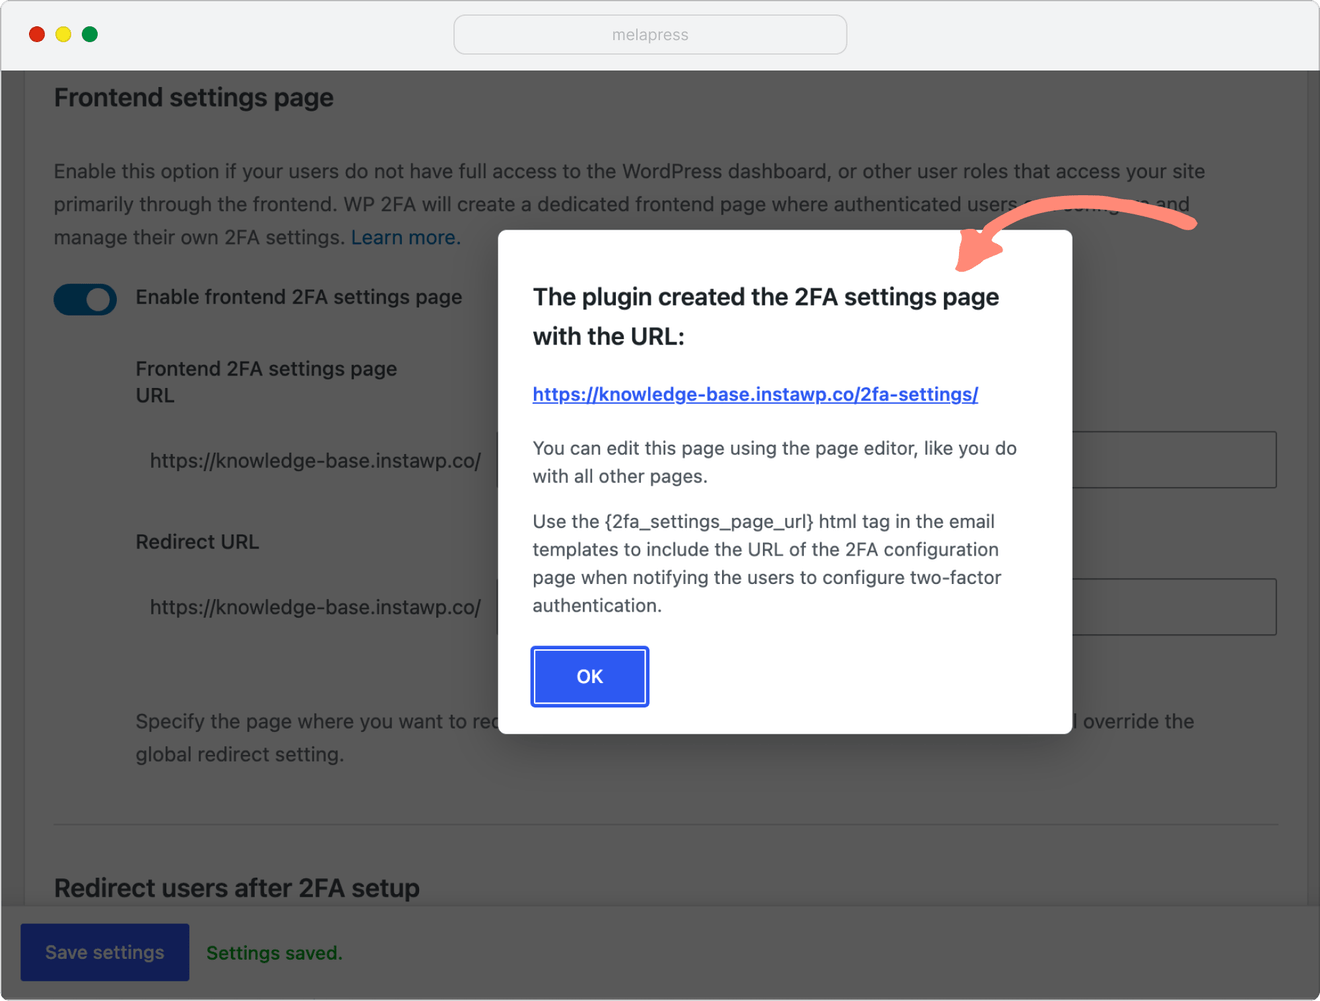
- In Frontend 2FA settings page URL, enter the URL slug you want to use, for example, 2fa-settings.
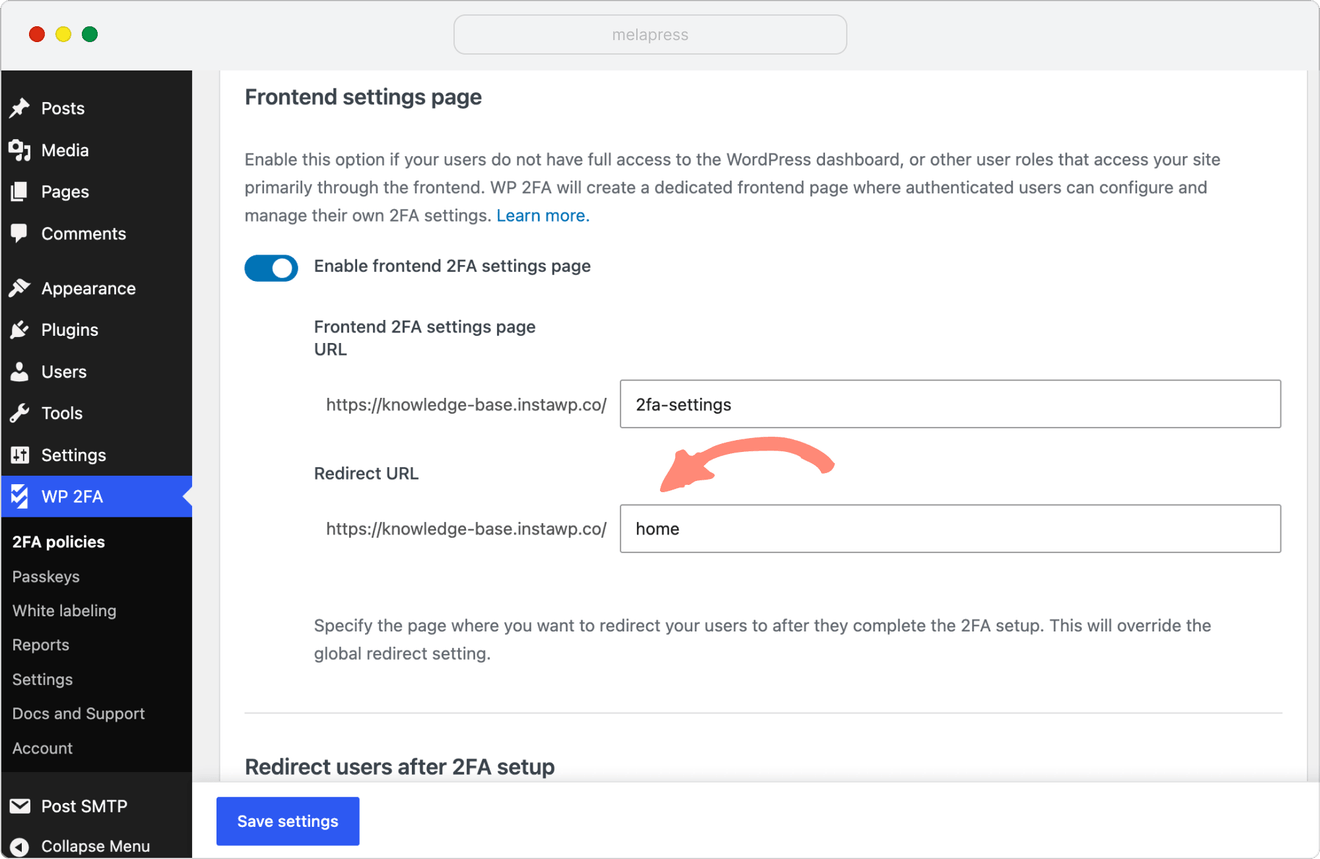
- Optional: Enter a URL in Redirect URL if you want users to be redirected to a specific page after they finish configuring 2FA.
- Click Save Settings.
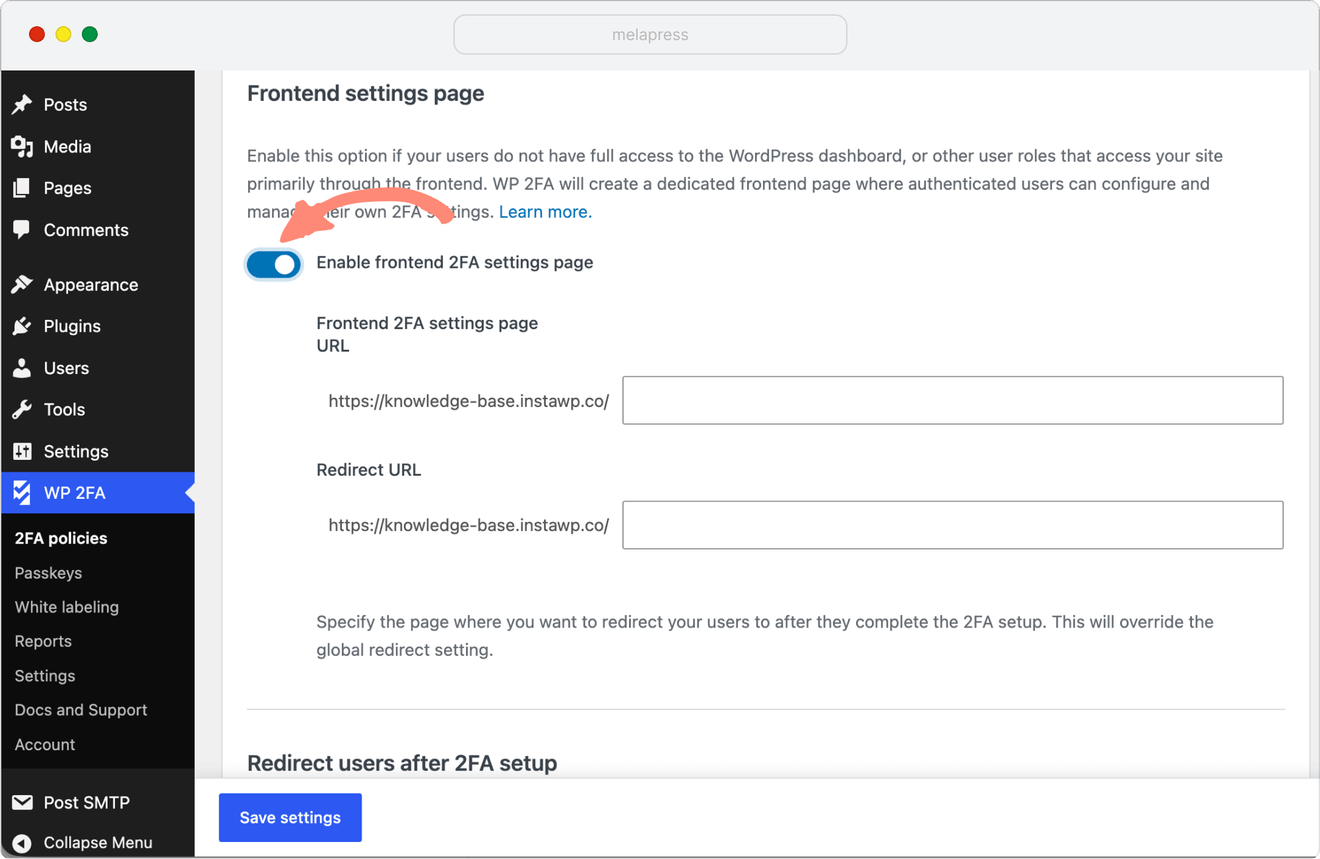
WP 2FA will automatically create the frontend 2FA settings page using the URL you specified.
Note: If you have configured separate policies for a specific user role in WP 2FA Premium, that role has its own Frontend settings page settings. These settings take priority over the sitewide settings for users with that role.
Redirect users after they configure 2FA
You can also choose where users are redirected after they configure 2FA.
Enter the page URL in the Redirect URL field. If you leave this field empty, users are redirected back to the page they came from.
View or customize the frontend page
After saving the settings, you can:
- View Page to open the frontend 2FA settings page.
- Edit Page to edit it in the WordPress block editor.
Click View Page from the same settings section any time you want to see it live, or Edit Page to open it in the block editor.
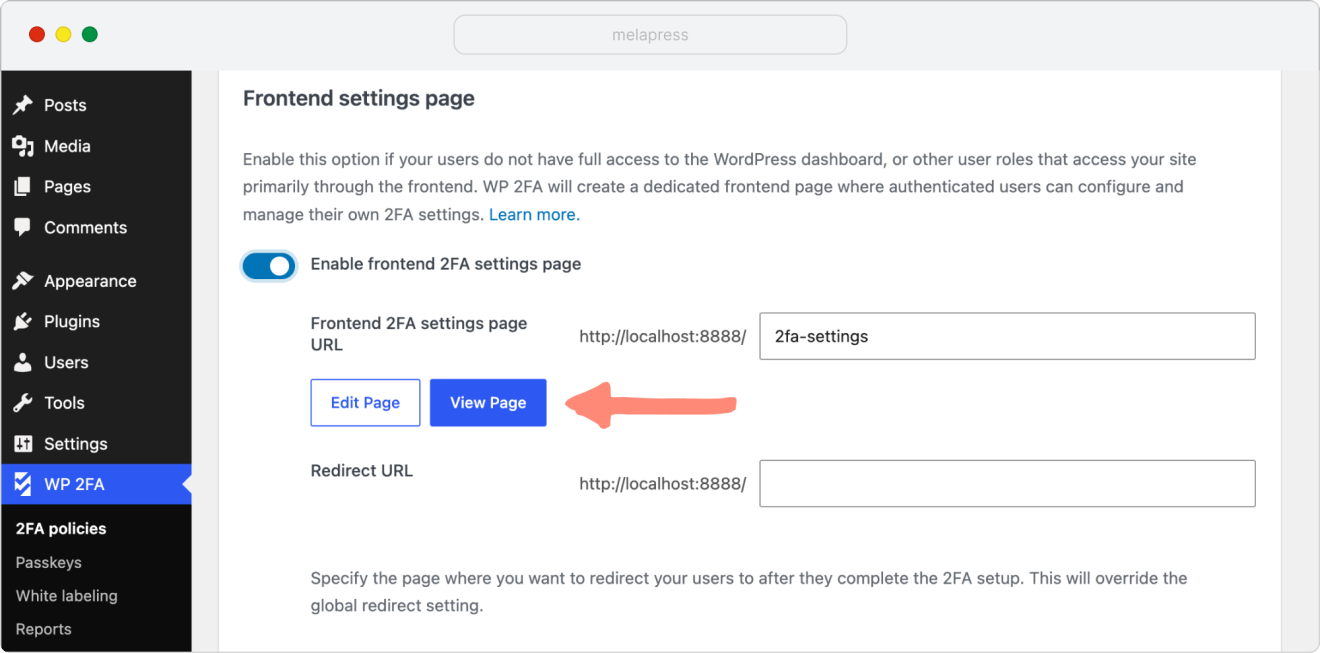
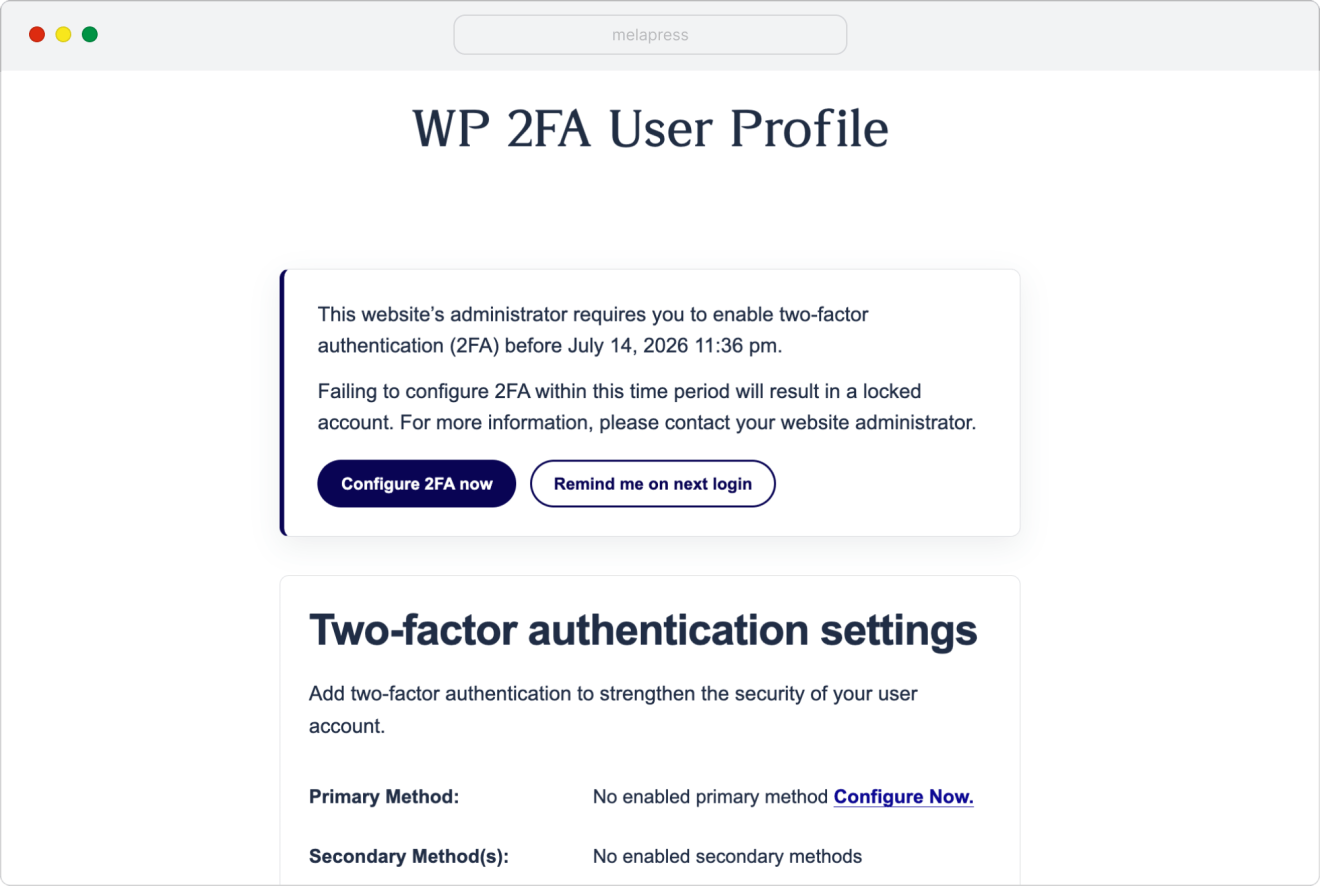
The page contains the WP 2FA setup form, so you can customize it like any other WordPress page. For example, you can add your own text, headings, images, or other blocks around the form.
Here is an example of a page created:
Add the 2FA setup form to an existing page
If you already have a frontend account, profile, or membership page, you can add the WP 2FA setup form directly to it.
Add the following shortcode to the page:
[wp-2fa-setup-form]The shortcode displays the same 2FA setup and management interface used by WP 2FA.
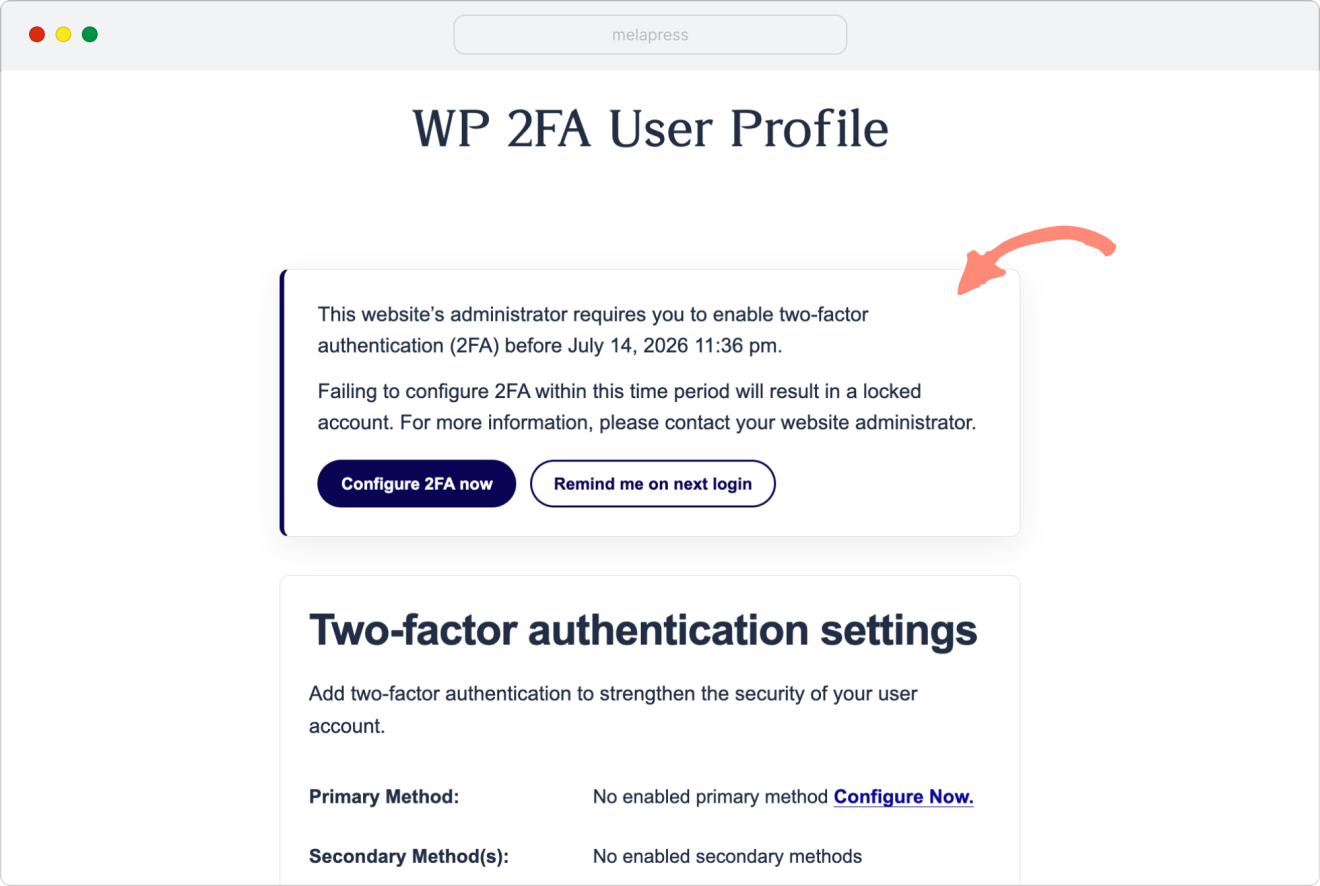
Before a user configures 2FA, they will see a prompt to complete the setup. If a grace period applies, the notice also shows how much time they have left.
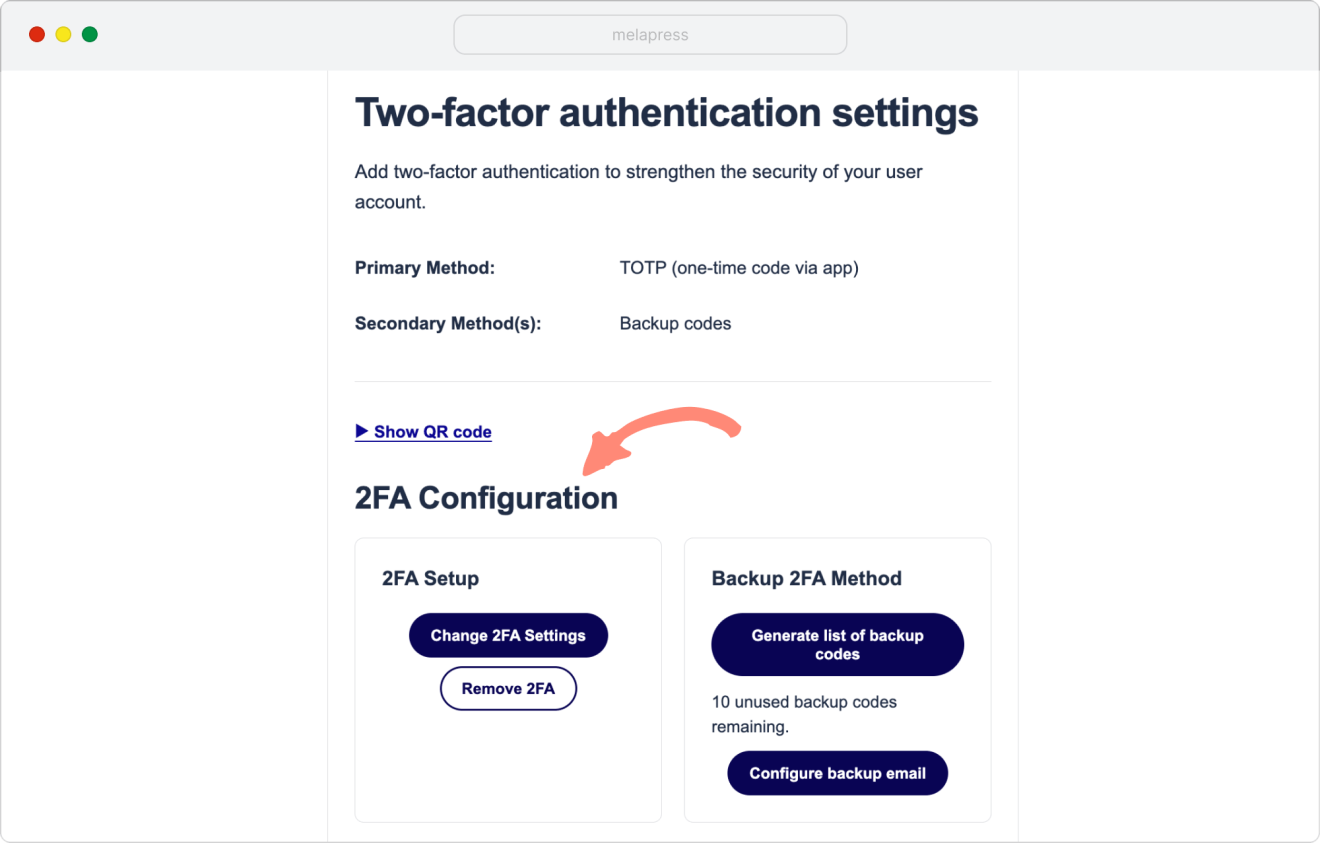
After configuring 2FA, users can manage their settings from the same page. Depending on your WP 2FA configuration, they can change their authentication method, remove 2FA, or generate new backup codes.
Further customizations
WP 2FA supports a handful of shortcode parameters and CSS hooks so you can fine-tune how the form and its notices look and behave.
Hide the introductory text
If you want to add your own introduction above the form, you can hide WP 2FA’s default introductory text. Use shortcode:
[wp-2fa-setup-form show_preamble="false"]Hide the user’s configured 2FA methods
By default, the form displays the user’s currently configured primary and secondary 2FA methods. To hide this information, use:
[wp-2fa-setup-form do_not_show_enabled="true"]Show the 2FA setup notice on a frontend page
Users who have access to the WordPress dashboard can see a notice reminding them to configure 2FA.
If your users do not have dashboard access, you can display the same notice on a frontend page with:
[wp-2fa-setup-notice]The notice is shown only for users who still need to configure 2FA.
By default, the Configure 2FA now button opens either the standard WP 2FA setup process or the frontend settings page you configured earlier.
To send users to another page instead, specify that page with the configure_2fa_url parameter:
[wp-2fa-setup-notice configure_2fa_url="https://example.com/your-page/"]Add the setup form to a template file
If you are working directly with a WordPress theme or template file instead of adding the shortcode through the page editor, use WordPress’s do_shortcode() function:
do_shortcode( '[wp-2fa-setup-form]' );
Style the frontend 2FA form
The frontend form inherits styling from your active WordPress theme. You can also customize individual elements with CSS.
The setup wizard uses the .wp2fa-modal container. Useful selectors include:
.wp-2fa-button-primary– the primary action button (e.g. Continue)..wp-2fa-button-secondary– the secondary button (e.g. Go back)..wp2fa-modal h3– step headings (not every step has one – the welcome step, for example, doesn’t)..wp2fa-modal p– the body/description text..wp2fa-modal input– text fields, such as the verification code field.
Note: Older versions of this article referenced.wp2fa-modal .buttonas the button selector. That class no longer matches the rendered wizard – kindly use.wp-2fa-button-primaryand.wp-2fa-button-secondaryinstead, as shown above.
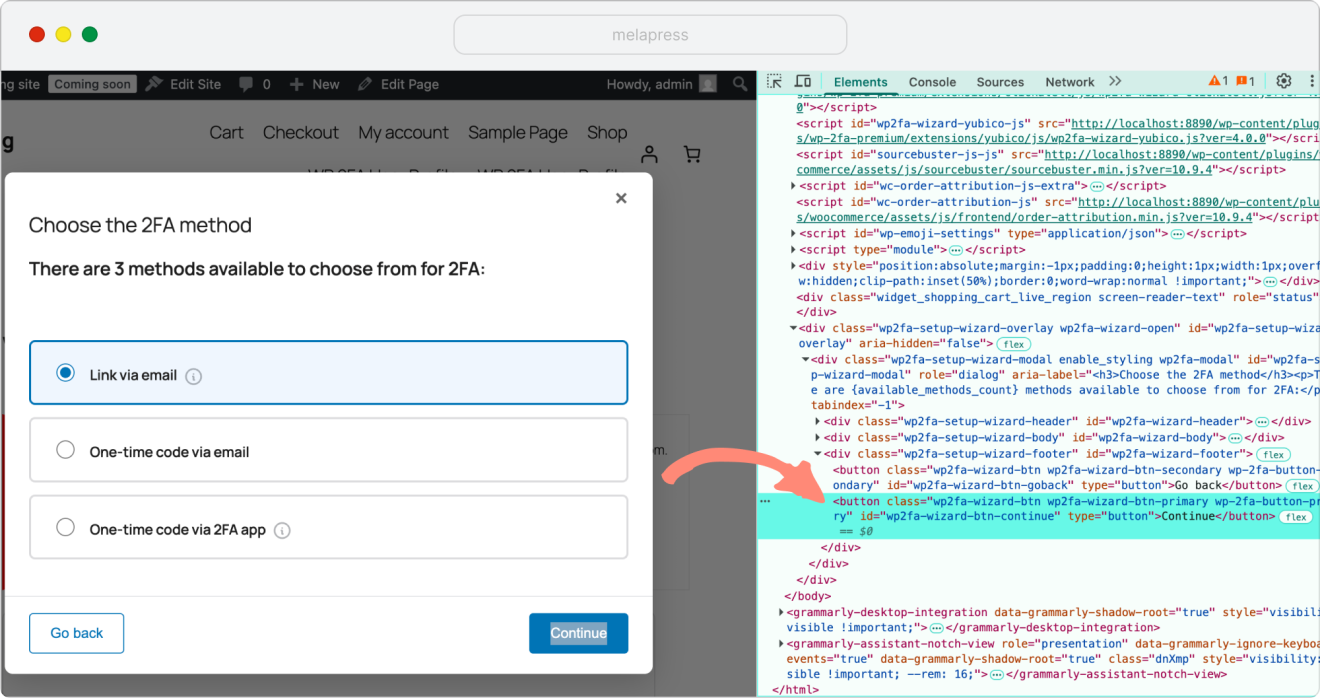
For example, you can customize the primary button with:
.wp-2fa-button-primary {
  padding: 13px 20px;
  background-color: #337ab7;
  color: #ffffff;
  letter-spacing: 0.4px;
  text-transform: uppercase;
}
Or customize the input fields with:
.wp2fa-modal input {
  padding: 13px 20px;
  border: 1px solid #cccccc;
}
Note: If anything is unclear or you run into a snag, our team is happy to help – simply open a support ticket. Many thanks for trusting WP 2FA with your website's security!