


Updated on 7 October, 2026
How to enable and configure trusted devices in WP 2FA
The Trusted devices feature in WP 2FA allows users to skip two-factor authentication (2FA) when logging in from a device they have previously marked as trusted.
When Trusted devices are enabled, users will see a Remember this device option when entering their 2FA code, as shown below.
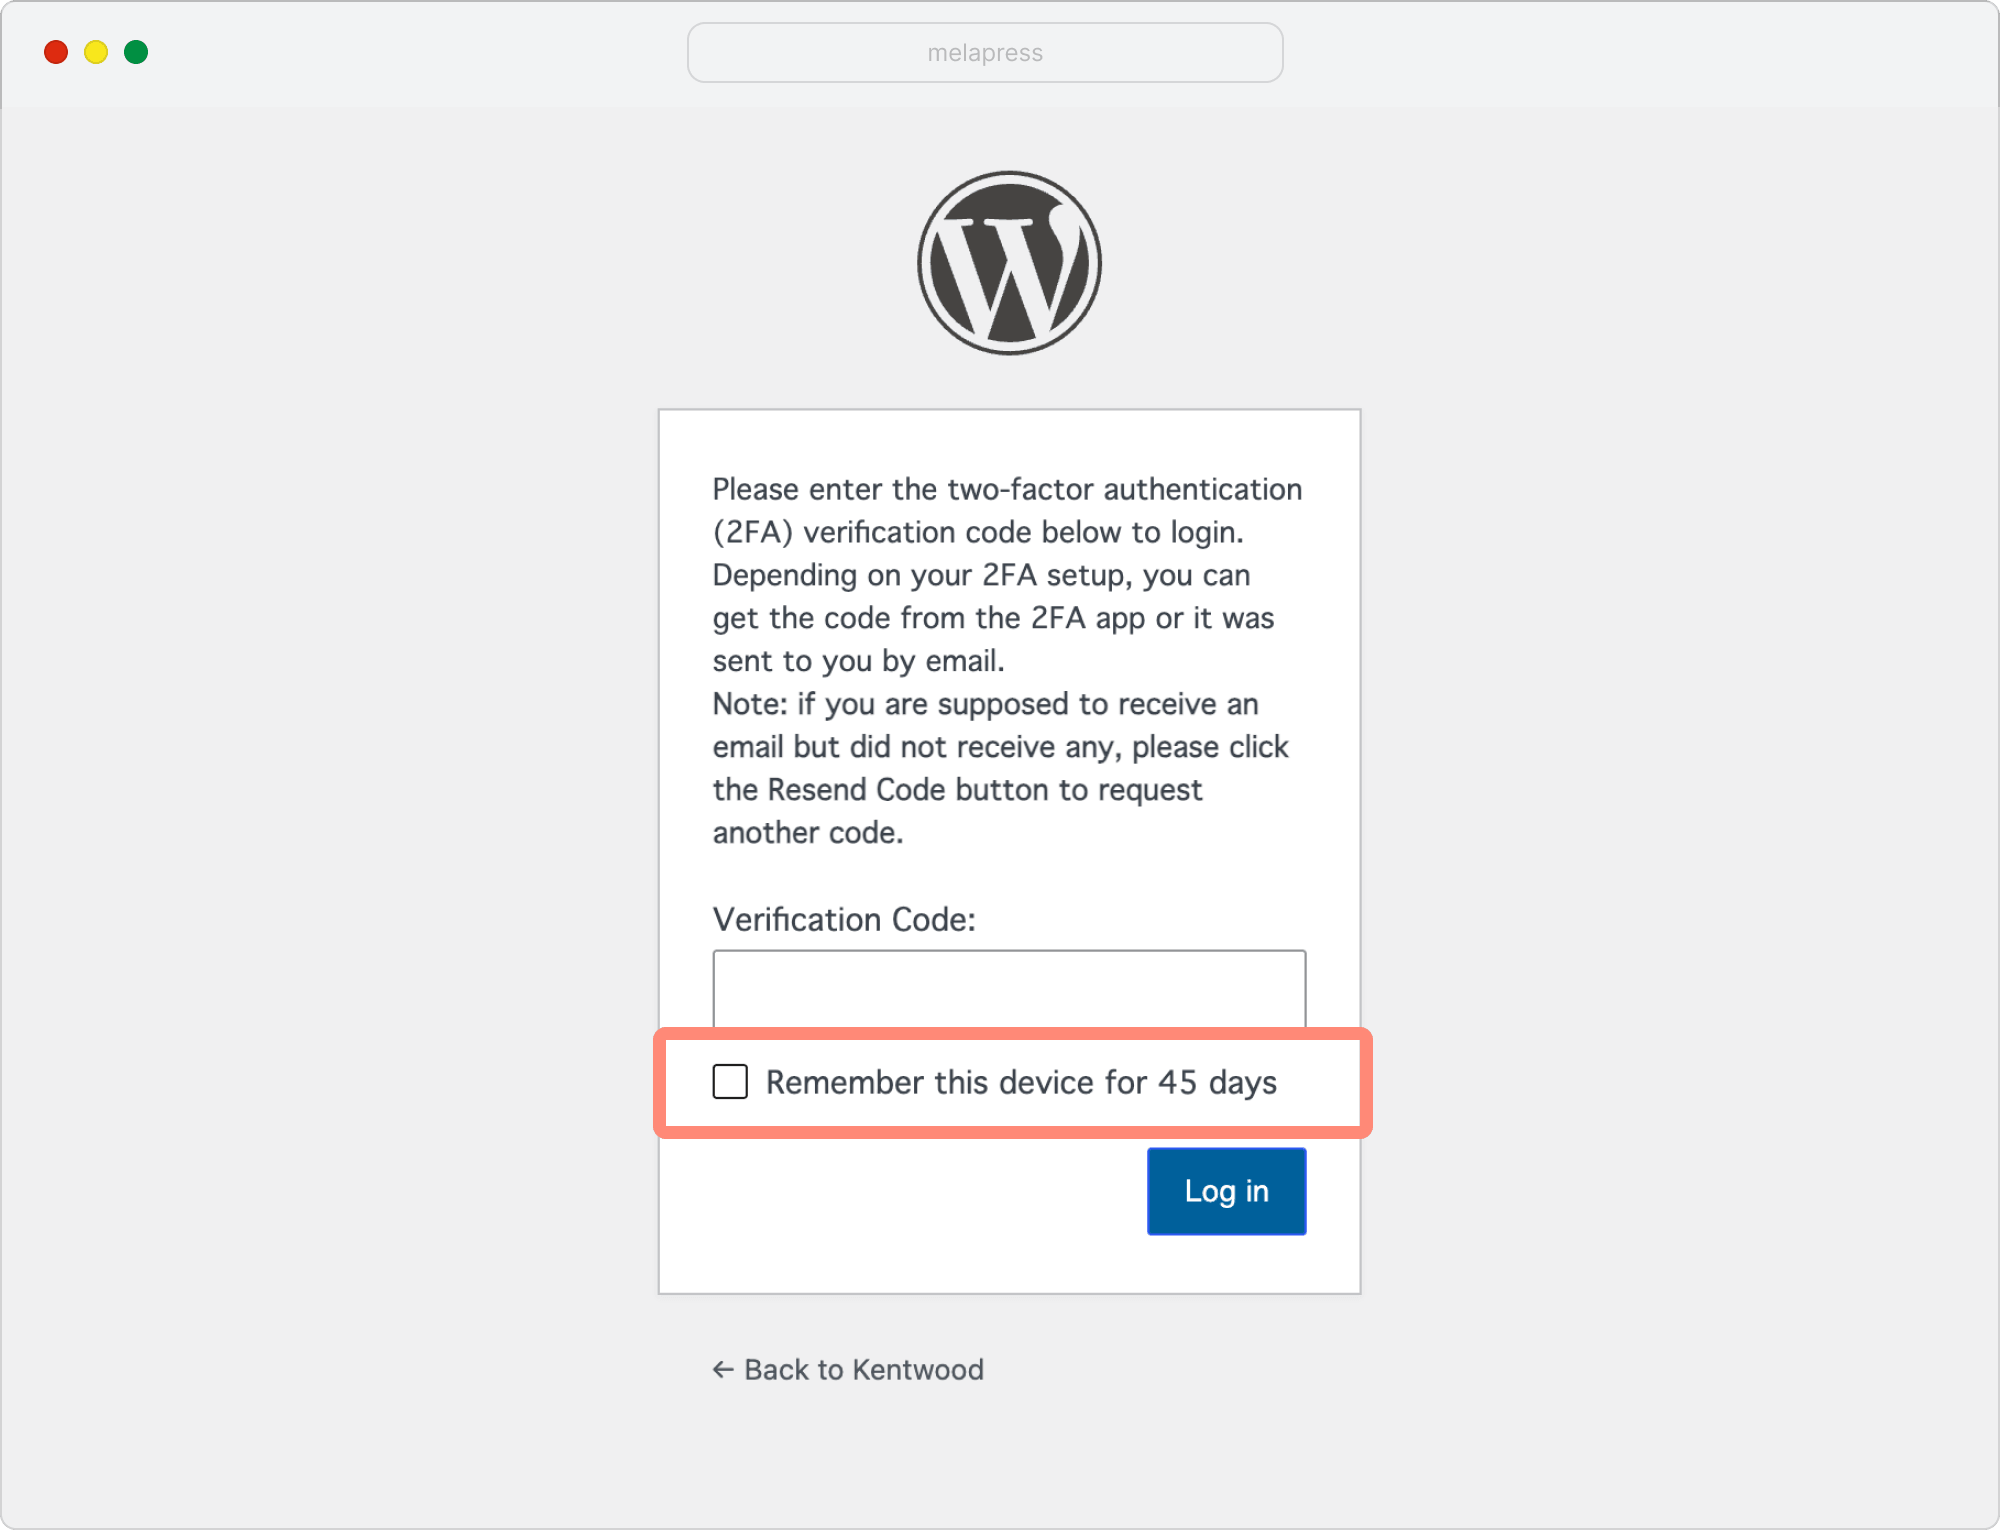
Note: The Trusted devices feature is available in WP 2FA Premium.
When a user selects Remember this device, WP 2FA stores a cookie in their browser. This allows the plugin to recognize the device and, depending on your configuration, let the user log in without entering a 2FA code for a specified period.
Users can add multiple trusted devices.
Enable trusted devices in WP 2FA
To get started with trusted devices configuration:
- Navigate to WP 2FA > 2FA Policies > Sitewide 2FA policies
- Choose User Access Settings
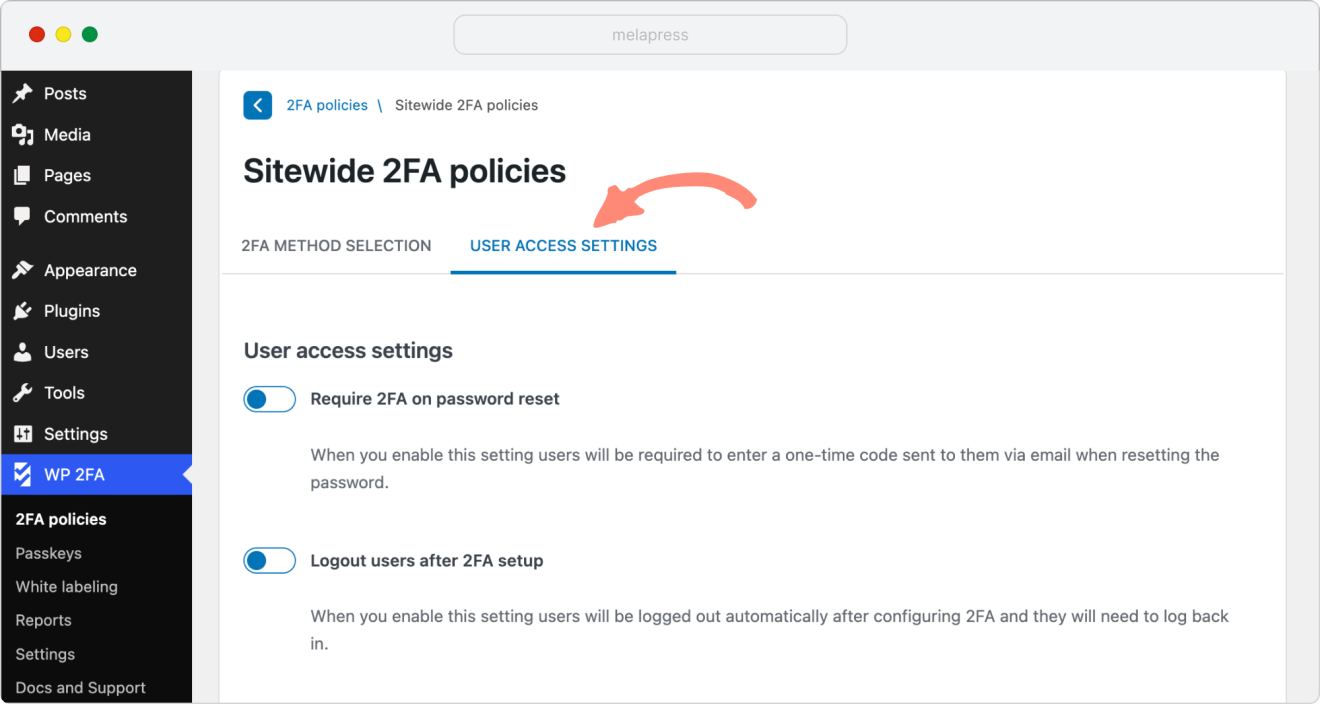
3. Scroll down until you reach the Trusted Devices section.
4. Click Enable trusted devices
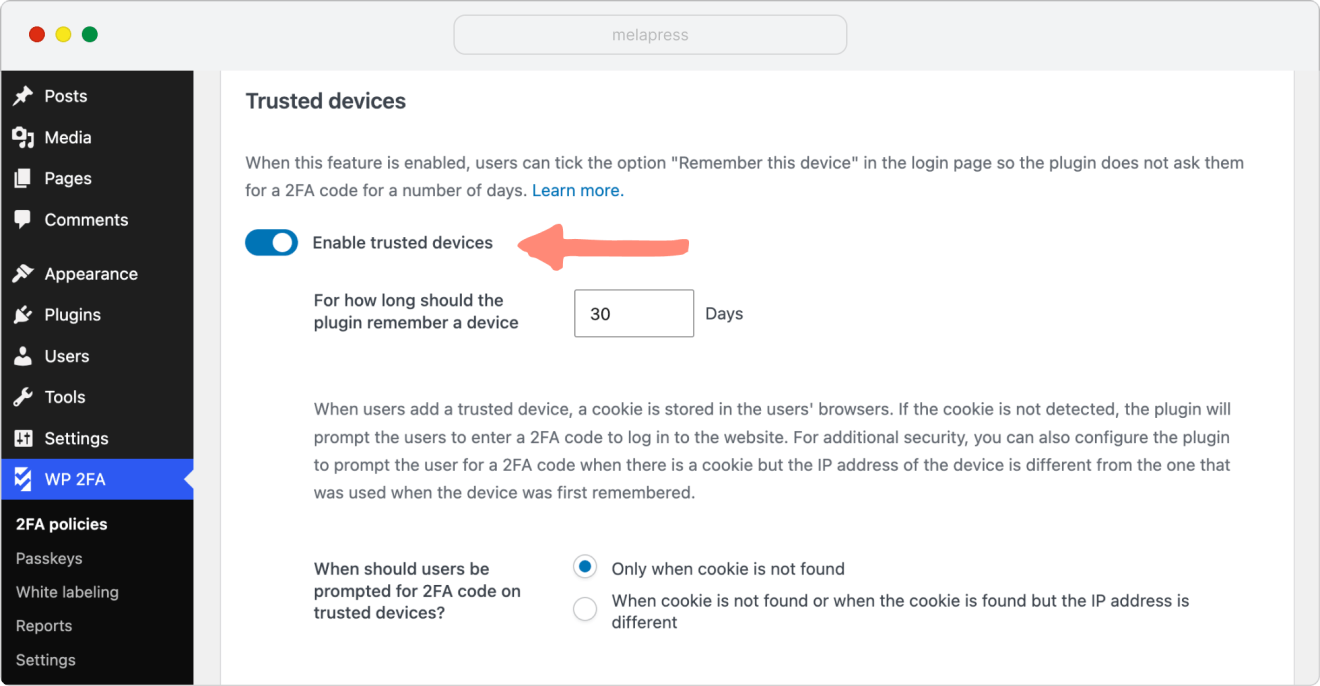
You’ll such options available:
- For how long should the plugin remember a device – select the number of days the plugin will remember the trusted device. Once it expires, users will need to authenticate via 2FA again.
- When should users be prompted for 2FA code on trusted devices – choose when users should be asked to enter a 2FA code again on trusted devices:
- Only when cookie is not found — users will only be prompted for a 2FA code if the trusted device cookie is missing.
- When cookie is not found or when the cookie is found but the IP address is different — users will be prompted for a 2FA code if the trusted device cookie is missing, or if the device is recognized but the login comes from a different IP address.
Important: Trusted devices settings are configured per 2FA policy. To enable Trusted devices for a specific user role, first follow the instructions for setting up a separate 2FA policy per user role.
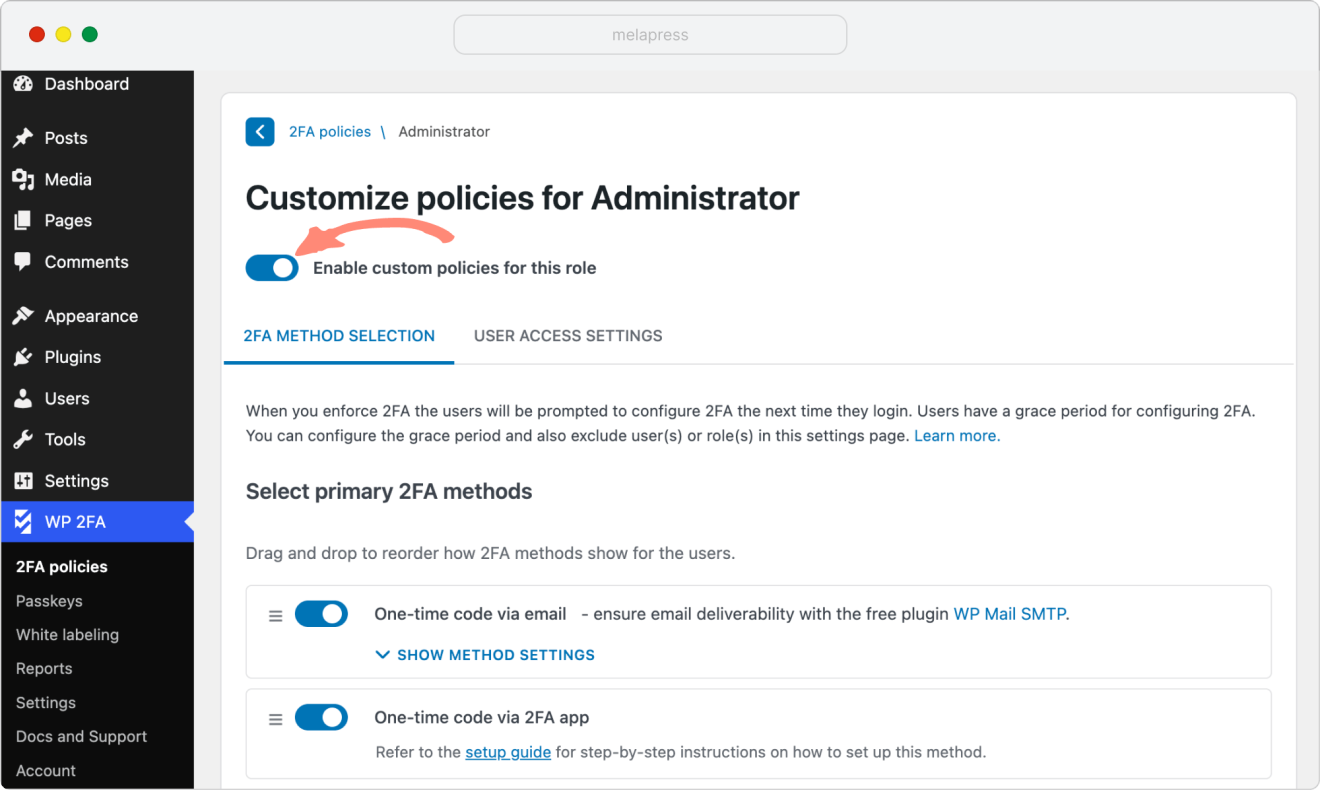
Then, follow the same instructions in this guide: open User Access Settings, scroll down to the Trusted devices section, and configure the settings for that role.
