Search for answers or browse our knowledge base.
How to mirror the WordPress activity log to a log file
The WP Activity Log plugin can be configured to mirror the activity log of your WordPress website(s) to a log file on your server or hosting service. Log files are very well supported: there are quite a large number of tools that can read, parse and understand logs from log files, hence why we have developed this feature. Also, the WordPress activity log is mirrored to third party services in real time, so you can see what is happening on your site whenever you need to.
This document explains how you to configure the plugin to mirror the activity logs of your WordPress website(s) to a log file. In short, the process consists of the following steps:
- Set up a Log file connection in the WP Activity Log plugin
- Configure the mirroring of the activity log to the log file
1. Create a log file connection in the plugin
To setup an AWS log file connection in the activity log plugin:
- Click on the Integrations node in the plugin menu.
- Click the Create a Connection button to launch the connection setup wizard.
- Select Log file from the Type of Connection drop down menu in the first step of the wizard and click Next.
- When the plugin completes the requirements test, click Next.
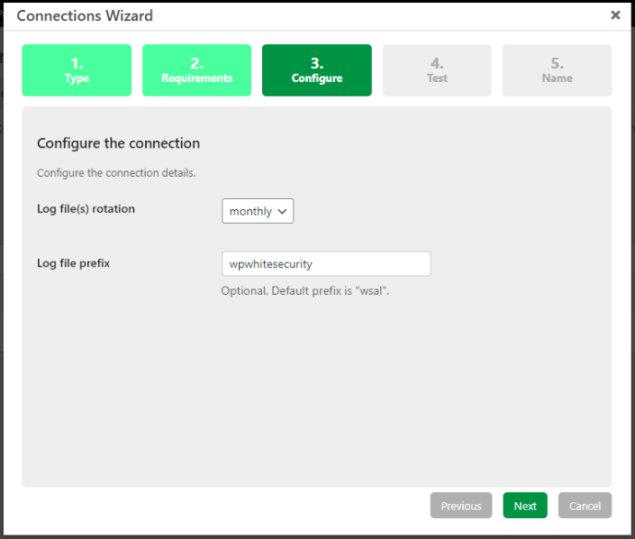
- In the third step of the wizard, you have to specify the following:
- Log file(s) rotation: specify when the plugin should rotate the log file. You can choose from daily, weekly and monthly.
- Log file prefix: use letters to prepend a prefix to the log file name. This is handy if you will be saving multiple log files in the same location.
- Click Next when ready. When the plugin completes the test, click Next again.
- Specify a name for the connection. The connection name is the friendly name that is used in the plugin. They can be up to 25 characters long and can only consist of letters, numbers and underscores.
- Click Save Connection to close the wizard.
Log files’ naming convention
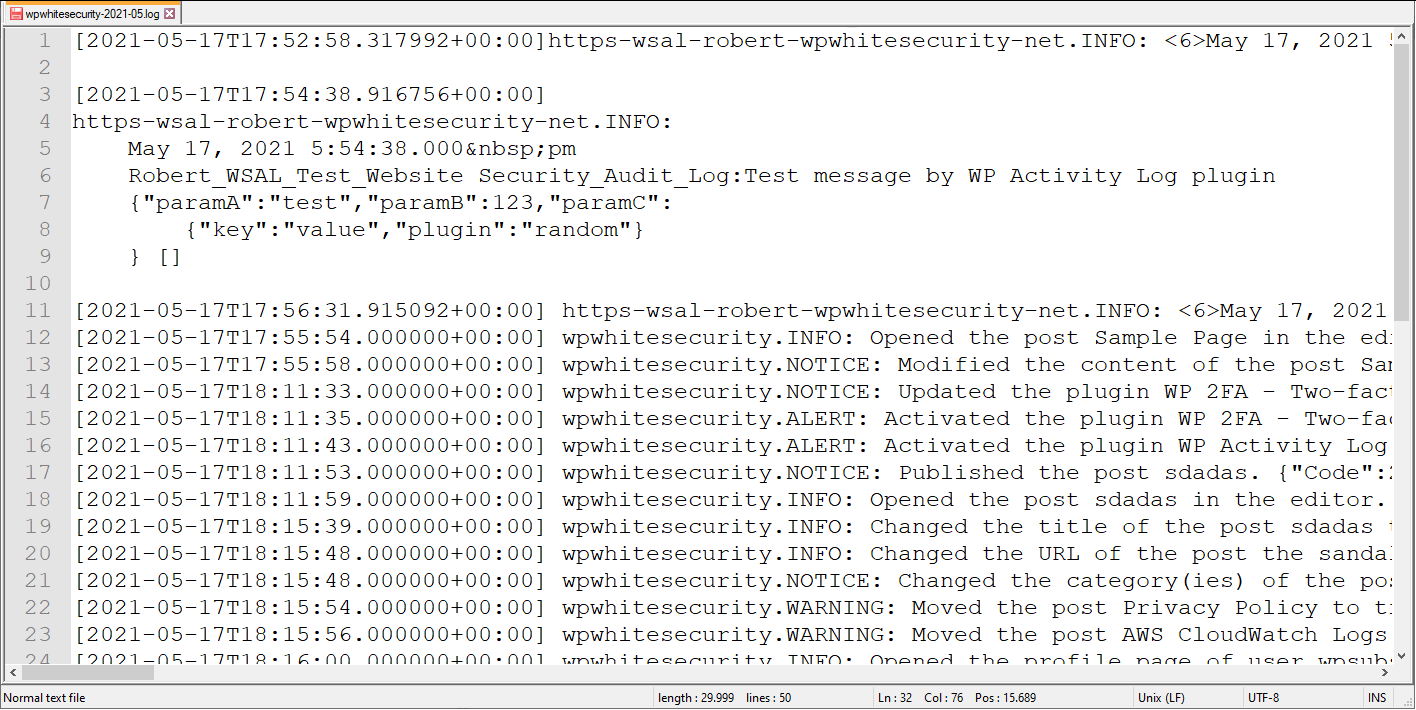
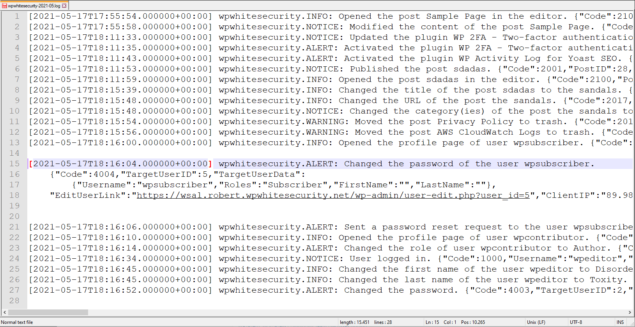
The log file’s name format is as follows; [prefix]_yyyy_mm_dd.log. For example, if you specify wpwhitesecurity as prefix and select monthly log file rotation, the log file’s name for the month of May 2021 will be wpwhitesecurity_2021_05.log.
If you select daily log file rotation, the name of the log file of 17th May 2021 will be wpwhitesecurity_2021_05_17.log.
If you do not specify any prefix when configuring the log file, the plugin will prepend the default prefix; wsal.
Log files’s location
By default the log files with the activity log are saved in the plugin’s working directory, which is; /wp-content/uploads/wp-activity-log/logs/. If you want the plugin to save the log files in a different location change the plugin’s working directory location.
Testing the Log file connection
Once the connection is setup it will be listed in the Connections tab. Click the Test button to send a test message to the configured service via the plugin and confirm the configuration.
3. Configuring the mirroring of the activity log to the log file
Once the log file connection has been configured and tested, configure the mirroring by following the below instructions:
- Click on the Integrations node in the plugin menu.
- Navigate to the Mirroring tab and click the Setup an Activity Log Mirror button.
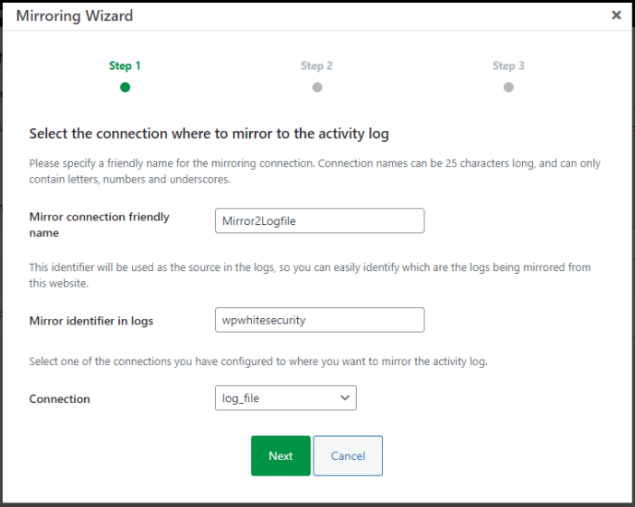
- In the first step of the wizard specify the following:
- Friendly name for the mirror.
- Mirror identifier in logs (this will be added to each even, so you know the source of the activity log event).
- Select the log file connection you’ve just setup from the Connection drop down menu.
- In the second step of the wizard specify if you want the mirroring to start right away.
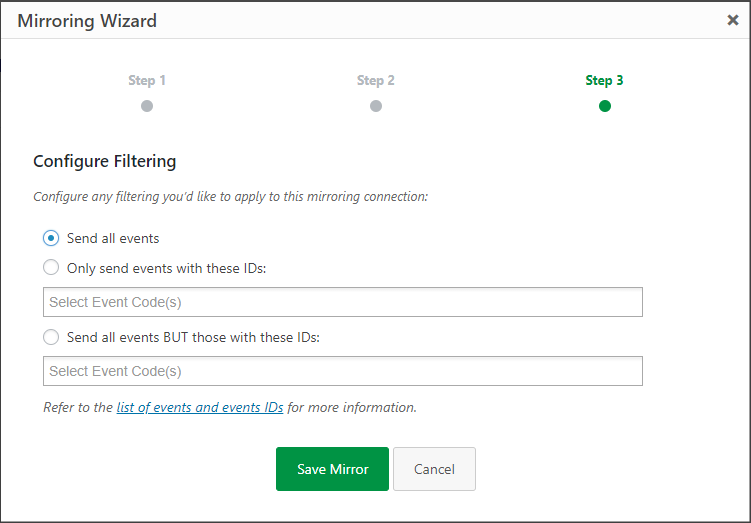
- In the last step of the wizard you can configure activity log filtering rules for the mirroring connection. By default the connection is set to Send all events option, though if you’d like to setup any filtering rules refer to configuring filtering rules for activity log mirroring connections.
- Click Save mirror to save the new mirroring process.
Saving the WordPress activity log to a log file
That is it. Now the plugin will send a copy of the activity log events to a log file as they happen, in real time!
Restrict log writing to mirror only
Once the mirroring setup process is complete, and WP Activity Log has successfully started writing to the log file, you will have the option to stop writing activity logs to the database. While this will help you prevent redundant data, do keep in mind that the plugin will only write activity logs to the configured mirror(s).
To stop writing activity logs to the database, switch off the Write activity log to database option as available in the Mirroring tab.

More information & other Integrations
Refer to getting started mirroring the WordPress activity log for more information on the format of the logs, the third party services the plugin can mirror activity logs to and other technical details.
