Search for answers or browse our knowledge base.
How to store the WordPress activity log in an external database
By default, WP Activity Log stores the WordPress activity log in separate tables in the WordPress database. However, you can configure the plugin to store the activity log in an external database. By storing the activity log in an external database, you can:
- Control and better manage the size of your WordPress database.
- Segregate the logs from the primary WordPress database. This setup is considered more secure and typically recommended by regulatory compliance rules.
This document explains how to store the activity log of your WordPress site to an external database using the WP Activity Log plugin. This process consists of three steps:
- Setting up an external database connection in the plugin
- Configuring the plugin to use the new external database to store the activity log
- Migrating the activity log from the WordPress database to the new external database or deleting it
Setting Up an External Database Connection for the Activity Log
To set up an external database connection in the plugin:
- Click on Integrations in the plugin menu
- In the Connections tab, click the Create a Connection button to launch the connection setup wizard
Step 1: Selecting connection type
WP Activity Log offers several different connection types, allowing you to integrate with different systems. As we are connecting to a MySQL database, select MySQL Database from the Type of Connection drop-down menu and then click Next.

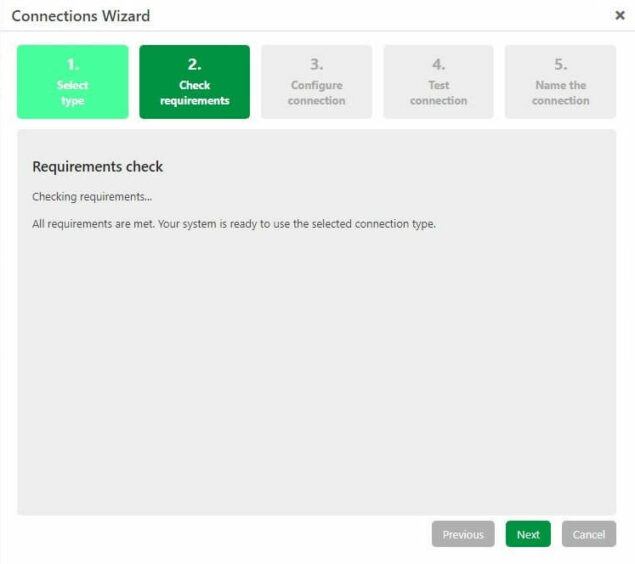
Step 2: Requirements verification
In the second step of the process, the wizard checks if your system meets all the requirements to make the connection. This check is done automatically, with no input required on your part. Once the check is finished, click on Next.

Step 3: Connection configuration
In the third step of the wizard, we need to specify the connection details that will allow us to connect to the external MySQL database. Enter the below information
- Database Name
- Database User
- Database Password
- Database Hostname
- Database Base Prefix (Enable the ‘Use Website URL as table prefix’ checkbox to use the website URL as prefix).
If your MySQL server is configured to accept SSL encrypted communication, enable the SSL setting and specify the paths to the CA SSL certificate and Server SSL Certificate. If your server requires a client certificate, you can also specify this.
Certificates should be specified by entering the full path name to the certificate file, example: /home/wpe-user/sites/prodtradeor/cert/client-cert.pem

Writing the logs directly to the external database
When you configure the plugin to write the activity logs to an external database, the plugin sends all the logs through a library called Action Scheduler. The Action Scheduler, which works with the WordPress cron acts as a buffer, in case the external database is unavailable.
This means that the activity logs in the external database are not in real time; there are a few seconds of delay.
Enable the option Write directly to DB in this step so the plugin bypasses the Action Scheduler and sends the logs directly to the external database. When you configure this, the logs are sent in real time. However, if the external database the logs sent during that time will be lost. Thus the up time of the external database and its connection are of utmost important if this option is enabled.
Step 4: Connection test
In Step 4, the wizard tests the connection to make sure it can connect using the provided information. Once this is verified, you can click Next to move to the final step of the wizard.

Step 5: Connection naming
In the last step of the wizard, specify a name for the connection in the Connection Name field. Connection names are just a reference for you and have no bearing on the actual connection. Names can be up to 25 characters long and can only consist of letters, numbers, and underscores.

Configuring the plugin to store activity logs to an external database
Once the external database connection is set up, you can configure the plugin to start using it for storing the activity log in the external database, as explained below:
- Click on Integrations in the plugin menu
- Click on the External Storage tab
- Click on the Switch to external database button
- Select the newly created connection from the Connection drop-down menu
- Click on the Switch connection button
Upon successful connection, if there are existing events in the local database, you will be asked to Migrate existing events or Delete existing events.
Once you make your selection, the wizard will migrate or delete existing events. If you choose to migrate the data, depending on how many logs you have, you will be able to see a progress bar for the data migration process.
The plugin will now use the newly configured external database and will save any new activity log events in the new database.
Switching back to the WordPress database (local storage)
If, for some reason, you want to stop using the external database, click on the Switch to local database button and then click the Switch connection button. Migrate the activity log from the external database to the WordPress database by clicking the Migrate Events to WordPress Database.
Other Integrations
Refer to the getting started guide for external databases & third party services for more information on other integrations and activity log management.
