


Updated on 30 January, 2025
Getting started with Melapress File Monitor
Melapress File Monitor offers a complete WordPress website file changes monitor plugin that alerts you whenever a change in WordPress website files or permissions is detected. Using its hashing algorithm, it can scan any type of file, including custom code and third-party files.
Use Melapress File Monitor scans to effortlessly uncover code changes, leftover files, malicious code, permission changes, and malware injections with pinpoint accuracy. The plugin also offers instant email notifications for hands-off monitoring.
Step 1: Install and activate Melapress File Monitor
First, log in to your WordPress admin dashboard and navigate to Plugins > Add New Plugin. In the search text box, type Melapress File Monitor and click Install Now, as shown in the screenshot below.

Once you’ve installed the plugin, activate it to start the initial configuration wizard, which will walk you through the plugin setup process.
Step 2: Configure Melapress File Monitor
Configuring Melapress File Monitor is easy, thanks to the initial configuration wizard. Once the plugin has been activated, the wizard will kick in, starting with the welcome screen.

Click on Next Step to continue.
Set schedule
Melapress File Monitor has been highly optimized to be as resource-efficient as possible. Even so, you should consider running scans during off-peak hours, especially if you have a larger website with many files.

Select the frequency and time from their respective drop-down menu and click on Next Step once ready.
Core files modifications
Melapress File Monitor can be configured to check for modifications to the WordPress core files by comparing the files on your website with the official files in the WordPress.org repository. To enable this type of scan, ensure that the Cross check WordPress button is switched to the on position, as shown in the screenshot below.
IMPORTANT: When this option is disabled, Melapress File Monitor will check for modifications to the core files using past hashes instead of comparing them to the files in the WordPress.org repository.
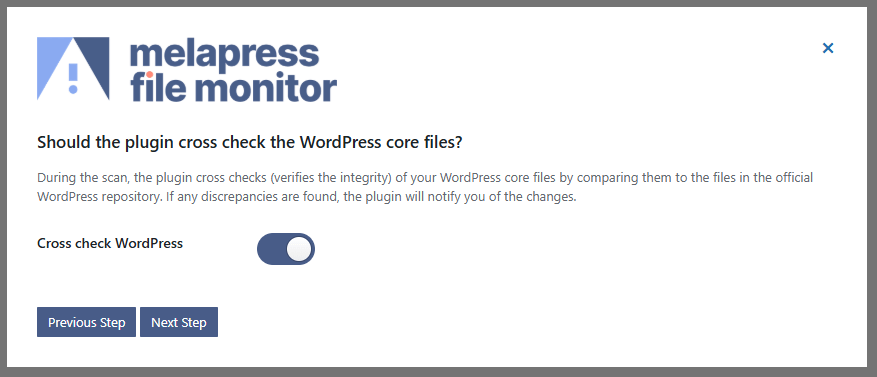
Once you’ve made your selection, click on Next Step to continue.
E-mail notifications
Melapress File Monitor sends an email notification whenever it finishes a scan. By default, this email is sent to the admin email address configured in WordPress. If you would like to send this notification to another email address or addresses, you can add them here.

When ready, click Next Step to save changes and move to the next screen.
E-mail frequency
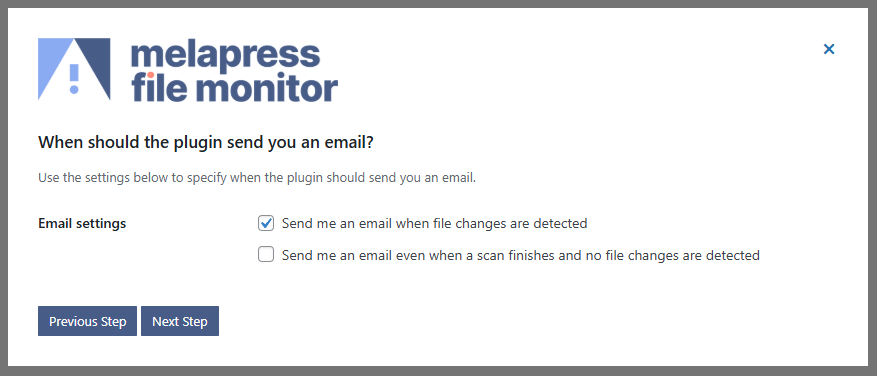
By default, Melapress File Monitor only sends a notification whenever it detects a change. If no changes are detected during the scan, no email is sent. You can change this behavior by choosing when Melapress File Monitor should send you the file changes notification email.
Tick Send me an email when file changes are detected to receive an email whenever Melapress File Monitor detects a change. Untick it if you do not want to receive the email.
Tick Send me an email even when a scan finishes and no file changes are detected to receive an email whenever Melapress File Monitor finishes a scan and does not detect a change. Untick it if you do not want to receive the email.
Ignore directories, files, and file types
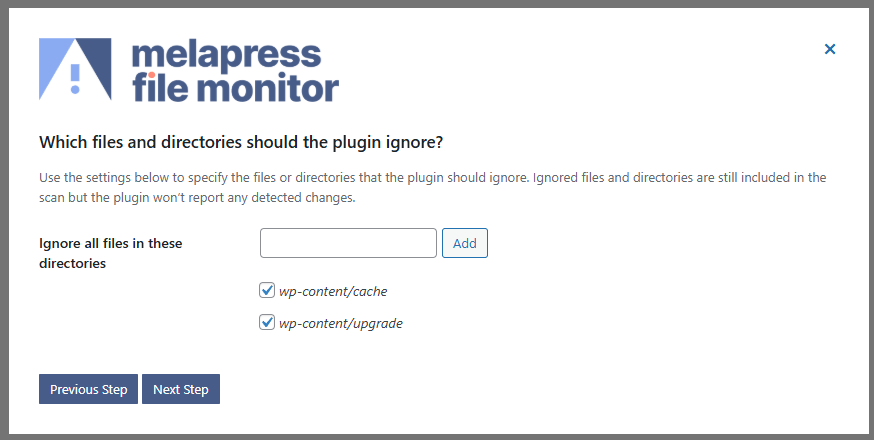
You can choose to ignore specific files, directories, or file types from Melapress File Monitor scans. Whenever a file, directory, or file type is ignored, Melapress File Monitor still scans it; however does not report the changes.
P.S. If you want to exclude objects, there is an option for that which we’ll cover soon.
To ignore a directory, enter the directory in the Ignore all files in these directories textbox and click on Add.
You can also include any of the directories ignored by default by unticking the checkbox next to the directory name.
To ignore a file during scans, enter the file name, complete with the file extension, in the Ignore these files textbox, and click on Add.
You can also include any of the files ignored by default by unticking the checkbox next to the file name.
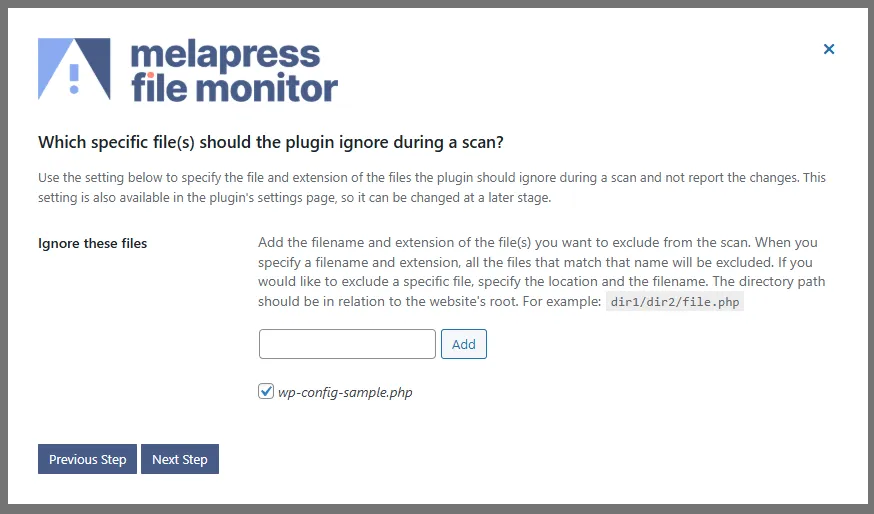
Click Next Step once done.
To ignore a file type, enter the file extension in the Ignore all files with these extensions textbox and click on Add.
You can also include any of the file types ignored by default by unticking the checkbox next to the file type name.

Click Next Step once done.
Directory exclusion
Excluding directories excludes them from Melapress File Monitor scans. The directory, along with any sub-folders in it are not scanned and thus no reports are made.
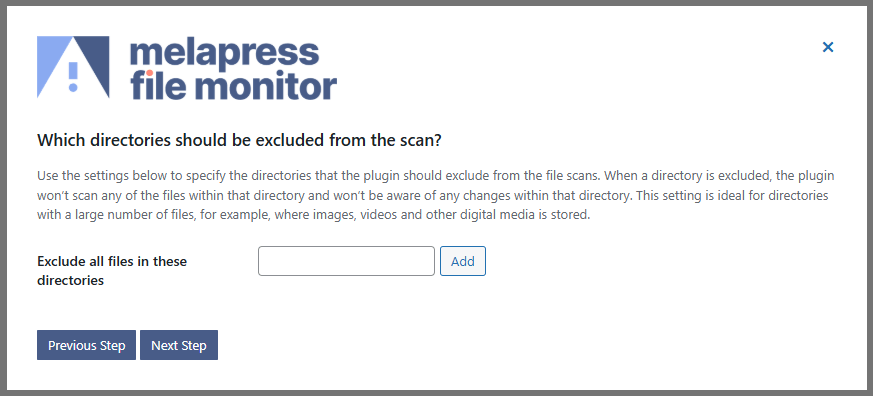
To exclude a directory, enter the full URI following the website’s absolute path in the Exclude all files in these directories textbox and click Add.
Click Next Step once done.
Scan history
By default, Melapress File Monitor keeps the scan results of the last scan, overwriting them with each new scan. To keep a more extended history, enter the number of past scans you want the plugin to keep in the available textbox.

Click on Next Step to continue.
Finishing up
That’s it! All that’s left to do now is to run your first scan. Click on Complete setup & run scan to continue.

Your first Melapress File Monitor scan
Once you complete the initial configuration wizard, Melapress File Monitor will automatically initiate its first scan.
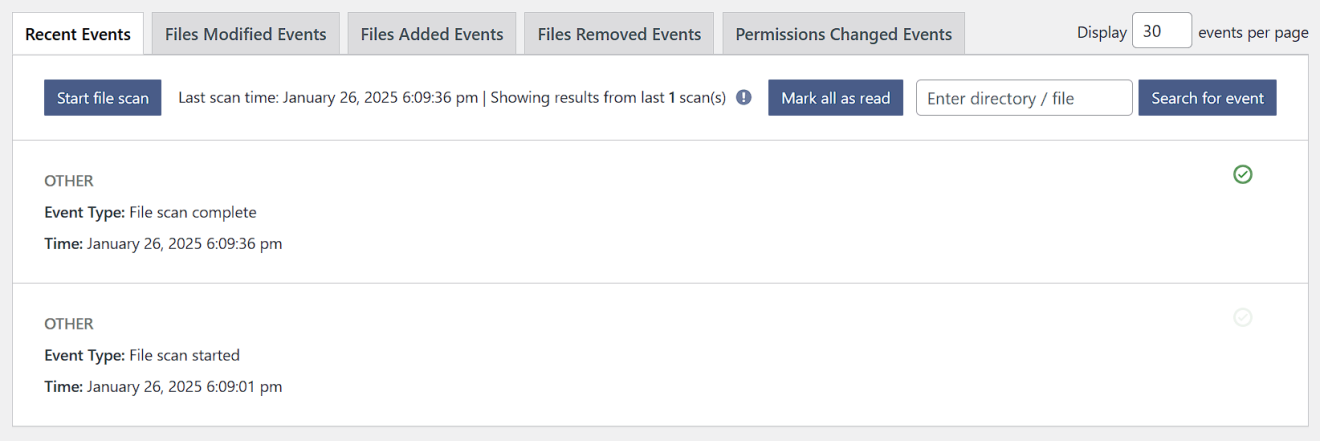
If no changes are detected, the scan will complete with no notifications other than a File scan complete notification. You will also receive an email with the results of the scan:

This concludes the scan. Melapress File Monitor will run another scan at the next scheduled date and time.
How Melapress File Monitor reports changes
If a change is detected, you will see an alert detailing which file has been changed.

If you are aware of the change and want to exclude the file or its directory from being included in future scans:
- Click the x in the File modified field to exclude the file
- Click the x in the Directory field to exclude the directory

You will also receive an email with the scan results.
Viewing scan results in the WordPress activity log
If you have WP Activity Log installed, you will also be able to see this change detection in the activity log:

Clicking on More details… will show you the metadata associated with that event.

Learn more about Melapress File Monitor
How Melapress File Monitor detects file changes on WordPress
How to change the maximum file size to scan
Excluding files, file types, and directories from the file changes scan
