



Updated on 22 April, 2025 by Joel Barbara
The 2025 WordPress Security Checklist: 16 Items to Tackle
Checklists are indeed the best invention since sliced bread. Since remembering minute details is next to impossible, checklists take away the pressure of remembering every task that needs to be done. To this end, a WordPress security checklist is of great help in securing your WordPress website.
Get ready for the ultimate wordpress security checklist, where we break down the security tasks that form the foundation for a secure WordPress site.
Table of contents
- 1: Keep WordPress, themes, and plugins updated
- 2: Uninstall plugins not in use
- 3: Ensure strong passwords and 2FA
- 4: Review user accounts
- 5: Change the default admin username
- 6: Ensure you have a TLS certificate
- 7: Secure the login page
- 8: Log user and system activity
- 9: Check files for unauthorized changes
- 10: Install a firewall and malware scanner
- 11: Configure HTTP security headers
- 12: Disable file editing
- 13: Change the default WordPress database prefix
- 14: Relocate the wp-config.php file
- 15: Disable directory browsing
- 16: Disable PHP file execution
- More WordPress security tips
1: Keep WordPress, themes, and plugins updated
Updates may be the most critical security measure you can take to keep your WordPress site safe. They’re also easy to install and free – a double whammy if there ever was one.Updates can be installed directly from the WordPress dashboard by navigating to Dashboard > Updates.

Here, you’ll find three different sections with updates for WordPress, plugins, and themes. You can choose to update individual items or everything in bulk.
You can choose to install critical updates automatically or even test them in a staging environment. The latter is especially recommended in environments that feature specific customizations. In doing so, you can ensure updates play nicely together before rolling them out to your live WordPress website.
2: Uninstall plugins not in use
Plugins are one of the many reasons why WordPress is so popular. Easy to install and manage, they extend the functionality that WordPress offers out of the box to just about anything from fully-blown eCommerce stores to membership sites and everything in between.
With plugins being easy to install, many sites end up with several plugins that are not being actively used. There isn’t necessarily anything wrong with this, but each plugin we install extends our attack surface – whether by little or much.
As such, it is always a good idea to deactivate and uninstall any plugins that are not in use. This also applies to themes.
To uninstall plugins:
- Go to Plugins > Installed Plugins
- Locate the plugin you want to uninstall
- Click on Delete
- If the plugin is active, you will need to Deactivate it first before you can uninstall it.
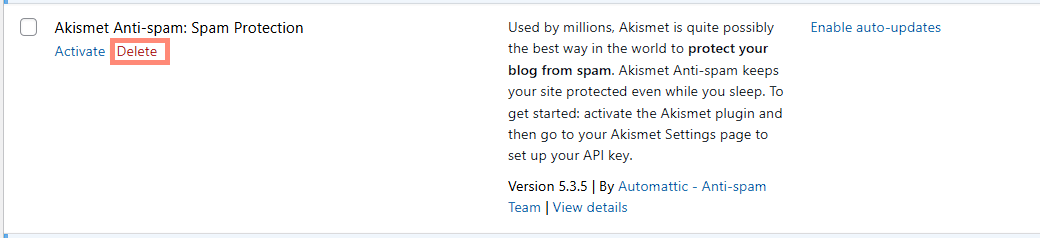
This also applies to WordPress security plugins. Having two firewalls, for example, does not double security. It is more likely that these will create conflict, slow down your site, or worse, lead to crashes.
If you have a large number of websites, managing plugins, themes, and updates as mentioned above can eat up a lot of time. A more efficient way to manage this for larger numbers of sites is through multi-site management tools like WP Umbrella.
Using tools like this, theme, plugin, and core updates for multiple sites can be managed through a single portal. Plugins can also be activated, deactivated, and deleted at the click of a button without having to log in to each site.
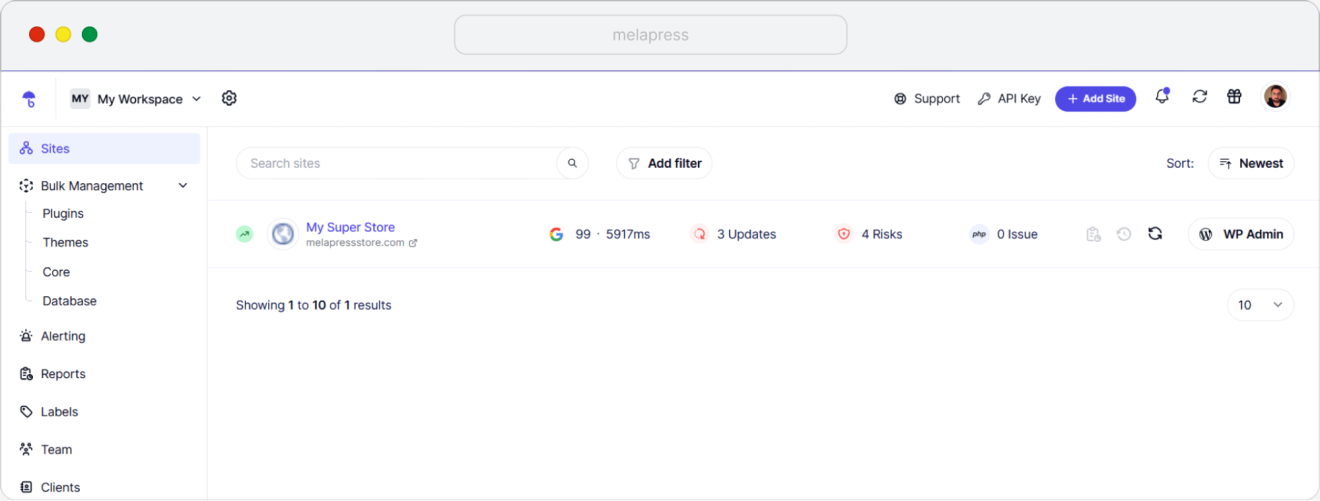
You will need to install the WP Umbrella plugin on each site and provide the API key, which you can sign up for from WP Umbrella’s website.
3: Ensure strong passwords and 2FA
Strong passwords and Two-Factor Authentication (2FA) work hand in hand to ensure that users’ accounts are as secure as can be.
Enable two-factor authentication (2FA)
To enable 2FA, you need to install a plugin. A good option is WP 2FA, which we develop ourselves. WP 2FA comes in both free and premium editions. Which one you choose will largely depend on your requirements. Having said that, 2FA is recommended for websites of all sizes, whether it’s just one user or many.
The free edition offers unlimited 2FA with both TOTP (authenticator code) and e-mail codes available. It also includes 2FA backup codes to ensure users don’t get locked out of their accounts.
The premium edition includes additional authentication methods, such as SMS, Yubikey, and one-click email login. You also get configurable policies, one-click WooCommerce integration, and much more.
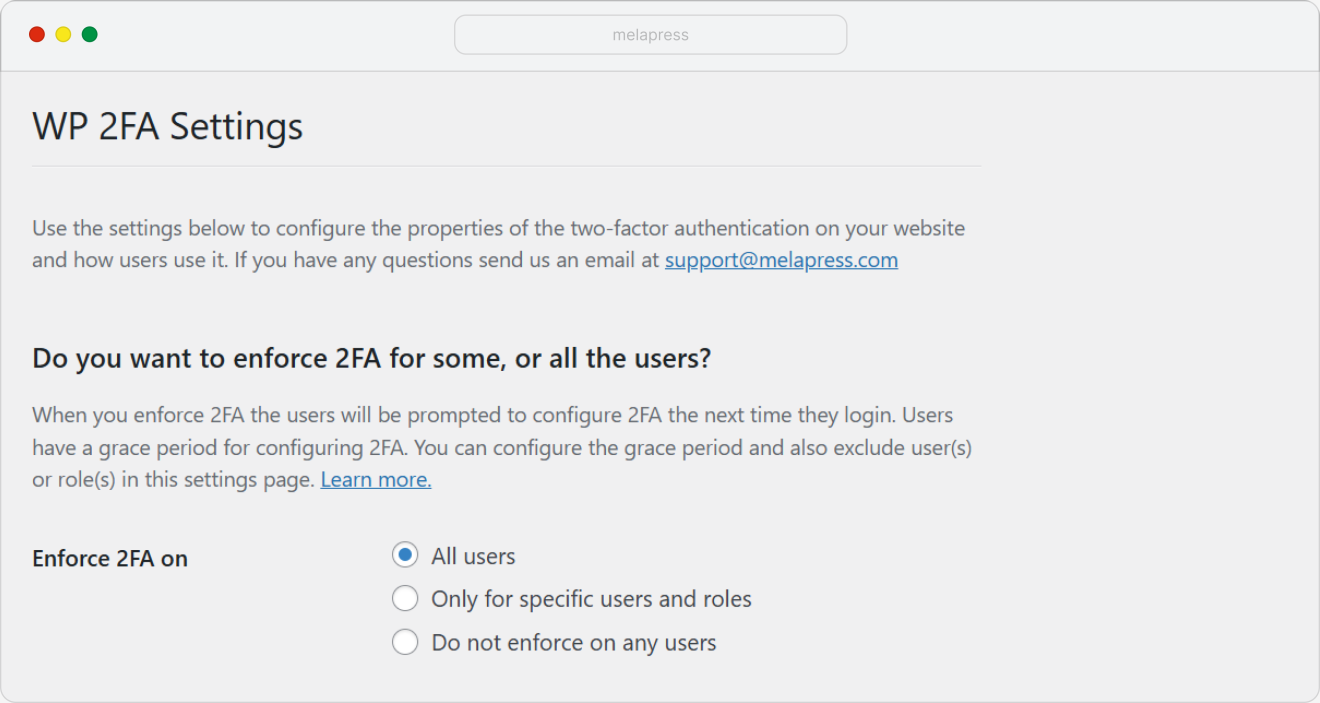
The free edition of the plugin can be downloaded from the WordPress repository. To do so:
- Navigate to Plugins > Add New Plugin
- Search for WP 2FA
- Click Install, and then Activate
Once activated, the setup wizard will kick in, walking you through the setup process. Once done, you will also have the opportunity to configure 2FA for your WordPress admin account.
Enforce strong passwords
While 2FA drastically increases the security of the login process, passwords remain an integral part. As such, when looking to protect the login page, we must ensure strong passwords are used by everyone with an account on our WordPress website.
While it is certainly possible to ask users to use strong passwords, ensuring they do can be a challenge. This is where Melapress Login Security comes in. Developed internally by the team, the plugin offers a range of WordPress login security policies, including password policies.
Policies can be set up site-wide or by role, giving you flexibility in how you secure your site. To ensure users are not frustrated by the process, the plugin offers users real-time hints to help them configure a password that meets the requirements laid out in the policy.
Even more good news? Password policies are available in full in the free edition of the plugin. To get started, install and download Melapress Login Security just like you would with any other plugin. Once installed:
- Head to Login Security > Login Security Policies.
- To set up a site-wide policy, select the Site-wide policies tab. To set up a role-based policy, select the role for which you want to set up the policy from the Role-based policies tab drop-down.
- Next, tick the checkbox next to Activate password policies and choose the desired options.

Click Save once done for the changes to take effect.
4: Review user accounts
Whenever users come on board, leave, or change roles, chances are that over a given period of time, user accounts need to be reviewed.
Inactive user accounts are a security concern. If a bad actor manages to gain access, no one will report any abnormal activity that typically follows a WordPress site breach. To this end, we need to ensure that inactive user accounts are blocked after a period of inactivity. We can automate this through Melapress Login Security’s inactive user policies, as shown in the screenshot below:

Start by navigating to Users > All Users
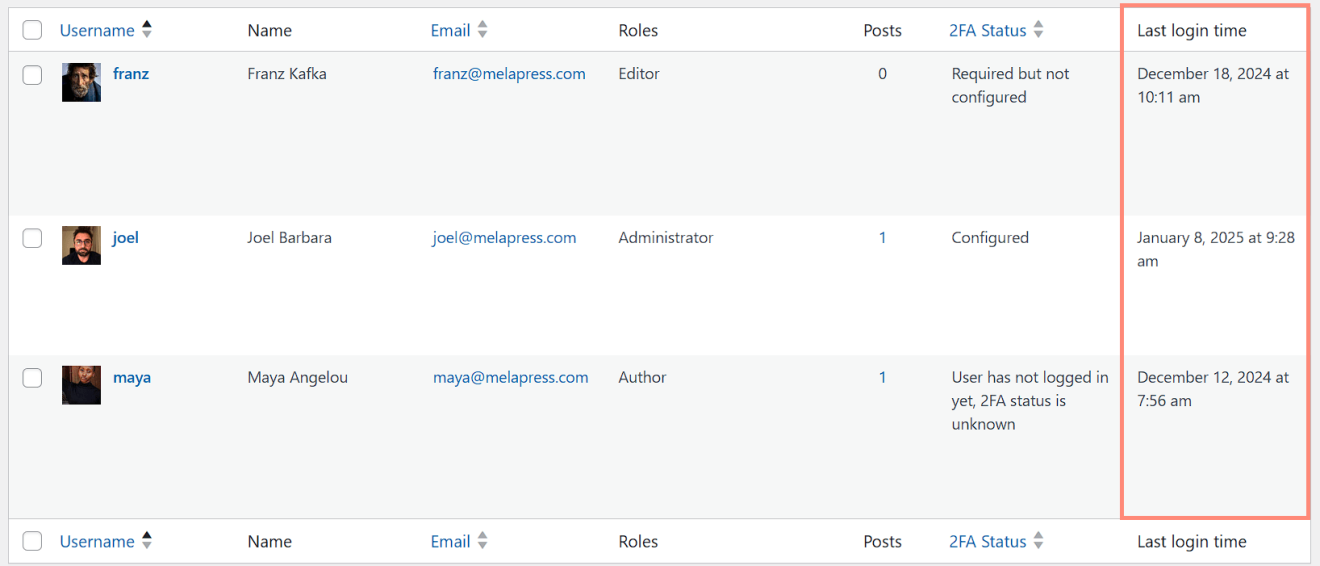
Here, you will see a list of all users registered on your WordPress site.
If you installed Melapress Login Security from the previous checklist item, you will also see their last login time, highlighted in orange in the above image. The premium edition plugin also enables us to automatically deactivate inactive user accounts automatically.
- Navigate to Login Security > Login Security Policies
- Ensure the Enable login security policies checkbox is ticked, then scroll down to Enable Inactive Users policies
- Tick the Activate Inactive Users policies checkbox
- Choose how long users must be inactive before the policy kicks in
- Choose whether you want to require users to reset their password on unlock and whether you want to block Password reset requests from deactivated users
- Scroll down to the bottom of the page and hit the Save button

Enforce the principle of least privilege
Equally, we should make sure that accounts follow the principle of least privilege; that is to say, they do not have any additional rights over and above what they need to do their assigned tasks.It is always safer to err on the side of caution, since you can always add capabilities if the user is unable to complete a given task.
If the included roles do not provide the access level required, use a plugin such as our Melapress Role Editor. The plugin offers an easy-to-use interface and comes with new roles straight out of the box to help you get up and running.
5: Change the default admin username
Default values are often a big security risk. They drastically reduce the information-gathering phase that bad actors go through before launching an attack. As default values are known to all, your WordPress security is much weaker.
One default value that you should change is the admin username. The username “admin” is one of the first usernames bad actors try in a brute-force attack. If you use this username it halves the effort they need to go through to guess the correct credentials.
To reduce the risk associated with brute-force attacks, change the username to something random that is not easily guessed. Keep in mind that usernames cannot be changed in WordPress. As such, your best course of action is to create a new user and then delete the old one. Alternatively, you can change the username directly from the database or by using a plugin such as Easy Username Updater.
6: Ensure you have a TLS certificate
A TLS certificate (formerly SSL certificate) encrypts data as it traverses the internet from the web server to the visitor’s browsers. It protects visitors and users by providing them with privacy and security. However, it also protects your WordPress website from attacks such as Man-in-the-Middle.

TLS certificates are typically installed through the hosting provider’s back-end. Many providers offer free TLS certificates and an easy-to-use installation interface.
Alternatively, you can use a plugin such as WP Encryption to get the job done.
7: Secure the login page
Protecting the login of your WordPress website is of critical importance. The login page tends to get the brunt of attacks and nosing around. As such, the more security measures we can implement here, the better your WordPress security will be.
- Limit login attempts: Just like you shouldn’t give your ex unlimited chances, so shouldn’t users have unlimited password guessing attempts. Limit login attempts to a reasonable number to reduce the risk of a successful attack.
- Change the default WordPress login URL: We previously discussed the importance of changing default values and putting the admin user account in the spotlight. Now it’s time to shine the light on another default value that should be changed – the WordPress login URL. Changing /wp-admin/ to an obscure URL makes it more difficult for bad actors to find it – just make sure you keep a note of the new URL somewhere safe.
- Place IP restrictions: To further secure the login page, restrict which IP address can access it. Do keep in mind that this works best if you have a static IP. Also, you might not be able to log in should you find yourself connected to a new network such as a coffee shop or airport.
- Restrict login times: Another way to reduce your attack surface is to limit the hours users can and cannot log in. You might want to exclude the administrator account from this policy to make sure you can still log in should there be an emergency outside of regular hours.
Our Melapress Login Security plugin makes it easy to implement all of the above policies (and many others). Designed specifically to secure the WordPress login page, the plugin offers an intuitive interface for better security without breaking a sweat.
If you have installed the plugin already:
- Navigate to Login Security > Login Security Policies
- Ensure Enable login security policies checkbox is ticked
- Find the login policies you want to enable, tick the checkbox next to each one, and configure them accordingly

You’ll also find login page hardening settings by navigating to Login Security > Login page hardening. Here you can:
- Change the login page URL
- Limit access to the login page by IP address
- Set up geo-blocking
- Display a consent message for GDPR-compliance
8: Log user and system activity
Logs and WordPress security are not always seen as two sides of the same coin. Yet, this is a missed opportunity that can enable you to improve the security of your WordPress site.
Keeping a log of users’ activities enables you to suss out suspicious behavior, such as failed login attempts, before it becomes an issue. It also has the added benefit of encouraging users to be more mindful of their activities. Additionally, it is a great forensic tool should there ever be a breach.

To add activity logging capabilities to your WordPress website, you’ll need to install a plugin such as WP Activity Log – which we develop and maintain ourselves. The free edition of the plugin comes with no restrictions on the activity it logs. There are also no data retention restrictions, making it a great starting point.
The premium edition adds features such as advanced search filters, user session management, log mirroring, and much, much more.
To start logging user and system activity with WP Activity Log:
- Download, install, and activate WP Activity Log
- Once activated, the initial setup wizard will kick in, walking you through the initial configuration process
The plugin will automatically start logging activities with no further action required on your part. Of course, you can always fine-tune how the plugin works (or change any of the settings configured in the wizard) by navigating to WP Activity Log > Settings.
9: Check files for unauthorized changes
Security breaches can be notoriously difficult to detect. A recent report by Gigamon showed that one in three organizations failed to detect a breach in the prior 12 months.
Yet, one tell-tale sign of a breach is unauthorized file changes. Whether to inject malware, add redirects, or anything in between, files and directories invariably experience some form of alteration.
Thus, scanning files for any changes can help you understand whether there has been a breach and, if so, which files were altered. Having this information drastically reduces the recovery time since you’ll know exactly which files need to be replaced.
One way you can do this is with a malware scanner. While we’ll discuss this in more detail in the next section, a malware scanner looks for known malware signatures to detect foreign code during malware scanning.
Another way to accomplish this is using Melapress File Monitor. This free, nifty plugin compares hashes of individual files and directories with previous hashes – detecting malware injections as well as any other type of alteration, including PHP files, WordPress core files, and anything in between.
To scan for unauthorized file changes:
- Log in to your WordPress, then navigate to Plugins > Add New Plugin
- Search for Melapress File Monitor then click on Install Now and Activate
- The initial setup wizard will kick in, after which the plugin will run its first scan. If you opted to cross-check WordPress, any discrepancies will be highlighted after the first scan
- Subsequent scans, which will run at the selected schedule, will highlight any difference from the previous scan

10: Install a firewall and malware scanner
If you do not have a web application firewall (WAF) installed on your site, installing one might be a good idea. Many web application firewalls come with a malware scanner, keeping your WordPress site safe from different threats.
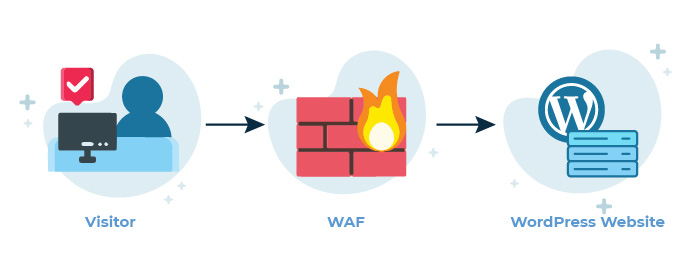
A WordPress application firewall (WAF) is a type of security plugin that examines incoming traffic to determine whether it’s malicious or legitimate. Malicious traffic is blocked, keeping your website safe from different types of attacks.
On the other hand, malware scanning examines WordPress files, looking for specific signatures of known malware. Many reputable security plugins include both. There is no shortage of firewall plugins, with Wordfence, All-in-One-Security, and MalCare being some of the more popular choices.
11: Configure HTTP security headers
HTTP security headers are, in essence, packets of information the web server includes with responses. They are completely independent of WordPress; however, they significantly improve WordPress site security.

How you add security headers will largely depend on the web server – whether it’s Apache, Nginx, or IIS. Click here to learn how to set up HTTP security headers. Alternatively, you can use dedicated WordPress plugins such as Headers Security Advanced & HSTS WP.
12: Disable file editing
WordPress includes a file editor which can be accessed directly from the dashboard. While this is very convenient, it does present a security risk should there be a breach. And while your login should be pretty secure if you followed the steps outlined in this checklist, disabling the editor ensures that even if there is a breach, the damage that can be done is limited.
File editing can be disabled by editing the wp-config.php file. We will need to add a couple of lines of code, however, plugins such as Malcare enable you to do this through their GUI.If going down the manual route, open the wp-config.php file and add the following:
// Disable file editing
define( ‘DISALLOW_FILE_EDIT’, true );
define( ‘DISALLOW_FILE_MODS’, true );
13: Change the default WordPress database prefix
Changing the WordPress database prefix is not for the faint of heart. However, it can help you improve your WordPress security through what is known as security by obscurity. The premise behind this strategy is simple – by obscuring sensitive elements, bad actors will have a harder time finding them and decide to move on to easier targets. Another example of security through obscurity is changing the login URL – which we discussed earlier.
The easiest way to change the default WordPress database prefix is during installation. However, it is also possible to change the prefix at any point after that. You will need to:
- Start by changing the table_prefix variable in the wp-config.php file to the new prefix
- Log in to MySQL or phpMyAdmin and change the database table names to reflect the new prefix
- Update database entries to reflect the change in the database prefix name
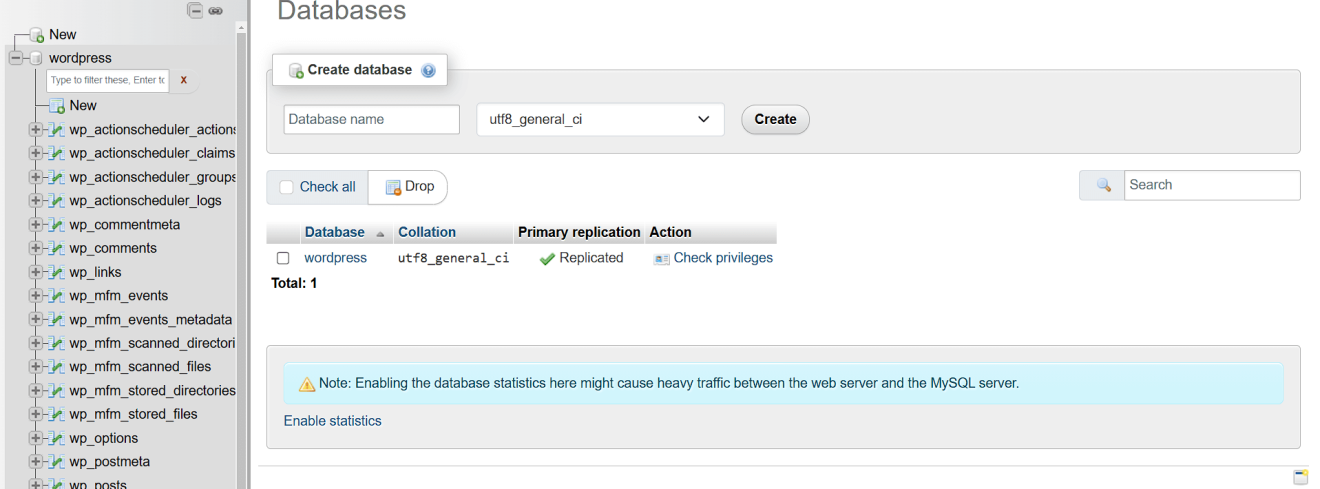
It is important to first test the changes in a staging environment. This will allow you to iron out any snags you may encounter before rolling out the changes to your live WordPress website.
Click here to learn more about changing the default WordPress database prefix.
14: Relocate the wp-config.php file
The wp-config file contains important configuration settings related to your WordPress site. It includes sensitive information such as database connection details, including the MySQL username and password.
Moving the file outside of the WordPress root directory can improve WordPress security. The good news is that WordPress automatically searches one folder up should it not find the wp-config file in the root directory.
Alternatively, you can restrict access to the wp-config file using an htaccess file.
Whichever method you choose, you’ll need to connect to your WordPress server using SFTP to make the necessary changes.
15: Disable directory browsing
Most website directories have an index page which serves as the entry point for the directory. However, visitors may see a list of all files and subdirectories if there’s no index file. This can be a security risk if directory listing isn’t disabled, as attackers could exploit it to access or harm your site.
Directory browsing can be safely disabled by placing a htaccess file in the directory with the following line added to it:
Options -IndexesThe directive will be applied to the folder where the htaccess file is placed and all of its subdirectories. Anyone trying to access the directory will get a 403 – Forbidden error instead of the listing.
16: Disable PHP file execution
While WordPress does depend on executing PHP files to function, not all directories should allow PHP files to be executed. The media file directory is one example where PHP file execution should be disabled.
Just like we did in previous examples, we can use an htaccess directive to modify this behavior. It’s important to place this directive in a directory that should not be executing PHP files. Placing it in a directory that does require PHP file execution will cause WordPress to stop functioning.
The directive that needs to be added is as follows:
<Files *.php>
  Order Allow,Deny
  Deny from all
</Files>
More WordPress security tips
In this comprehensive WordPress security checklist, we included the most important WordPress security tasks to keep your WordPress website safe. However, as any experienced administrator will tell you, security is not a one-time task you can set-and-forget.
Security requires constant vigilance and tweaking to ensure it can hold up against threats as they evolve.Take WordPress security to the next level with our WordPress hardening guide.