



Updated on 16 April, 2026 by Joel Barbara
WordPress Maintenance: 14 Essential Tasks [+ Checklist!]
Every website needs regular care to stay in top condition. This applies whether it’s a simple WordPress blog or a bustling WooCommerce store. Maintenance keeps your site fast, secure, and glitch-free. It’s all about tackling updates, clearing out unused files, fine-tuning settings, and shoring up your security.
Think of your site like a car or a home. Skipping upkeep might not seem like a big deal at first, but it can lead to costly problems later. Regular maintenance prevents headaches and keeps everything running smoothly.
The good news? Most tasks are quick and easy, and many can even be automated. With a checklist like this, you’ll know exactly what to do and how often. No need to spend extra on professional services or lock your site in maintenance mode.
In this guide, we’ll break down the ten most important WordPress maintenance tasks. You’ll learn how each one works and why it matters. Ready to dive in? Let’s go!
Table of contents
- The importance of maintaining your WordPress website
- Top 14 WordPress maintenance tasks
- 1. Perform regular backups
- 2. Update WordPress core, themes, and plugins
- 3. Delete unused themes, plugins, and files
- 4. Optimize the database
- 5. Regularly check and optimize your website for speed
- 7. Check and fix broken links
- 8. Test your forms from time to time
- 9. Audit user accounts and permissions
- 10. Harden your site’s security
- 11. Regularly check and optimize your site for mobile
- 12. Monitor website uptime
- 13. Review SEO performance
- 14. Monitor and analyze website analytics
- WordPress maintenance checklist
- Frequently Asked Questions
- Use WordPress Maintenance to Keep Your Site Running Smoothly
The importance of maintaining your WordPress website
WordPress maintenance is an ongoing process. If you don’t keep up with WordPress maintenance, visitors might run into errors and downtime while navigating your pages. Basic maintenance tasks like plugin updates, backups, and performance optimization improve performance and user experience. All of this while reducing security risks.
Here’s a quick look at why it’s so important:
- Reduces security risks: WordPress sites experience an average of 13,000 attacks per day. This totals about 4.7 million attacks annually, according to Hostinger. Alarmingly, 95% of these attacks exploit outdated versions of WordPress plugins, underscoring the importance of regular updates.
- Prevents website errors: Proper maintenance secures a healthy website and avoids errors. Plugins and themes can break when outdated, so staying on top of updates prevents this.
- Improves SEO: Some tasks can even improve your pages’ SEO. Things like checking for broken links, performance optimization, and making your site more mobile-friendly all qualify.
Overall, the more effort you put into maintenance tasks, the fewer site-breaking errors you’ll encounter. That means less downtime for your users. How’s that for a win-win?
Top 14 WordPress maintenance tasks
Now you know why maintenance is so important. Next, let’s explore how you can keep your site up-to-date and prepared to perform at its best.
You don’t have to be a WordPress developer or WordPress security expert to perform any of these tasks. All you need is a bit of time and effort. Let’s get to it:
1. Perform regular backups
Performing a full-site WordPress backup is arguably the most important WordPress maintenance task. A complete site backup provides a restore point if anything goes wrong. If you run into a site-breaking error or your website gets hacked, simply restore it to an earlier backup instead of spending hours troubleshooting.
Ideally, you’ll back up your website every day. You can do this manually by copying your site and database files to a different storage location. But this is tedious and generally not recommended.
In most cases, the best option is to use a WordPress web host that backs up your website automatically every day. Many hosting services do this, particularly managed WordPress solutions like Kinsta, shown below:
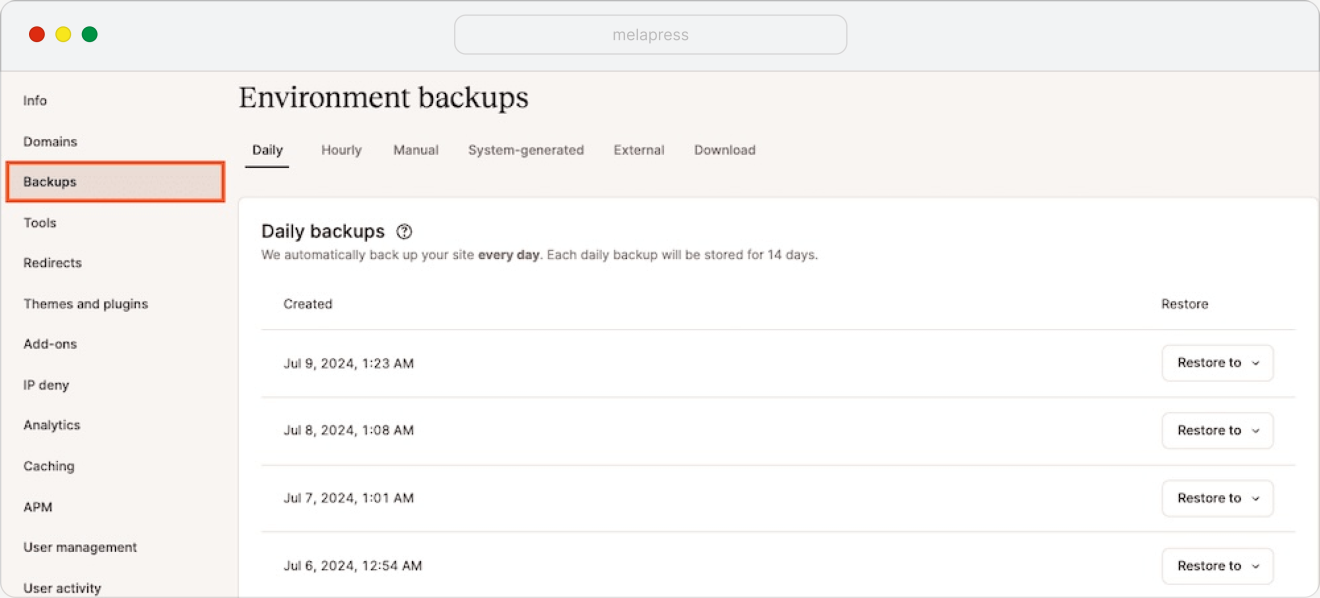
If you don’t want to use the services offered by your hosting provider, you can always opt for a WordPress backup plugin instead. Consistency is more important than how you backup. Remember to test restores occasionally to ensure you can successfully restore your website should something happen. Something like UpdraftPlus is a good option.
Whatever method you use, creating backups should be automated.
2. Update WordPress core, themes, and plugins
One of the leading causes of WordPress errors and security issues is neglecting to update and maintain the core software and its components. If you look at update logs for any major plugin and WordPress.org itself, you’ll notice many of them are related to security issues and bugs.
The more time you spend using outdated software, the more often you may encounter errors. Updating WordPress and its components is so simple there’s no reason not to do it often. Doing so also provides access to new features to help improve different aspects of your website.
At least once a week, go to the WordPress dashboard and open the Updates tab. Look at the list that needs updates, and execute all of them:
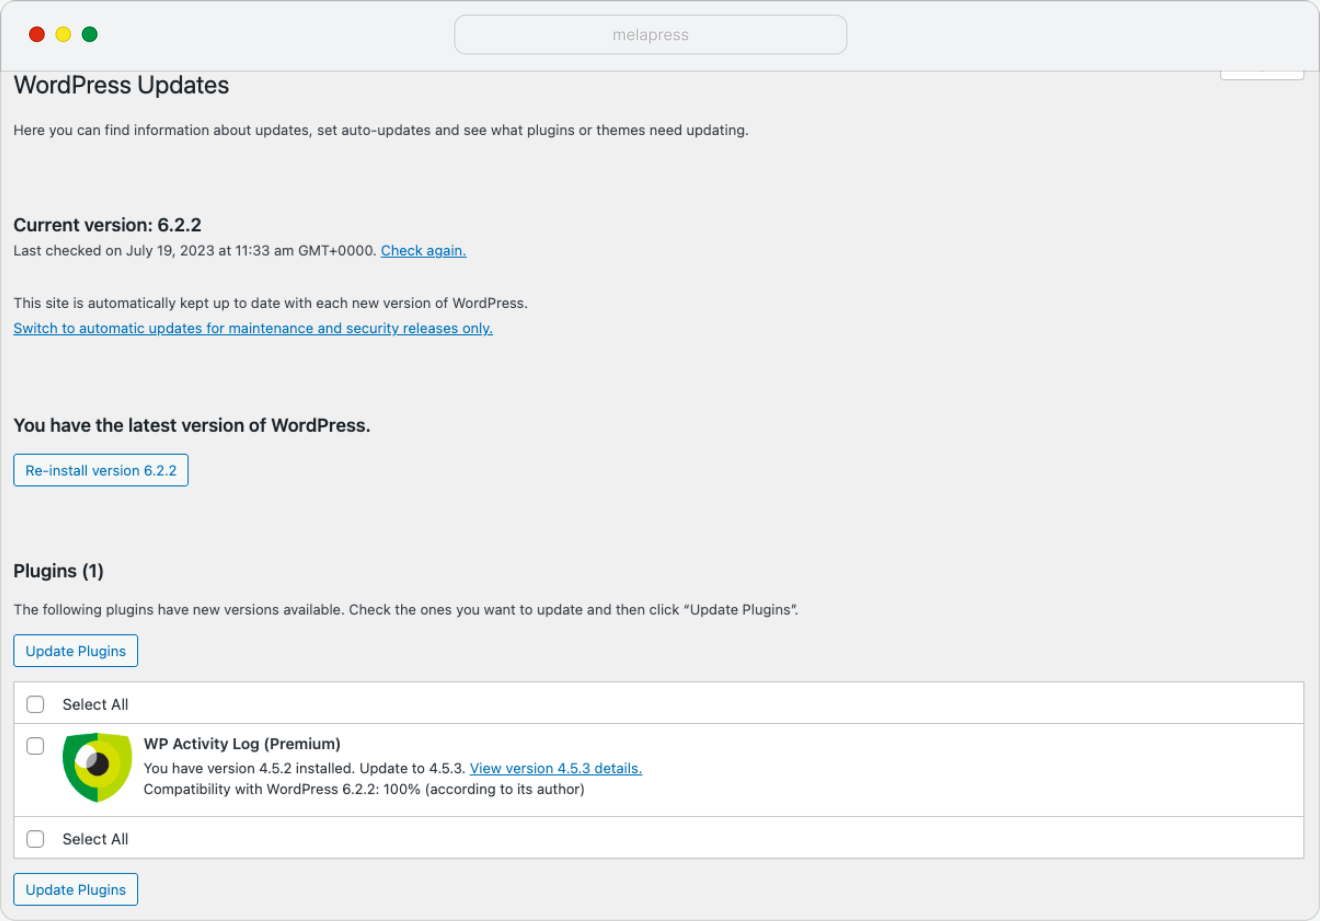
Updating WordPress core, plugins, and themes can lead to errors sometimes. That’s why you must have a solid WordPress updates strategy in place before making changes. This means taking a fresh backup before making the updates.
Even better would be to test the updates on a staging environment first. This is the safest approach to use. Run updates on the staging site, verify that they don’t cause any errors, and then push them to the live website.
3. Delete unused themes, plugins, and files
A cluttered WordPress site with unused themes, plugins, and files is harder to manage. It can also pose serious risks to performance and security. If you have inactive themes or plugins installed, delete them to improve the security of your WordPress website.
Here’s how to go about it:
Delete inactive plugins and themes
If you regularly update dozens of plugins and themes you don’t even use, it’s time to clean house. Unused plugins and themes take up server space and create database entries, adding bloat that slows your site down.
Worse, inactive or outdated plugins and themes are common entry points for malicious actors. By deleting them, you improve speed and reduce your site’s attack surface.
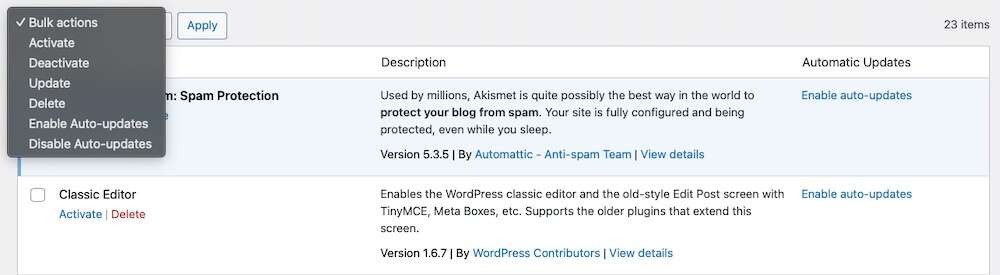
A few tips to help you approach this process:
- Start by reviewing your list of installed plugins and themes. Ask yourself which ones are essential and actively used.
- Delete anything you don’t need. This includes deactivated plugins sitting idly in your dashboard.
- Conduct this review every couple of months. Frequent updates or site changes can cause unused tools to accumulate without you realizing it.
Delete unused files
Files stored on your server can also pile up over time. Unused images, temporary configuration files, or leftover backups may seem harmless, but they create unnecessary clutter. These files can inflate your backups, increasing both the time it takes to create them and the storage they require. Large, bloated backups are more prone to failure and take longer to restore during emergencies, too.
Beyond performance, storing unreferenced files also introduces security risks. Files left forgotten on your server without outdated configurations can be exploited by attackers. Clearing them out improves site speed and strengthens security.
To keep your site lean and efficient, schedule time every few months to check your WordPress folders. Remove unused images, temporary files, and anything else no longer needed.
4. Optimize the database
Optimizing the WordPress database means removing unused tables and rows. Many WordPress plugins leave orphaned entries in the database after you’ve deleted them. This bloat can slow down database queries, which in turn slows down your website. This is where database optimization really helps.
Browsing through the database and determining which entries you can safely delete can be tricky. Here’s how to approach the process:
Step 1: Back up your database
Before making any changes, back up your website, including the database. If you’re already using an automatic backup solution like UpdraftPlus or Jetpack VaultPress Backup, ensure your latest backup is saved and accessible.
Step 2: Review and clean orphaned entries
Orphaned entries — leftover data from uninstalled plugins — can be tricky to identify. To manually review your database:
Access your WordPress database through your hosting provider’s control panel, like phpMyAdmin in cPanel.
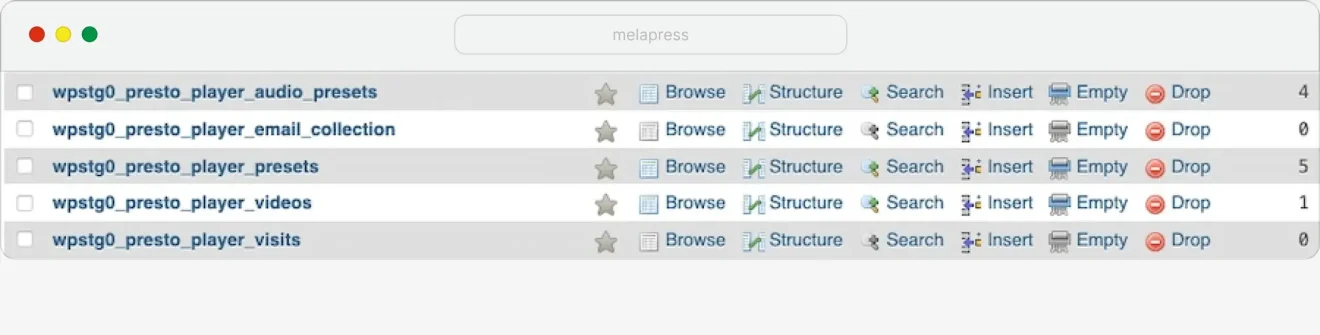
Go to the tables labeled with prefixes from old plugins like wp_pluginname_ and verify whether they’re still in use.
If you’re unsure, cross-check active plugins in your WordPress dashboard to avoid deleting anything critical.
There are several WordPress database tools that you can use to make sure the database is running in tip-top shape.
A revision limiting or removal plugin, like WP-Sweep can help. This tool helps you manage unnecessary post revisions, database entries, and temporary files with minimal effort.

After installing this plugin, go to Tools > Sweep in your WordPress dashboard.

Select specific options to remove orphaned meta, revisions, and other unused database entries.
Click Sweep for each category to clean the database safely.
Step 3: Manage post revisions
WordPress stores every version of your posts, which can quickly add up. To clean up post revisions, you can use the WP-Sweep plugin again.
In Tools > Sweep, locate the Post Sweep section and find Revisions beneath it. Review the number of stored revisions.
Then, click Sweep to remove these revisions to reduce unnecessary bloat.
For better control moving forward, limit the number of revisions WordPress stores. Add the following code to your wp-config.php file to restrict revisions to a maximum of 5 (or any number you choose):
define('WP_POST_REVISIONS', 5);Step 4: Clean transient options
Plugins often create transient options — temporary data that may no longer be relevant. Use WP-Sweep or WP-Optimize to clean them. This plugin removes unnecessary post revisions, transient options, and unused database tables.
If you’ve installed WP-Optimize, go to the dedicated menu for this plugin, then select Database.
Check the box next to Remove expired transient options and click Run optimization.

Step 5: Automate with WP-Optimize
For a comprehensive approach, WP-Optimize offers additional tools like database table optimization and image compression.

With regards to frequency, this largely depends on the size of your website. Once a month is a good place to start from, then you can adjust depending on your results. This minimizes bloat as your website (and, by extension, database) grows.
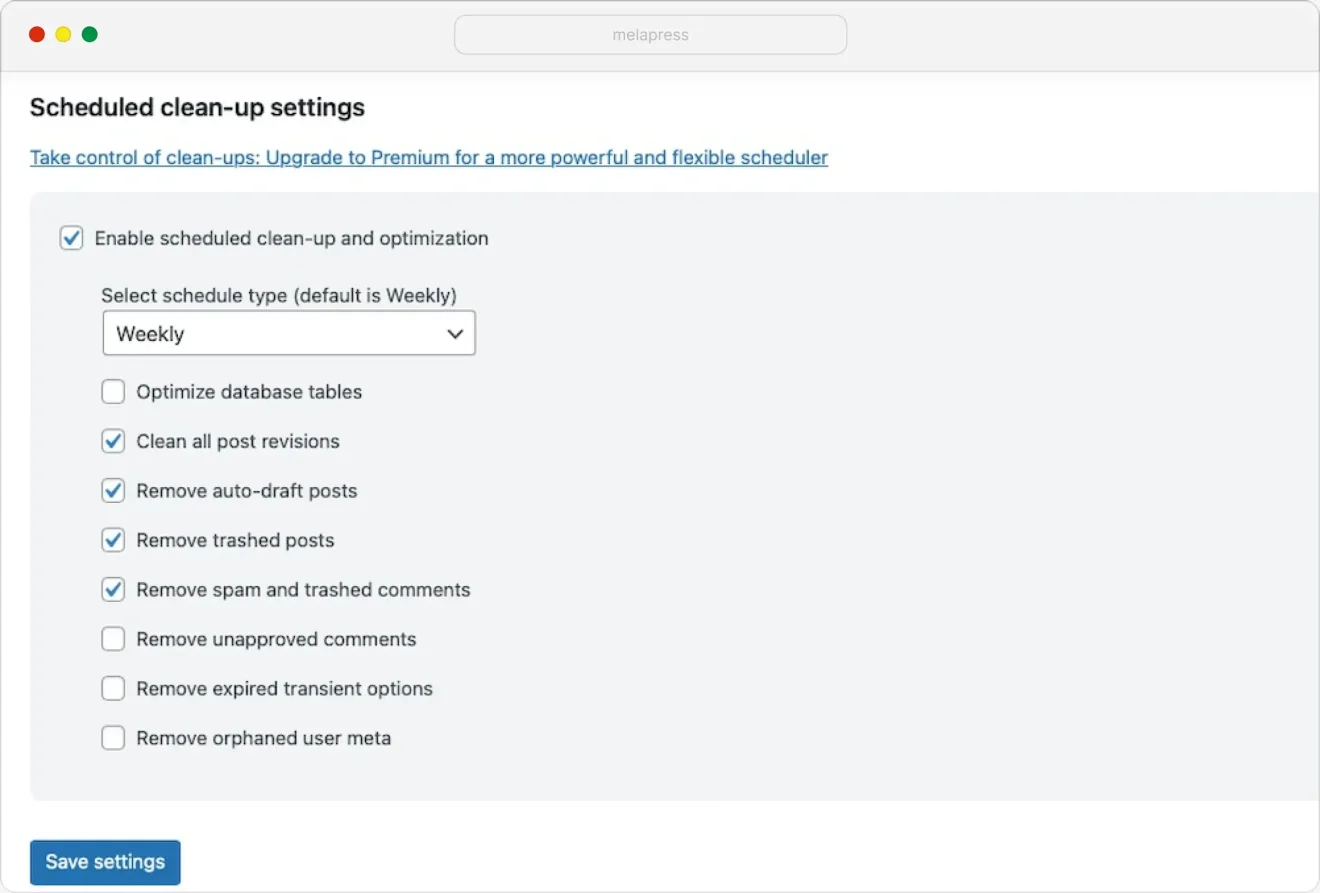
To set up an optimization schedule on your site, go to WP-Optimize > Database then click the Settings tab. Then under Scheduled clean-up settings check the box next to Enable scheduled clean-up and optimization. Select the schedule that works best for you.
5. Regularly check and optimize your website for speed
When you launch a website, every page should load almost instantly. Over time, as you customize the site, add plugins, and upload content, it’s natural for loading speeds to slow down. However, keeping your loading times snappy is critical.
To monitor your site’s speed, use free tools like GTMetrix, PageSpeed Insights (which also assesses Core Web Vitals), Pingdom Tools, or Google Search Console. These tools provide detailed reports, pinpointing areas where improvements can be made.

With Pingdom, simply enter your page URL and receive a performance breakdown, including actionable recommendations.
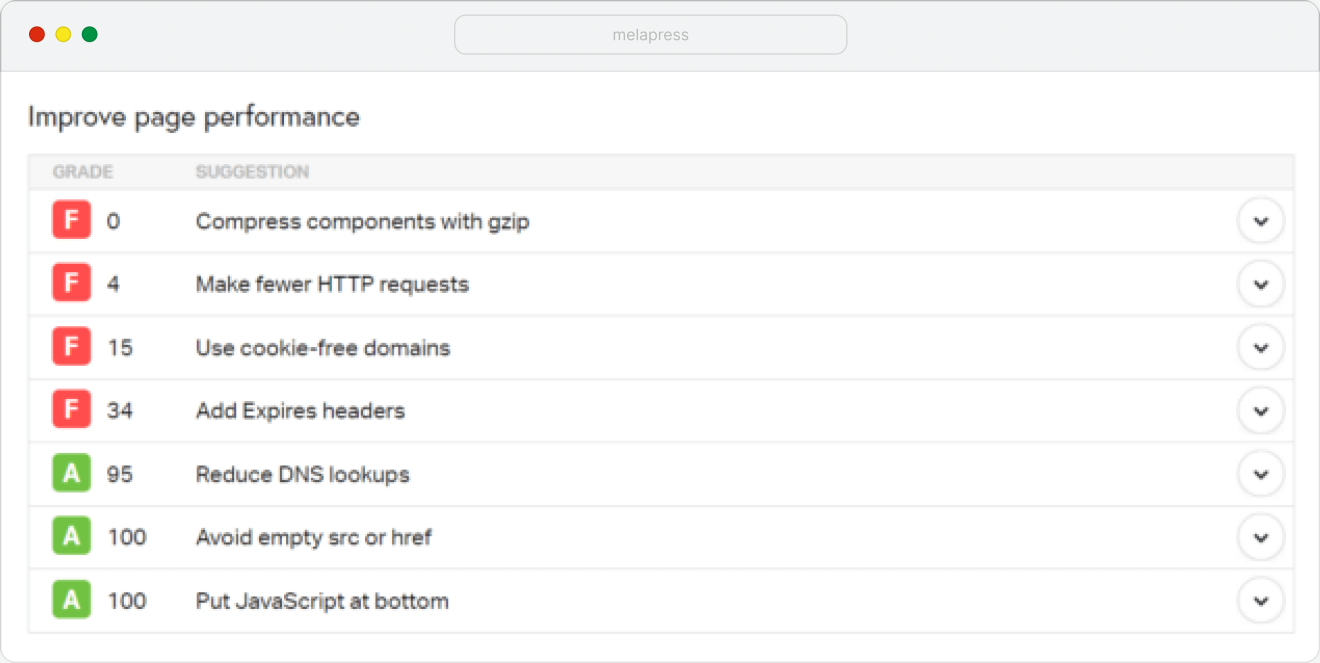
Here are a few ways to decrease the average page loading times:
Compress and optimize images
Images are often the heaviest files on a website. Tools like Smush, Imagify, or online platforms like TinyJPG can compress images without compromising quality.

Minimize CSS and JavaScript files
Bloated CSS and JS files slow down your site. Use tools like Autoptimize or WP Rocket to minify and combine these files. This reduces the number of requests made to the server.
Reduce third-party scripts
External scripts, like Google Fonts or analytics trackers, add significant load time, too. This happens because they rely on external servers. Remove or replace unnecessary scripts to improve speed.
Use a Content Delivery Network (CDN)
A CDN caches your content across multiple global servers, delivering it faster to users based on their location. This reduces the load on your own hosting server and improves load times globally.
Use browser caching
Configure your site to store static resources, like images or CSS files, in a visitor’s browser cache. This reduces load times for repeat visits.
For the best results, check the loading times for several of your site’s key pages every month and keep track of the results. If you notice loading times increasing, there’s probably a problem with your site’s configuration or server load.
7. Check and fix broken links
Broken links can be problematic. If someone runs into a broken link on your website, they might think your content is outdated or no one is checking for errors. Broken links can also harm your search engine rankings, as they send crawlers to pages with 404 errors.
If the broken link points to an internal page, that’s even worse. For every click on a broken internal link, you’re missing out on people spending more time on your website. Plus, it makes your content look untrustworthy.
Modern websites often include thousands of links, both internal and external. Monitoring all those links manually is nearly impossible.
Fortunately, plugins like Broken Link Checker can automate the process of fixing broken links:
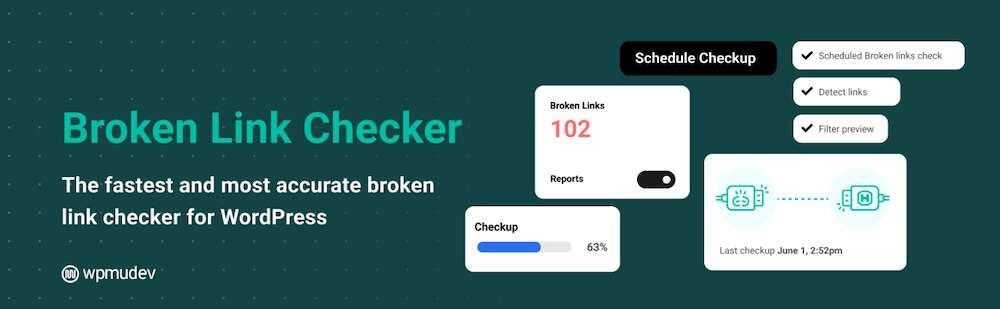
You can use the plugin to scan your website for links to pages that don’t exist or aren’t loading. The tool also checks pages for missing images and redirects.
Once you’ve identified a broken link, you can correct it if it’s wrong or point it toward another page. By the end of the process, every link should work and point to relevant pages.
If you prefer non-plugin options, tools like Seobility and Sitebulb are great alternatives. Both allow you to crawl your website for broken links and provide detailed reports on issues like redirect chains and missing images.
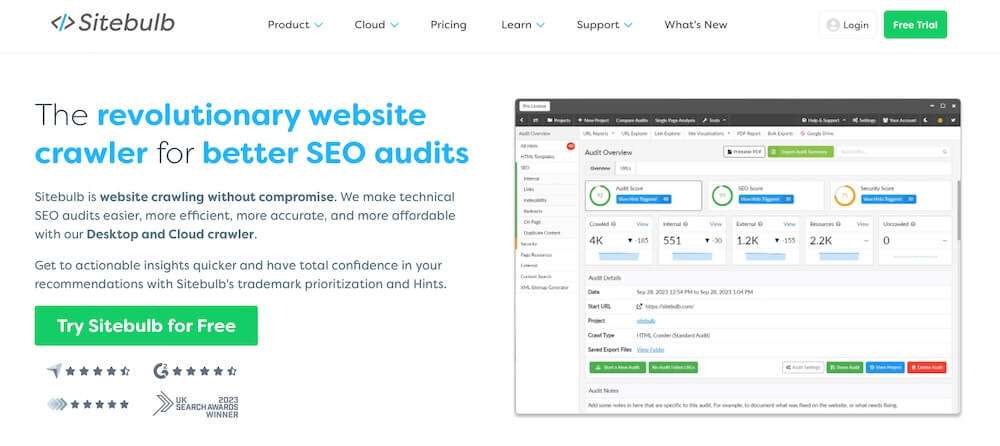
These tools can be particularly helpful if you want to analyze multiple sites or need advanced SEO insights.
Links can break at any time, so we recommend running full site scans for broken links every month.
8. Test your forms from time to time
Forms are one of the most essential elements on any website. This is especially the case for e-commerce stores. They’re one of the few fully interactive elements in web design. If a form stops working, it prevents you from receiving new leads, support requests, and even payments.
Considering how vital forms are, it stands to reason that you should test them periodically. That means using the form as a regular user and checking to ensure it works. In most cases, when you submit a form, you should see a success message.
If the form doesn’t display a success message, make sure you’ve received an email notification when someone makes a submission. Depending on the type of form, you probably already get an email upon submission.
Your goal should be to minimize form downtime as much as possible. To ensure this, test your site’s critical forms at least once per month.
If you stop receiving notifications about new submissions, that’s usually a sign that a form is not working correctly. In that case, test it immediately to ensure the form functions as it should.
While you’re ensuring proper form function, protect them, too. Adding CAPTCHA 4WP can help with this.

While spam is unlikely to break any of your forms, it can take advantage of unprotected forms to inundate your inbox. Mitigate risks associated with spam by using CAPTCHA 4WP. It supports different types of CAPTCHA, including ReCAPTCHA V3, for a non-intrusive CAPTCHA implementation.
9. Audit user accounts and permissions
Proper WordPress maintenance includes auditing user accounts and permissions to ensure your website stays secure and operates smoothly. An audit involves reviewing user roles, permissions, and activity to identify potential vulnerabilities or inefficiencies.
Step 1: Review user roles and permissions
Start by examining the roles assigned to each user on your website. WordPress offers default roles like Administrator, Editor, Author, Contributor, and Subscriber, each with specific permissions. Ensure users have only the permissions they need for their responsibilities:
To do this, go to the Users > All Users section in your WordPress dashboard. Then, review each user’s role and adjust as needed to match their current duties.
Use a plugin like Melapress Role Editor to create or modify custom roles if the default roles don’t match your requirements.
Step 2: Disable inactive accounts
Inactive accounts pose a security risk, as they can be exploited by bad actors. Regularly check for those who no longer need access to your website, like former employees or contributors. Disable or delete these accounts to minimize risks.
To do this, go to Users > All Users in your dashboard. Identify inactive accounts and either change their role to Subscriber (if unsure) or delete them entirely.
MelaPress Login Security allows you to set up policies for this. This helps you automate an otherwise tedious task while drastically improving your WordPress login processes.
Step 3: Monitor user activity
Auditing user accounts and permissions boils down to knowing what is going on on your website. To this end, monitoring user and system activities can uncover potential issues early on. The easiest way to monitor a WordPress website is by using an activity log plugin.
WP Activity Log is a WordPress plugin that provides an in-depth overview of everything that happens on your site. Use activity logs to monitor what users are doing. Or, look for specific activities, track e-commerce transactions, and even configure custom notifications.
Users are an essential part of many WordPress websites. Keeping tabs on what users are doing using an activity log goes a long way. However, preventive measures are equally important.
10. Harden your site’s security
WordPress is a secure CMS out of the box. However, you can do many things to improve WordPress security. Even if your website doesn’t store sensitive user data, you need to do this. Why? Malicious actors can use your website to propagate spam or malware.
The most important WordPress security task is keeping it (and any plugins or themes you’re using) up-to-date. Updates include security patches, so you shouldn’t wait too long to get them.
Besides updating WordPress (and making regular backups), here’s what you should be doing to increase WordPress security:
- Enforce the use of strong passwords – Motivating (or forcing) people to use strong passwords is the most effective way to protect WordPress users’ information. That applies to administrators and staff as well.
- Enable Two-Factor Authentication (2FA) – Implementing 2FA in WordPress, alongside enforcing strong passwords, means accounts on your website should be basically unbreachable. Using 2FA means malicious actors can’t brute force their way into accounts.
- Limit login attempts and block malicious IPs – Limiting the number of login attempts helps mitigate brute-force attacks. After a set number of failed attempts, the login page is temporarily locked. Combine this with IP blocking for added protection.
- Set up a web application firewall (WAF) – A web application firewall protects your site from malicious traffic by filtering out harmful requests. Many WAFs also include additional security features like DDoS protection. Consider services like Cloudflare or Sucuri for robust WAF options. Many hosting providers also include WAF functionality in their plans, so check with yours.
- Use HTTPS – Securing your website with an SSL/TLS certificate ensures that all data transmitted between users and your site is encrypted. Most hosting providers offer free SSL certificates via Let’s Encrypt, and activating HTTPS is straightforward.
- Monitor and scan for malware – Monitoring your website for malware helps identify potential issues before they escalate. Regular scans ensure your site is free of malicious code.
The more steps you take to secure your website, the less maintenance work you’ll need to do to protect it.
11. Regularly check and optimize your site for mobile
One of the most significant changes of the last decade is that most people now browse the web via mobile devices. That means most of your site’s views are likely from smartphone users. When a lot of people think about web design, however, they still imagine layouts created primarily with desktops in mind.
That means every change you make to your website’s design needs to look and work perfectly on mobile devices. Most WordPress themes are mobile-friendly, so this cuts out some of the complexity.
The Block Editor also makes it easy to design pages for smaller screens:
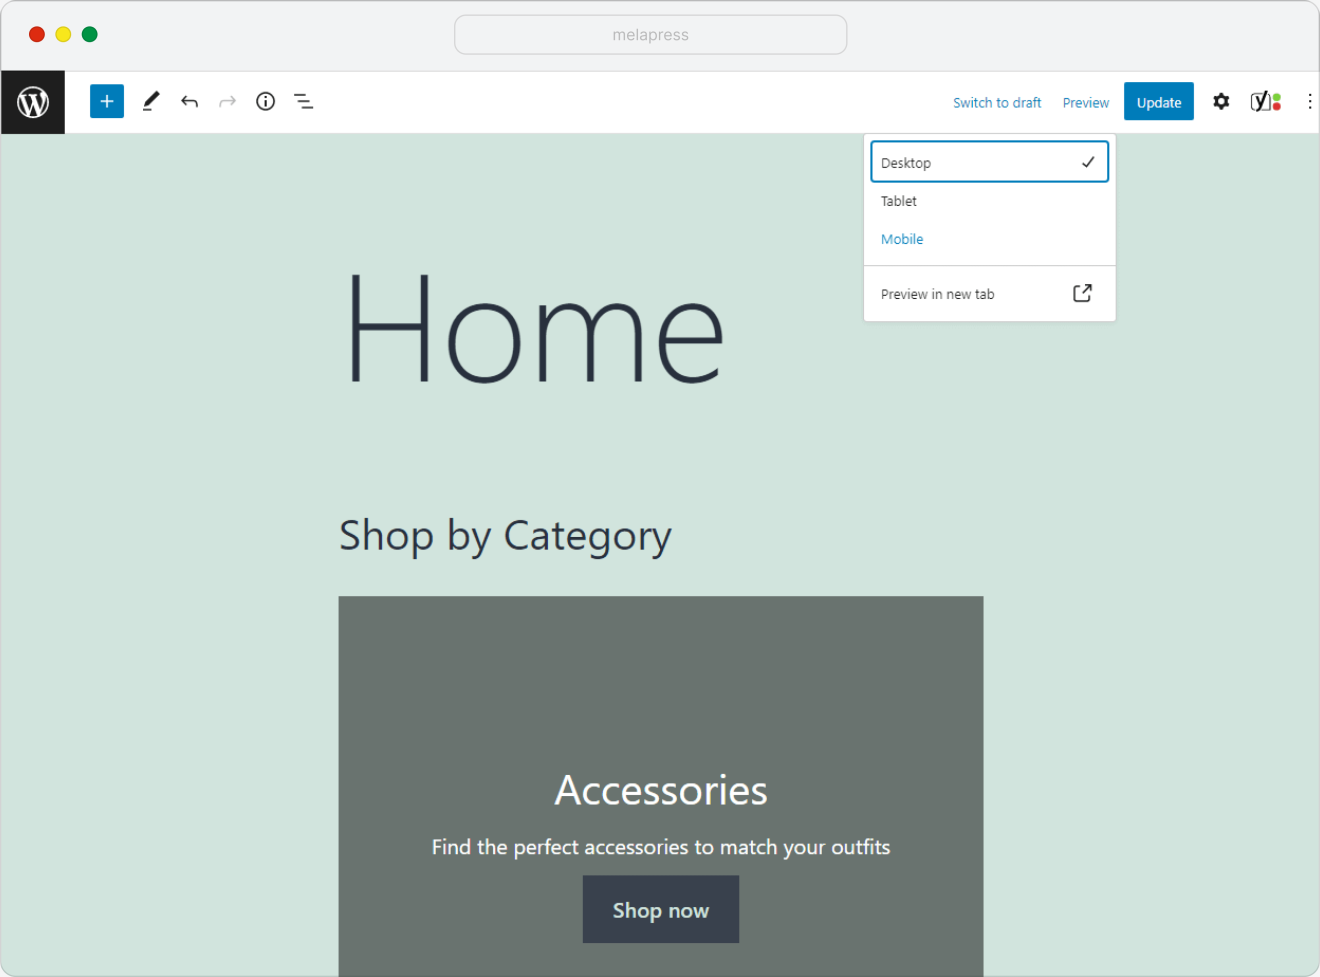
Whenever you update your website, take a minute to determine whether the changes work well on mobile. Testing with even one device is a good start because it will reveal any glaring errors. However, if you can test your designs on multiple smartphones and tablets, that’s the way to go.
Ideally, you should do design and functionality testing for your entire website at least every few months. This will let you catch and correct usability issues before they scare users away.
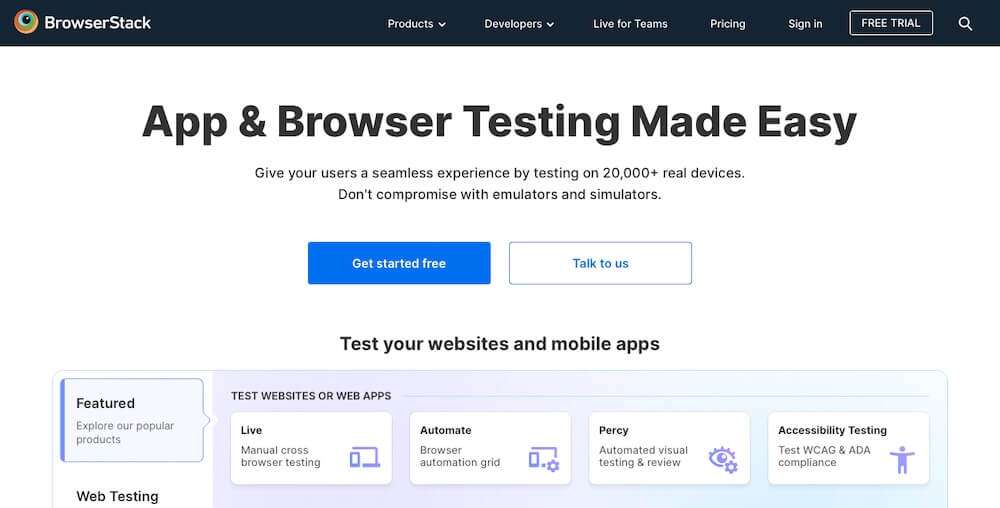
To streamline testing, consider using a tool like BrowserStack. It lets you test your site across a variety of devices, operating systems, and browsers. This ensures your design and included features work flawlessly for all users.
12. Monitor website uptime
Monitoring uptime ensures your WordPress site is accessible to visitors at all times. Uptime monitoring tools actively check your site at regular intervals—usually every few minutes. It also alerts you if it becomes unreachable. This allows you to address issues immediately and minimizes disruptions for your audience.
To get started, choose a monitoring tool like UptimeRobot or Pingdom. These tools notify you via email, SMS, or app notifications whenever downtime occurs. Many also provide reports that help you identify patterns, like recurring outages at specific times.
Regular uptime monitoring helps you maintain a reliable online presence so visitors can access your content without interruptions. This proactive step saves you from lost traffic, customers, or credibility.
13. Review SEO performance
Regularly reviewing your site’s SEO performance matters, too. Maintaining and improving your visibility in search engine results means your site continues to find an audience. Search engine optimization requires consistent monitoring and adjustments to stay ahead of competitors.
To effectively review your WordPress site’s SEO performance, you should complete the following tasks regularly:
Use dedicated SEO tools
Platforms like Ahrefs, and Semrush can provide insights into keyword rankings, organic traffic, and search impressions.

These tools help you identify which search terms drive the most traffic. You can then pinpoint opportunities to optimize underperforming pages. Many also offer actionable recommendations to improve your site’s overall SEO health.
Analyze traffic sources
Check where your visitors are coming from. Look for trends in organic traffic and monitor bounce rates or time spent on key pages. Understanding traffic sources, you can identify which marketing efforts or campaigns are working. Then, refine your strategy to target high-performing channels more effectively.
To do this, log in to your Google Analytics 4 (GA4) account. Open your GA4 property and go to the dashboard.
In the left-hand menu, click on Reports. Under Acquisition, select Traffic Acquisition. Review the Session default channel group column to see the primary sources of traffic, like Organic Search, Direct, Social, and Referral.
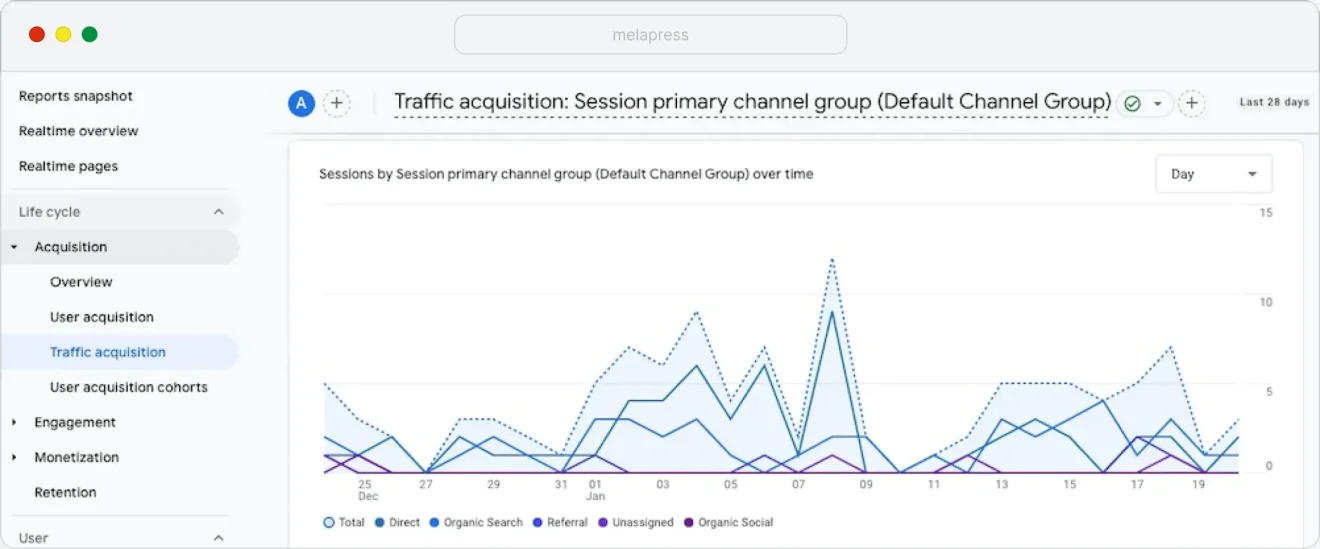
For more details, use the drop-down menu above the table to filter by specific dimensions like Session source/medium or Session campaign.Look at metrics like Users, Sessions, Engagement rate, Average engagement time, and Conversions to understand how each source performs. Then, compare traffic sources to identify high-performing channels.
Look at specific pages
Next, identify high-performing pages and those with declining traffic. To do this, go to Engagement > Pages and Screens to see how traffic from each source performs on key pages.
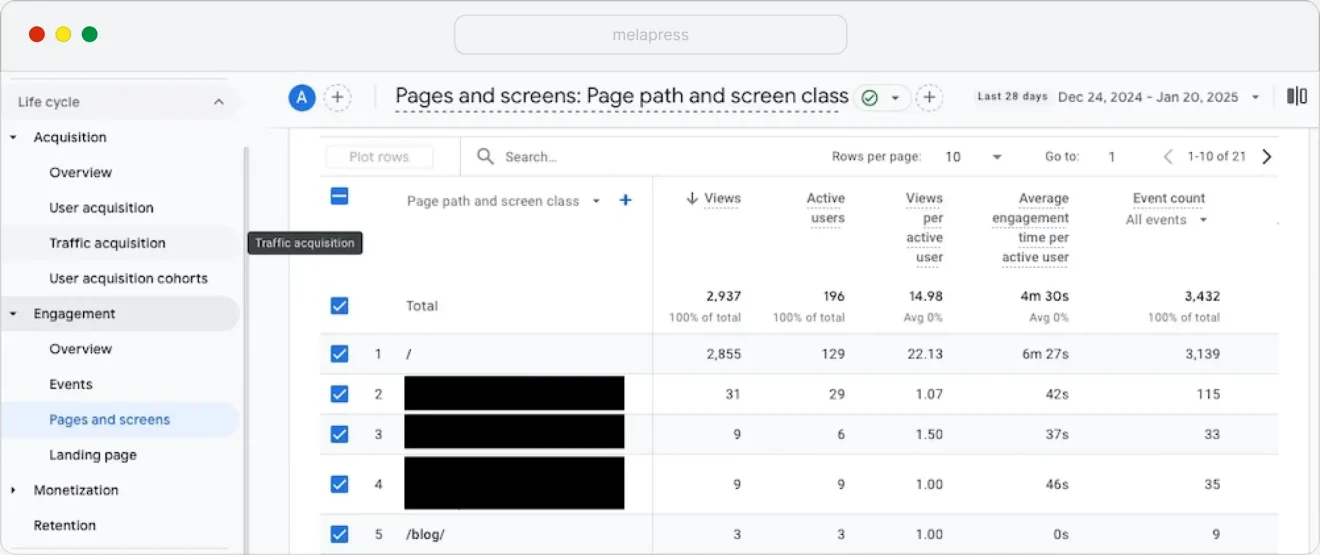
Filter the report by a specific source — Organic Search, for example — to assess engagement metrics like bounce rate and average session duration for each page.
Check backlinks
Backlinks are a key ranking factor. Use tools like Moz Backlink Checker or Ahrefs to ensure your site gains high-quality links. High-quality backlinks boost your domain authority and drive referral traffic. So, focus on cultivating links from reputable, relevant websites in your niche.
14. Monitor and analyze website analytics
Keeping a close eye on your website analytics helps you understand how visitors interact with your site. This also helps you to identify areas for improvement. Analytics data can tell you about your audience’s behavior, preferences, and how effectively your site meets its goals.
To monitor and analyze website analytics effectively:
- Set up tracking tools – Use Google Analytics to collect data on page views, user demographics, and traffic sources (as discussed in the previous section).
- Define key metrics – Focus on ones like bounce rate, average session duration, conversion rate, and top-performing pages. These indicators help gauge user engagement and site performance.
- Monitor trends over time – Regularly review traffic patterns to identify seasonal trends, spikes, or drops in activity. Understanding these trends can inform your marketing and content strategies.
- Set goals and track progress – Define measurable objectives, like increasing newsletter signups or product sales, and use your analytics tools to track your progress.
WordPress maintenance checklist
Now that we’ve covered WordPress maintenance in detail, we’ve compiled that information into a handy checklist. Use this checklist to stay on top of your WordPress site’s maintenance. It covers essential tasks to keep your site fast, secure, and performing well.
Daily
- Perform backups – Use an automated backup tool like UpdraftPlus or rely on your hosting provider’s daily backups.
Weekly
- Update WordPress core, themes, and plugins – Check for updates in your dashboard and apply them after ensuring compatibility.
Monthly
- Delete unused themes and plugins – Remove inactive plugins and themes to reduce bloat and improve security.
- Optimize your database – Use tools like WP-Sweep or WP-Optimize to clean up post revisions, transient options, and unused database entries.
- Check and fix broken links – Use a plugin like Broken Link Checker to scan for and resolve broken links.
- Test forms – Submit forms manually to ensure they work correctly and display proper success messages.
- Audit user accounts and permissions – Disable inactive accounts and review roles to ensure appropriate access.
- Analyze website analytics – Review data from Google Analytics or Jetpack Stats to track performance, bounce rates, and user behavior.
Quarterly
- Review SEO performance – Use tools like Google Search Console, Ahrefs, or Yoast SEO to monitor keyword rankings, backlinks, and metadata.
- Monitor and optimize for mobile – Use tools like BrowserStack to test how your site performs across various devices and browsers.
- Check website speed – Test site speed with GTMetrix or PageSpeed Insights and address issues like image compression, bloated CSS/JS, or third-party scripts.
- Monitor uptime – Set up alerts with UptimeRobot or Pingdom to track site availability and address outages quickly.
As Needed
- Harden website security – Enforce strong passwords, enable two-factor authentication, and use CAPTCHAs to protect forms.
- Clean up server files – Regularly delete unused images, temporary files, and old backups to reduce storage usage.
Frequently Asked Questions
Does WordPress need maintenance?
Yes, WordPress sites need regular maintenance. Taking the time to do this ensures they can continue to function. Regular maintenance also avoids unnecessary downtime and keeps your site secure against potential security breaches.
What is the WordPress maintenance plan?
WordPress site owners have a few options to choose from when selecting a WordPress maintenance plan. Undertaking your own WordPress maintenance is not as difficult as you might think. With good planning, you can easily carry out important maintenance tasks yourself. Using a few choice plugins to assist with tasks like login security and monitoring user activity helps, too. Or, you can engage a maintenance and support services company to handle WordPress maintenance for you.
What are the advantages of WordPress maintenance?
When you perform WordPress maintenance tasks, you’re setting up your website for success. WordPress website maintenance carries a lot of advantages. It reduces unplanned downtime and keeps your website secure and fast. Keeping your website performing well can also improve search engine rankings. Slow websites are known to be penalized.
Should I use a WP maintenance mode plugin?
Whether or not you use a WP maintenance mode plugin depends on the type of maintenance you’ll be doing. For short jobs that don’t impact the performance and usability of the website, displaying a maintenance page might be unnecessary. For longer maintenance jobs that will impact the website, a maintenance plugin can save visitors additional frustration.
Use WordPress Maintenance to Keep Your Site Running Smoothly
Many people spend so much time working on content, looking for leads on social media, and growing their small business sites that they forget about website maintenance. Maintenance isn’t fun, but it ensures that your WordPress site runs smoothly. Knowing how to carry out these tasks yourself will save you from spending money on expensive WordPress maintenance services.
Once you get the hang of site maintenance, it’s time to focus on hardening your WordPress website. That means increasing its security to ensure visitors get the best possible experience and your WordPress user data is always protected.