Changing the WordPress login URL is a security practice recommended by several WordPress bloggers and security professionals. Even so, many others warn that changing the login URL of your WordPress website does little to thwart attacks. The truth, as is often the case lies somewhere in between.
Does changing the WordPress Login URL (default being /wp-admin/ or wp-login.php) really improve the security of your WordPress blogs and websites? Or is this another WordPress security myth? In this article, we will be looking at the merits of this security practice, along with how to change the URL of your WordPress login page.
Why Change the WordPress Login URL?
The main reasons why WordPress administrators would want to change the URL of the WordPress login page are:
- If visitors know you are using WordPress, they can easily find out your login page, thus making your site an easier target
- Protect your WordPress from brute force attacks
- Malicious hackers waste your WordPress resources and bandwidth when you use the default login URL because it is frequently attacked
- Protect WordPress from Zero Day Vulnerability Attacks
While these are not security issues per se, they can pose security risks, which can be partly mitigated by changing your WordPress login URL. This practice is called security by obscurity. The premise is that by hiding certain information, bad actors will have a harder time finding it – making an attack less likely.
Security by obscurity is not something new – in fact, it traces its origins back to the 1800s.
Hobbs, an American locksmith, demonstrated how locks can be picked. Responding to the backlash that he gave thieves the information they need to pick locks, he stated that many thieves already knew how to do this – and could indeed figure it out.
This argument against security by obscurity still stands today.
It is safe to say that nobody is disputing whether hiding your WordPress URL is an effective security measure or not – it is. The argument against changing your WordPress login URL largely rests on whether it’s an effective enough security measure – we will look into this next.
The flawed argument against changing the login URL
As we mentioned earlier, several security professionals question whether changing the URL of your WordPress admin is enough of a security measure that warrants implementation. The flaw in this argument is that, ultimately, no security measure on its own is ever enough.
Sure, a firewall might have a more significant effect on the security of your WordPress website than changing the login URL. Even so, a firewall on its own is not enough. The same can be said for any security measure (bar switching the server off, but that’s hardly a solution).
This does not mean that by changing the login URL, we are forever hiding it from everyone. For all intents and purposes, when changing the URL of your login page, you’re adding a stumbling block for bots and bad actors to trip over.
And it’s important to realize that no one solution can stop 100% of attacks. The idea behind every solid and effective security policy is to strategically place as many stumbling blocks as possible – while monitoring and adapting to emerging threats.
How hackers circumvent hidden login URLs
Hackers and other bad actors, and bots can get very creative when it comes to circumventing security measures. This creativity also extends to finding hidden URLs. While multiple tools can be used to find a hidden URL, one common technique is called fuzzing.
Fuzzers are used to generate and enter semi-random data in a program. While mostly used to find bugs, Fuzzers can also be used to discover leftover files on a web server and hidden URLs.
While this technique is by no means efficient, it goes on to show that there’s always a workaround. This is precisely why we need to take a 360-degree approach to WordPress security.
How to find your WordPress login URL
By default, the WordPress login URL is located in the /wp-admin or /wp-login.php sub-directory. This needs to be appended to your domain name URL, for example:
- www.myawesomesite.com/wp-admin
- www.myawesomesite.com/wp-login.php
If WordPress is installed in its own sub-directory or subdomain, then the login sub-directory needs to be appended to the full WordPress site URL. For example:
- blog.myawesomesite.com/wp-admin
- blog.myawesomesite.com/wp-login.php
- myawesomesite.com/blog/wp-admin
- myawesomesite.com/blog/wp-login.php
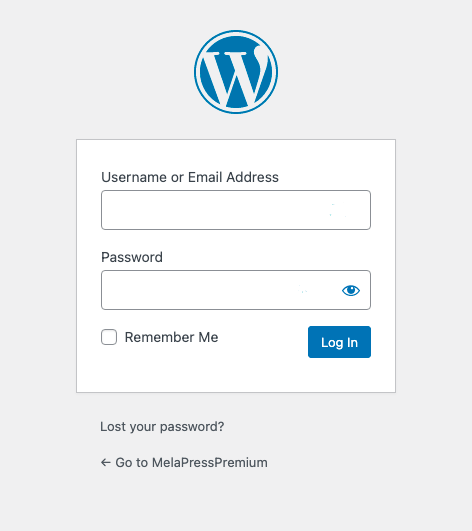
In a custom installation, the location may differ, depending on how WordPress was set up. Some hosting providers also provide a link to the WordPress admin area directly from their back end without requiring access to the login URL. Speak to your hosting provider or developer for the details in such cases.
How to change the WordPress login URL (in 2 easy steps)
Changing the login URL of your WordPress site is easy, thanks to Melapress Login Security. This plugin is built from the ground up to protect your WordPress login processes. In this short tutorial, we’ll show you how to change your old login URL to a brand-new one without breaking a sweat.
Step 1: Install and activate the plugin
Once you’ve purchased Melapress Login Security, download the ZIP file along with the license key. You’ll find both in the email sent to you upon subscription. Next,
- Login into your WordPress dashboard and navigate to Plugins > Add New
- Click on the Upload Plugin button located at the top of page
- Click on Choose File and locate the plugin ZIP file
- Select the file, then click on Install Now and then.
- Click on Activate Plugin and enter your license key when asked to activate your subscription
That’s it! The plugin is now installed and activated.
Step 2: Change the login URL
The plugin allows you to do much more than change the admin login URL. Melapress Login Security enables you to set up login policies for passwords, inactive users, and failed login attempts. To change the login URL, however, navigate to Login Security > Settings and then click on the Login page tab.
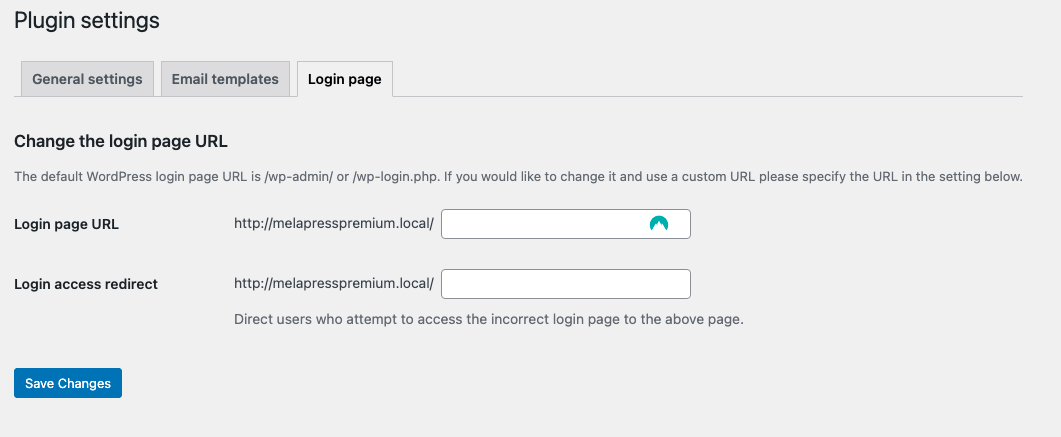
In the Login page URL field, enter the new URL you want your WordPress login to use. You can also redirect anyone trying to access the default login URL by entering the redirect URL in the Login access redirect field. Remember to click Save Changes when done.
That’s it – your login URL has now been changed! You can test it by visiting your new login URL, and don’t forget to update any bookmarks or documentation you may have.
How to troubleshoot issues with the WordPress login
If you’re having issues with your wp-admin login, there are several troubleshooting steps you can take to fix the problem. The steps you take will largely depend on the type of issue you are facing.
I cannot find the login URL
If, for one reason or another, you cannot find your login URL, the first step you should take is to check your hosting provider’s back end. Many providers offer a direct link, so you don’t need to know the wp-admin URL to login in. Alternatively, you can either SSH or FTP to the server and check the wp-login.php file. You’ll find the file in the public_html folder.
If you have used a plugin to change the URL, you might also want to check the database entries of that plugin for the updated URL.
I forgot my password
If you forgot your password, a few different options are available for resetting it.
The easiest way is to use the ‘Lost your password?’ option on the WordPress login screen. You’ll need to enter your username or email address, and WordPress will send you a new password. If you’re not the only administrator on the website, you can also ask one of your colleagues to reset your password.
Alternatively, you can reset your WordPress password through the database or use WP-CLI. You can also use FTP to reset your WordPress password.
More security measures to protect your WordPress login
As we mentioned earlier, changing the login URL of the WordPress admin login is a good security practice – as long as it’s undertaken in conjunction with other security measures. Here are more security measures you can apply for a solid login page:
Implement login policies
Now that you have the Melapress Login Security WordPress plugin installed, you can take full advantage of the plugin for better WordPress login security. Navigate to Login Security > Login Security Policies and then tick the Enable login security policies checkbox. This will allow you to set the following policies:
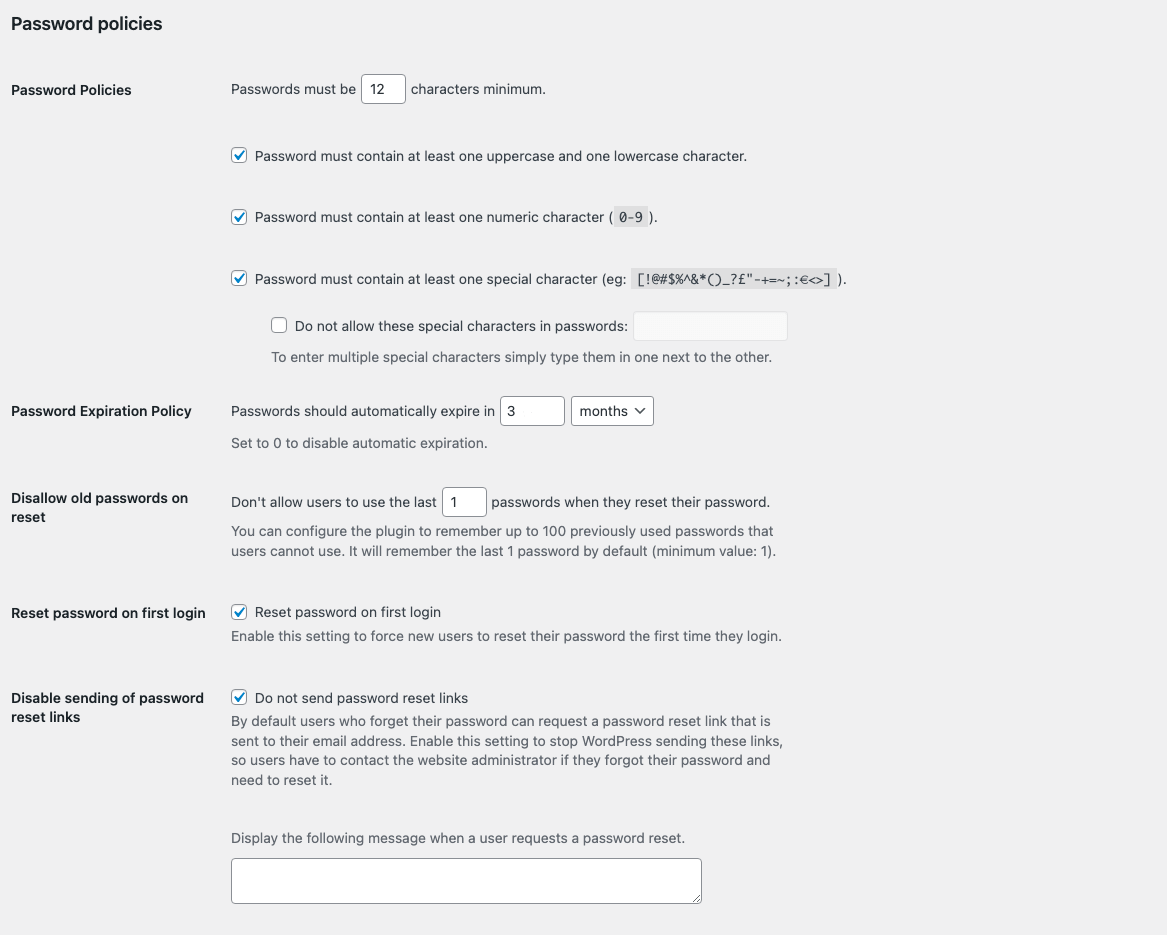
Password policies
Research shows that, left to their own devices, many users choose weak passwords that are easy to remember. Such passwords are often easy to crack, potentially leading to breaches. Through password policies, you can set policies for password complexity, expiration, recycling, and much more. In turn, this help you make passwords more robust and your login forms more secure.
Inactive users policies
Inactive WordPress users pose a unique security threat since breaches often go unnoticed. Automatically disabling inactive users ensures that such accounts do not become a target.
Failed logins policies
Failed WordPress logins can happen for one of two reasons – a user has genuinely forgotten their password, or a hacker is genuinely trying to guess it. With a failed login policy, you can essentially limit login attempts on your WordPress website – giving genuine users enough time to remember their passwords and bad actors not enough tries to guess the password (especially when having a strong password policy in place)
Change the admin username
Everyone is familiar with default administrator usernames, such as admin. As such, it is important to use a username that is not easy to guess, making it that much more difficult for attackers to guess the username. Any account bearing a default username should be disabled or deleted (after all appropriate rights have been transferred to another user account).
Add HTTP Authentication
HTTP authentication adds another authentication layer through the web server. On Apache systems, this is implemented through the htaccess file. You can edit this file directly or through applications such as CPanel – offered by most WordPress hosting providers.
An htaccess file protects the WordPress directory it is in and its sub-directories, so you need to be careful where to place it and how to edit it. If you have SSH access, you can log in to the server and edit it directly using a text editor. You can also use an FTP file manager.
Add two-factor authentication
Two-factor authentication, also known as 2FA for short, adds an additional security layer by requiring a secondary authentication following the username and password combination. One of the most common 2FA methods is called OTP, which is a one-time code provided by apps such as Google Authenticator.
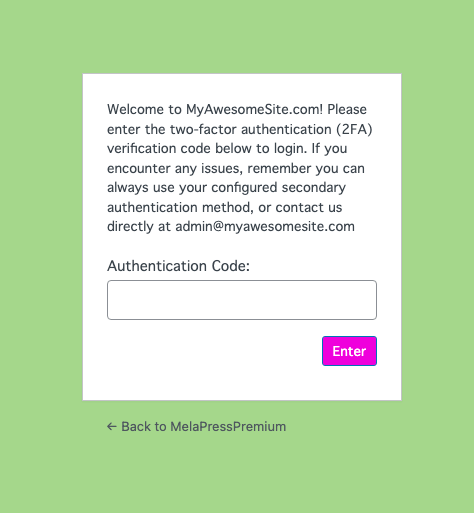
Adding 2FA to WordPress is easier than you might think, thanks to WP 2FA – the number one user-rated WordPress 2FA plugin.
Other solutions
When it comes to WordPress security, there are more solutions than you can shake a stick at. Some, like blocking specific IP addresses, tend to have very limited effect – it’s very easy to change IPs, after all. Others, such as installing a firewall, follow best practices that have withstood the test of time.
One of the most important things underpinning WordPress security is knowledge. Knowing what is happening, such as who is logging in, what activities are being actioned, and everything else that takes place on your WordPress website, can help you take action before risks become issues.
The best way to achieve this is by installing WP Activity Log. This plugin keeps a record of all user and system activities on your WordPress site, including activities for 3rd party plugins such as WooCommerce, MemberPress, Yoast, and many others.
Frequently Asked Questions
You can manually change the WordPress login URL by editing the wp-login.php file. Do keep in mind that editing the WordPress core files is not something that is recommended, and an update can easily wipe out all of your changes.
You can easily change your default WordPress login using Melapress Login Security. This security plugin is designed to secure different aspects of your WordPress login processes, including changing your WordPress login page URL. The plugin also enables you to set up policies for passwords, limit login attempts, and much more.
Yes. Melapress Login Security facilitates this process through a user-friendly interface that makes it very easy to set up a new login page.
