


Updated on 7 October, 2026 by Robert Abela
How to Clean a Hacked WordPress Website or Blog
WordPress websites are common hack targets, and the problem is more common than many site owners realize. According to our 2026 WordPress Security Survey, 67.7% of WordPress professionals had experienced at least one security incident, with a large chunk of them experiencing two or more.
This statistic shows why understanding how to properly clean a hacked WordPress website is so important. This post will show you how to do this, as well as dive deeper into some of the steps you can take to prevent it in future.
Table of contents
- How to tell if your WordPress site has been hacked
- How to clean and recover a hacked WordPress site
- 1. Gain back control
- 2. Place your site into maintenance mode
- 3. Take a (forensic/evidence) backup
- 4. Restore to a clean staging environment
- 5. Identify the entry point and signs of persistent access
- 6. Find the WordPress infection and malicious code
- 7. Clean the WordPress hack
- 8. Validate, then push live
- 9. Request a Google Safe Browsing review
- Why WordPress sites keep getting hacked
- How to prevent future compromises
How to tell if your WordPress site has been hacked
Note: Already know your website is hacked, and want to dive straight into the cleaning steps? Click here.
WordPress blogs and websites are common targets for hackers. Sometimes it’s pretty clear when a WordPress site has been hacked, for example, if your website has been defaced. In other cases, it may not be so clear-cut. In fact, hackers can do a very good job at hiding their activity, and it can take weeks (or even longer) for businesses to realize their website is hacked.
Before embarking on a WordPress clean-up process, it’s important to confirm that your WordPress website has actually been hacked and that it is not an unrelated technical issue.

Tell-tale signs your site has been hacked
There are several tell-tale signs that can help you understand whether there has been a security breach:
Changes in content
Unauthorized content changes that seemingly pop out of nowhere can be a sign of a hacked WordPress site. This could be strange images, content in a different language, or new links being added to pages.
Google Search Console
If you are using Google Search Console, and Google has confirmed that your site has been hacked, you’ll see a warning message in the Security issues report. This can be found under Security & Manual Actions > Security issues.
Search Engine
Google may display a “This site may be hacked” message in the SERPs (Search Engine Result Pages) when it believes a breach has occurred.
Redirections
Your website randomly redirecting to another webpage is another sign of a hacked website. In some cases, the entire website will redirect to malicious pages. In other cases, redirects may be peppered throughout your website. Typically, redirections will lead visitors to malicious or spam websites, resulting in further attacks or scams.
Inability to log in
If your password suddenly stops working (and you’re sure you have entered the correct password), your site might have been hacked.
A drop or sudden increase in traffic
A drop or sudden large increase in traffic can happen for many reasons, including a breach. This can be caused by search engine updates or recent marketing campaigns launched too, so it’s important to check this thoroughly.
Unknown user accounts
If new users you didn’t create start popping up on your WordPress site, chances are there has been a breach. Bad actors can create user accounts to maintain access, typically targeting accounts with administrator privileges.
How to actively check your site
If you suspect a hack but none of the signs above are obvious, the following checks will help you confirm it:
1. Review your audit trail
A reasonable indicator of a hacked site is unusual user activity: new users, password changes, role changes, and modified content. It can be difficult to track such under-the-hood activity, especially on a multi-user site, unless you use a WordPress activity log plugin.
A plugin such as WP Activity Log automatically records what changed, which account made the change, and from which IP address, down to the last letter.
Assuming you had one installed, check for strange activity, like activity outside of regular working hours, unknown user accounts making changes to the site, or logins/login attempts with strange IP addresses.
2. Run frequent malware scans
A number of online services provide malware scans, some are even free for a few pages. The free Sucuri SiteCheck, for example, scans for known WordPress security threats such as malware infections, spam, and irregular redirects.
If malware is detected, it’s a strong signal that you’ve been hacked in one way or another.
3. Monitor WordPress files for changes.
Bad actors often modify WordPress files to inject malware, add redirects, or create backdoors. File integrity monitoring helps you spot these changes early. For example, our free plugin, Melapress File Monitor, can alert you to new or modified files, including changes to index.php, functions.php, .htaccess, or files added to the WordPress installation directory.
4. Watch your traffic & Google Search Console warnings
Unusual activity, such as sharp increases or decreases, is another indicator. If an old post that never ranked well suddenly becomes popular for no reason, or a Europe-focused site suddenly sees a burst of traffic from non-European countries, that can signal something is wrong. A tool like Google Analytics can help here, but so can server-side analytics or even resource usage statistics.
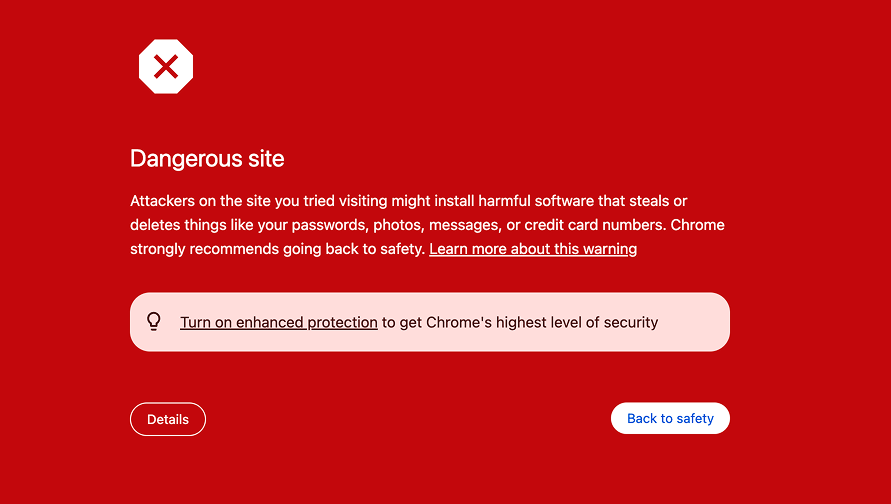
Google Search Console also alerts you via email if it detects malware on your website, and Google displays the following warning to visitors trying to access it.
5. Check the web server and control panel
Some attacks are sophisticated enough to impact the web server, for example, creating OS-level users after escalating privileges, scheduling tasks to automatically reinfect a cleaned site, or storing illegal downloads outside the web root. Run frequent checks if you manage your own server, and use your provider’s control panel (such as cPanel) to monitor cron jobs, FTP users, and files on a managed solution.
6. Check all the log files
Beyond the WordPress activity logs, there are many other log files WordPress site admins should check. They can tell you what has happened on your web server and WordPress site.
How to clean and recover a hacked WordPress site
1. Gain back control
Gaining back control depends on how much access you may have lost as a result of an attack. For instance, upon gaining access to a server, an attacker may rotate credentials to lock out legitimate users or change the WordPress admin password to prevent a WordPress admin from logging in.
If you are locked out of WordPress, try the standard password reset process first. If that does not work, use your hosting control panel, phpMyAdmin, WP-CLI, or your hosting provider’s support team to reset the administrator password.
If you suspect the hosting account or server has been compromised, contact your hosting provider before making any major changes. They may be able to help you recover access, check server-level activity, and confirm whether other sites on the same account were affected.
Once you have regained access, secure the accounts you control. Reset potentially compromised WordPress administrator and hosting credentials, along with FTP/SFTP/SSH credentials where relevant. You should also invalidate existing WordPress sessions so that an attacker who is already logged in cannot retain access.
2. Place your site into maintenance mode
If your site is defaced, redirecting to a malicious website, or is in any way a potential risk to your website visitors, you may want to temporarily take the compromised site offline or put it into maintenance mode while you investigate and clean it. If your hosting provider offers maintenance mode or a way to temporarily disable the site, use that first. Alternatively, you can use a dedicated WordPress maintenance-mode plugin.
Where possible, configure maintenance mode to return an HTTP 503 Service Unavailable response. This tells search engines that the outage is temporary rather than indicating that the affected URLs have disappeared permanently.

3. Take a (forensic/evidence) backup
Even if you have a WordPress backup solution in place, take a backup of the current WordPress website. Taking a WordPress backup at this stage is very important for a number of reasons, including the following:
- A backup allows you to analyze the infection at a later stage, as well as salvage any content if possible/necessary.
- Some hosting providers will delete hacked sites without warning to prevent the spread of malware, but a backup means you won’t lose your content.
- This backup can also be extremely valuable when it comes to providing evidence, both for what happened, as well as for potential legal investigations if needed.
Additionally, if you are running WordPress on a VPS, consider taking a snapshot of the entire virtual machine if possible (bear in mind this is usually associated with an extra cost). If WordPress is stored on external or network-attached storage, make sure your backup covers those volumes too (e.g., network-attached storage). You should also take a copy of wp-content, your MySQL database, and any web server access and error logs.
4. Restore to a clean staging environment
If you have a backup strategy in place, now is the time to put it into action. Assuming you have access to a recent backup from when your site was working, restoring it can potentially give you a clean starting point for recovery. However, do not immediately restore it over the live site and assume the problem is solved. If the vulnerability or compromised credential that allowed the attacker in is still present, the restored site can simply be compromised again.
To minimize the risk of carrying an infection forward, it is best to restore the backup to a staging environment first rather than directly to the live site. Many hosting providers offer staging functionality. Alternatively, you can use a local environment, such as Local or WordPress Studio, or an online option such as InstaWP.
Keep the original compromised site or forensic backup available for investigation. The staging site is your recovery copy, while the compromised environment is where you should look for evidence of how the attack happened.
What if I don’t have a backup, or I can’t restore my backup successfully?
If you do not have a usable clean backup, create an isolated copy of the compromised site for investigation and cleanup, or rebuild WordPress from clean core, plugin, and theme files and carefully migrate the content and database data you need. Avoid treating the existing application files as trusted simply because you have no backup.
5. Identify the entry point and signs of persistent access
Once you have the staging site set up, investigate the compromised site or forensic backup to find out as much as you can about what happened to your live site, that is, which security weakness the attacker exploited to gain access to your WordPress installation. Skipping this step means you’re likely to get hacked again.
As Francesco Carlucci, security expert and incident response specialist, put it during a live session about cleaning hacked WordPress websites:
“Cleaning the infection is not enough. You must identify and close the entry point. Otherwise, the attacker can reinfect the site.”
With that in mind, here is what to check:
Check the activity logs, web server, and FTP server logs
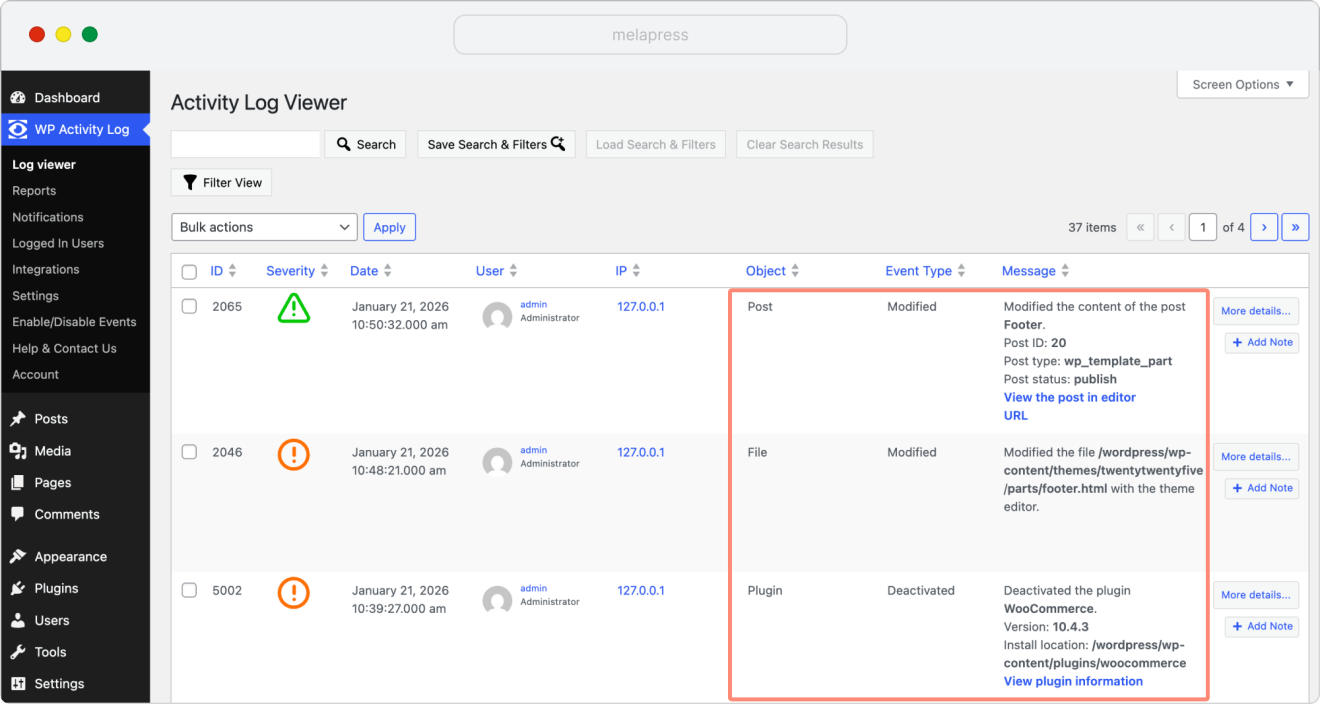
If you keep a WordPress activity log, this might be the best place from which to start your analysis. See if you can identify any suspicious behavior:
- New user accounts that were created without your knowledge
- Password changes, especially on admin accounts
- Unexpected file modifications to WordPress core, plugin, or theme files (here is the walkthrough guide for you)
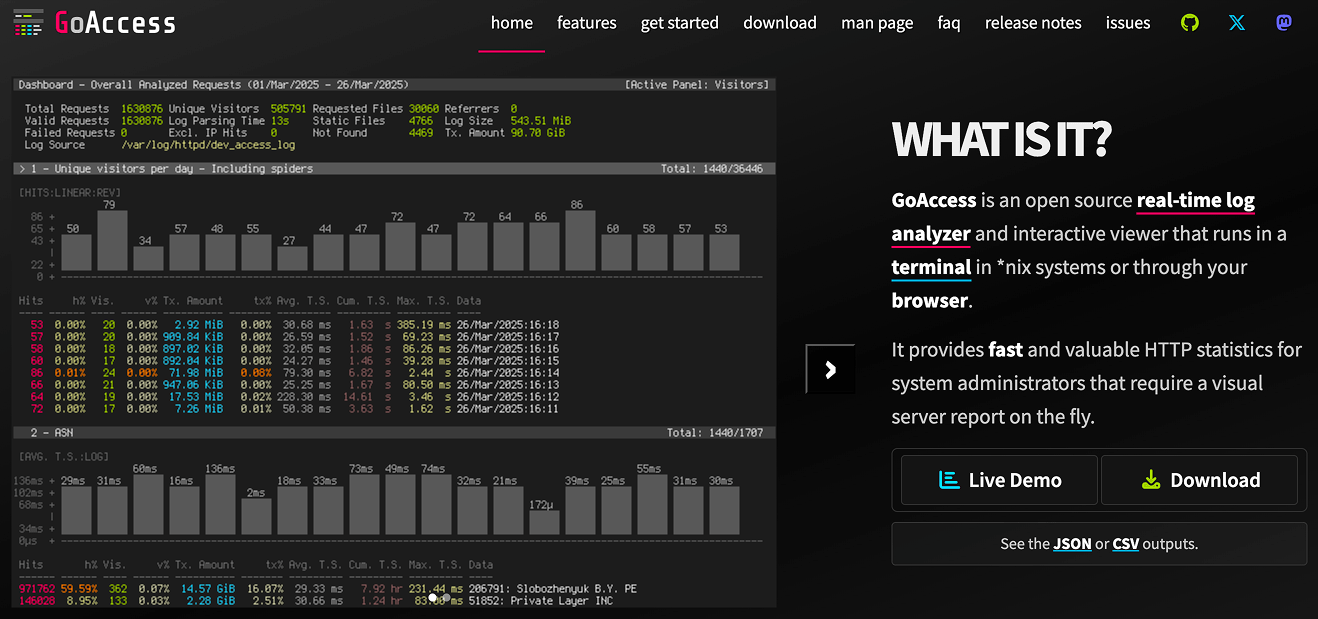
Also check your web server, FTP server, and operating system log files for unusual or suspicious behavior (particularly repeated requests from a single IP address). You can do this using a variety of utility shell scripts and one-liners. For a real-time view of your web server logs, GoAccess might come in handy.
Unused and outdated WordPress plugins and themes
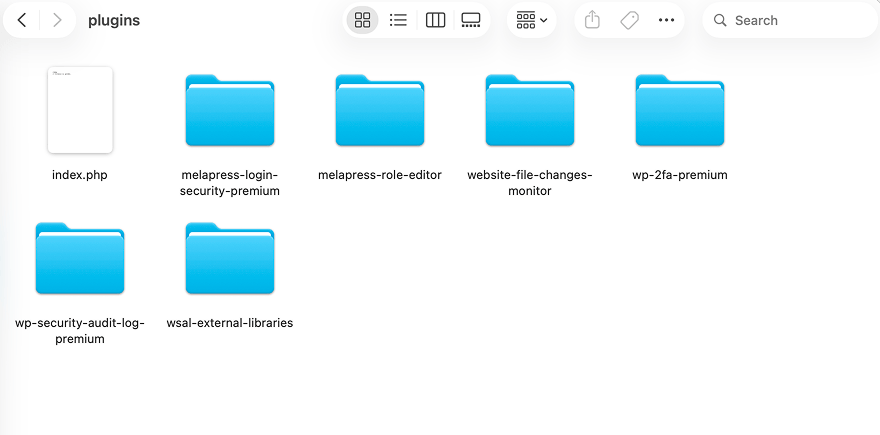
Check the list of installed plugins in both the WordPress dashboard and the directory /wp-content/plugins/. Are all the WordPress plugins being used? Are they all up-to-date? Where possible, determine which plugin and theme versions were installed when the compromise occurred and check whether those versions had known vulnerabilities.
Check the themes and the themes directory /wp-content/themes/ as well. You should keep only themes you need, like the one you are using and a WordPress default theme as a fallback. If you are using a child theme, you will have two directories.
Look for leftover files and old installations
Sometimes developers and sysadmins update files directly on the server and take a backup of the original with an extension such as .old, .orig or .bak. Attackers frequently take advantage of this: usually, .php files are executed by the PHP interpreter, but adding a .old extension causes the web server to serve the file as plain text instead. By simply guessing a backup file’s name (such as index.php.old), an attacker may be able to download source code containing sensitive information or hints on what to exploit.
A similar problem is retaining old installations of WordPress. When sysadmins rebuild their websites, they sometimes leave copies in an /old/ subdirectory. These would typically still be accessible over the internet, making them a juicy target for attackers to exploit known vulnerabilities in old versions of WordPress and its plugins.
Make a note of any unused files, old installations, abandoned plugins, or deactivated themes you find so they can be removed during the cleanup stage.
Check WordPress users and roles
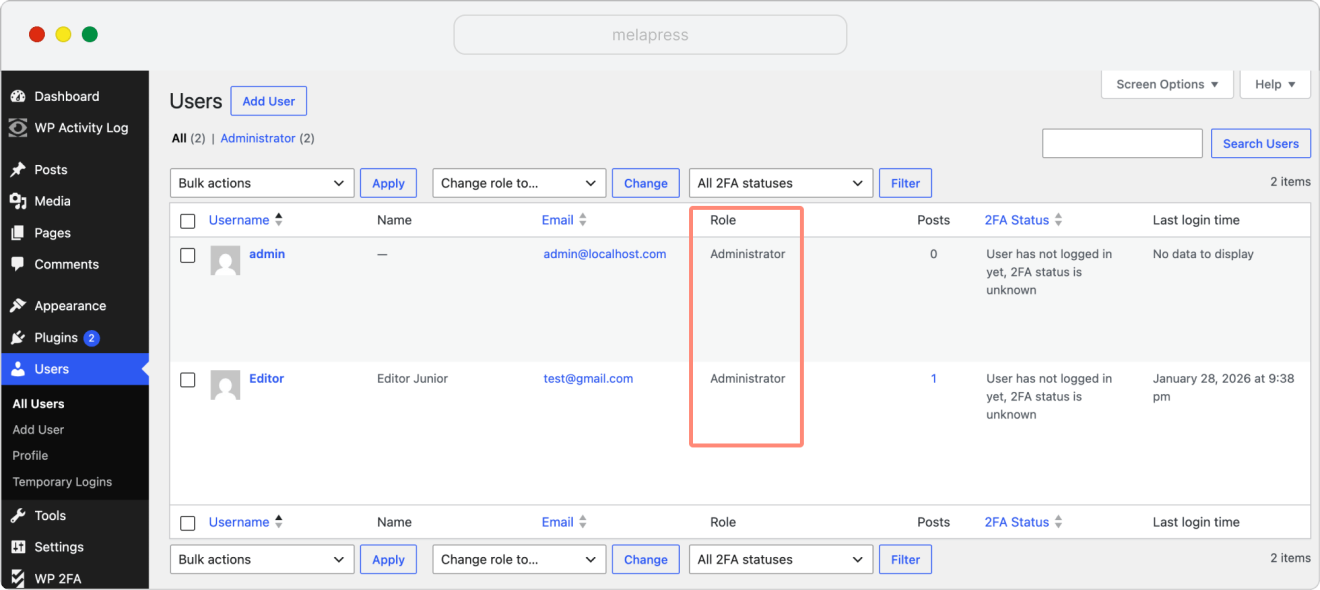
Verify that all WordPress users are used. Are there any new suspicious ones? Check that all the roles are intact. Review all administrator accounts and make sure each one is legitimate and genuinely requires administrator privileges. You can check out the WordPress users and roles guidelines for more information.
Check for persistent access
Attackers may create additional ways to regain access even after the original vulnerability is fixed. Check for unexpected administrator accounts, unfamiliar FTP/SFTP/SSH users or SSH keys, unusual cron jobs or scheduled tasks, suspicious MU-plugins or WordPress drop-ins, PHP files in unexpected locations such as the uploads directory, and unexplained changes to wp-config.php. If you manage the server yourself, also review server-level accounts and scheduled tasks.
Shared hosting providers
If your WordPress is running on a shared hosting provider, the source of the hack could be another website that happened to be running on the same server as yours. If you suspect such an attack took place, immediately get in touch with your hosting provider after backing up your website.
Check your .htaccess files
.htaccess files (directory-level Apache HTTP Server configuration files) are also a common target for hackers. They are typically used to redirect users to other spam, phishing, or otherwise malicious websites. Check all the .htaccess files on your server, even those which are not being used by WordPress. Some of the redirects can be difficult to spot.
Pay particular attention to configuration that redirects HTTP requests based on specific User Agent strings: attackers may be targeting specific devices (e.g., mobile users), or even engaging in black hat SEO by configuring your web server to respond differently to search engine crawlers.
If possible, consider adopting global configuration rather than relying on .htaccess files. They degrade performance and open your website up to security vulnerabilities if an attacker is ever in a position to read, or worse, write, their contents. As per the Apache HTTP Server documentation, the use of .htaccess files can be disabled completely by setting the AllowOverride directive to none in the main httpd.conf file.
Check other points of entry
There are several other points of entry on a web server. Make sure you check all of them, such as FTP servers, SSH, the web server, and so on.
6. Find the WordPress infection and malicious code
Before you start: A WordPress hack typically involves the insertion of code in a WordPress theme, plugin, or core file. Hence, to proceed with a clean-up, you should be comfortable with modifying code. If you are not, hire WordPress security professionals.
Check recently modified files
Ideally, you should use a WordPress file monitor plugin that tracks files across your WordPress installation for changes and alerts you immediately. If you do not have a File Integrity Monitoring (FIM) plugin, you will have to look for file changes manually.
If you have SSH access to your server, check which files on your WordPress website have changed recently. Typically, it is advisable to start looking for changes within the last five days of the hack being noticed, broadening your search as necessary.
To do so, navigate to the directory where your WordPress website is located and use the find command:
find . -mtime -5 -ls
The above command lists (-ls) all the files which have been modified (-mtime) in the last five days (-5). If the list is too long, use the less pager to browse and search through it with more ease:
find . -mtime -5 -ls | less
If you have recently updated a plugin or theme, any related file changes will show up in your search results. Logs and debug files are also updated frequently, so they will show up as well. As a result, you may have to do some extensive filtering to find file changes of interest.
Check all HTML files
In WordPress, there are very few HTML files, and hackers like to take advantage of them. Search through your website for all HTML files and analyze their content. Make sure all HTML files you have on your website are legitimate, and you know what they are used for. An easy way to list all HTML files in your WordPress directory (and subdirectories) is:
find . -type f -name '*.html'
Search for infection text
If your website has been defaced, or some text is showing up as a result of the infection, look for it with the grep tool. For example, if you’ve seen the text “hacked by”, navigate to the root directory of the website and issue the following command:
grep -Ril "hacked by"
The above command will return a list of files that include the content “hacked by”. Once you have the list of infected files, you can analyze the code and remove the infection.
What do the grep switches mean?
- -R indicates to grep to search recursively (through the whole directory structure, including all subdirectories and symbolic links).
- -i indicates that the search should be case-insensitive. This is very important in Linux/Unix environments since, unlike Windows, Linux file systems are case-sensitive.
- -l indicates that grep should return the filename rather than the file contents.
Apart from the obvious “hacked by” string, the following strings are commonly found in hacked WordPress files:
base64_decode, eval, gzuncompress, passthru, exec, shell_exec, assert, str_rot13, system, phpinfo, chmod, mkdir, fopen, fclose, readfile
A quick way of achieving this is via the following grep command, which looks for files recursively (following any symbolic links), searches for strings that match the specified PCRE regular expression, and returns the text match as well as the line number where the match occurred:
grep -rPn '\b(base64_decode|eval|gzuncompress|passthru|exec|shell_exec|assert|str_rot13|system)\s*\(' .
Important: Some of this code can also be used in legitimate code, so analyze it properly and understand how it is used before flagging something as an infection or hack.
Compare the files with an original WordPress install
This is an old-school method, and even though it is somewhat time-consuming, it works wonders. Compare the files of your website with those of an untampered website. If you have a backup copy, compare it against the tampered website. If not, install a new copy of WordPress and the plugins from the infected website on a different host, and compare them.
There are several tools you can use to compare files. In this example, we use a commercial tool called Beyond Compare, though there are several free alternatives (like Meld). When comparing the root directories of two WordPress websites, the tool highlights differences in the content of index.php, the new .htaccess and wp-config.php files, and differences in the subdirectories.

By double-clicking the file index.php we can see what the differences are.

What to look for in a WordPress file comparison?
Look for files that are not part of the WordPress core. Most infections add files to the root of the WordPress installation or to the wp-content directory. If the hack is a result of a vulnerable plugin, the plugin’s files might have been modified.
Check the database
Not every WordPress infection is stored in files. Attackers may inject malicious scripts, redirects, spam content, or configuration changes into the database. Check for unexpected posts, users, options, widgets, and other database changes, particularly if the symptoms remain after replacing infected files.
Finding the infection automatically with a WordPress service
If the above seems too much to handle, do not despair. There are several WordPress security services and plugins that you can use to scan your website for malware and other infections: search online for “WordPress malware removal service” and choose one that fits your technical and financial requirements.
Note: Many such tools work from known malware signature databases. Newer or custom attacks may not be detected, so manual review can sometimes still be a good option. The takeaway is that effective security involves several layers of defense and detection.
If getting into the weeds of cleaning a hacked site is not something you’re comfortable with, consider calling a professional team to do it on your behalf. Both Sucuri and Wordfence offer plans that include hands-on support, and you can also hire a specialized company, such as Team of Horses or Surver, or a vetted freelancer. If you go this route, check customer reviews before committing to any service provider.
7. Clean the WordPress hack
Once you know the source of the WordPress hack and have found the infection, it is time to clean and secure the recovery copy before returning it to production.
- Remove or replace infected files: replace infected core files with clean copies downloaded directly from WordPress.org. For infected plugins or themes, reinstall them from their original source.
- Reset passwords for all WordPress users, your cPanel or hosting panel, MySQL/database account, and FTP/SFTP/SSH accounts where relevant. If you change the database password, make sure you also update the corresponding credentials in the wp-config.php.
- Remove unused or suspicious users: audit all accounts across WordPress, FTP, MySQL, and any other service, and delete anything that shouldn’t be there.
- Update everything: WordPress core, all plugins, all themes, PHP, MySQL, your web server software, and your OS.
- Enforce a password policy & 2FA: install a plugin like WP 2FA and Melapress Login Security to ensure future passwords meet security standards.
8. Validate, then push live
Before returning the website to production, run a few final checks to make sure the infection has been fully removed, and the original point of entry has been addressed.
- Run another malware scan. Ideally, use both a WordPress/server-side scanner and an external scanner, since they look at different things.
- Verify WordPress core, plugin, and theme files. Make sure they match clean copies from their original sources.
- Check users and access again. Confirm there are no unknown administrator accounts, FTP/SFTP/SSH users, or other unexpected access methods.
- Check for persistence again. Review cron jobs, MU-plugins, drop-ins, wp-config.php, .htaccess, suspicious PHP files and anything else identified during the investigation.
- Check the database where relevant. Particularly if the attack involved injected content, redirects, spam posts, malicious users, or modified settings.
- Confirm the original entry point has been closed. For example, make sure the vulnerable plugin has actually been patched or removed rather than just cleaning the files it allowed an attacker to modify.
- Test the recovered site normally. Log in, browse pages, submit forms and test important functionality to make sure the cleanup itself has not broken anything.
- Take a fresh backup of your now-clean site before going live.
Once that’s done, you are ready to push it live.
9. Request a Google Safe Browsing review
If Google flagged your site and added it to its Safe Browsing blocklist, once your site is clean, submit it for a security review through Google Search Console. Google will review the site and remove the warning once it confirms the threat has been resolved.
Why WordPress sites keep getting hacked
WordPress sites can be compromised in a number of different ways, and understanding which avenues a bad actor can take helps you close them for good.
Outdated WordPress, plugins, and themes
It is no secret that even the best software can have security holes. While the risk is minimized when choosing reputable vendors, keeping all software up to date is an important step against XSS (Cross-Site Scripting) and SQL injection. Updates contain security fixes that patch vulnerabilities, making them something of an urgent best-practice necessity.
Weak and leaked passwords
Weak passwords are notoriously easy to crack. Attackers often use automated tools, leaked password lists, and common password combinations to speed up brute-force and credential-based attacks.
Many users use the same password across multiple sites. If any of those sites experiences a breach, the user’s password may end up for sale on the dark web, where bad actors buy these leaked passwords to use them in attacks. Protecting yourself from these types of attacks can be difficult since an attacker can use the correct password, unless you have two-factor authentication (like the WP 2FA plugin).
Use long, unique passwords for every account, especially users with elevated privileges. Where possible, enforce a password policy so users cannot set weak passwords in the first place. If you use Melapress Login Security, follow our getting started guide to configure password policies and strengthen WordPress login security.
Leftover files
Leftover and exposed files, such as temporary backups, can contain sensitive data without the protection afforded to other files. This can make them susceptible to theft, exposing data such as passwords and settings that can be used in future attacks.
Wrong file permissions
File permissions often confound even experienced administrators. Assigning overly permissive access rights can make things easier to manage, but it can also allow other users or compromised processes on the server to read or modify files they should not have access to. This can make it easier for an attacker to expand or maintain access after an initial compromise.
Default settings
Default settings, such as the WordPress login URL, are known to all. Thanks to the extensive WordPress documentation that anyone can access, finding information about important elements is very easy, which can also aid bad actors in their reconnaissance efforts. Some hackers can program bots to automatically search for default settings. By editing these, you can reduce some of the automated attacks your website might otherwise face.
How to prevent future compromises
Congratulations, you recovered your WordPress website from a hack. Now the priority is making sure it doesn’t happen again. Here’s what to do:
- Install a WordPress activity log plugin to track logins, changes, and suspicious activity in real time.
- Set up a backup solution if you do not already have one in place.
- Use a WordPress security scanning service to catch malware early.
- Rotate database and admin passwords, and force strong WordPress passwords.
- Limit login attempts to reduce the risk of brute force attacks.
- Add two-factor authentication (2FA), so compromised passwords can’t be used to log in.
- Change the default login URL to reduce automated attack traffic.
- Keep everything up to date: core, plugins, themes, and server software.
- Remove unused plugins, themes, and files. Unused components add unnecessary attack surface and should ideally be removed.
WordPress security does not end when the site is clean. As Francesco Carlucci, security expert and incident response specialist, explains:
“Security is not a one-time setup. You patch what’s most likely, then you monitor continuously.”
That is the mindset to take from here: keep reviewing, patching, and monitoring your site as part of regular maintenance. For a more complete hardening process, we prepared a WordPress security checklist.