When you visit a website, your browser (also known as a client) sends a HTTP request to a web server. Once the web server sends an HTTP response, the browser can then render the page to your screen. However, HTTP traffic has a problem; it is a plaintext protocol. This makes it susceptible to snooping and meddling.
If an attacker is on the same network as you they can intercept and read your HTTP traffic. They may also modify both your requests to the server, as well as the server’s responses back to you. This is known as a Man-in-the-Middle (MitM) attack. This can easily happen on public WiFi’s, such as the ones in hotel lobbies and public spaces.
That is why a website should be on HTTPS – so traffic cannot be intercepted. This article explains what HTTPS, SSL and TLS are. It also explains how you can configure your WordPress website to work on HTTPS.
Table of contents
What is SSL and TLS?
Once the internet started to grow, it became obvious that we needed a mechanism to securely transfer information between a client and server without anyone being able to eavesdrop or modify traffic — enter SSL, or Secure Socket Layer. SSL is an Internet security protocol, first developed by Netscape back in 1995 to solve this problem.
More specifically, SSL set out to accomplish the following:
- Encryption — to encrypt the traffic so it cannot be intercepted by an unauthorized third-party by eavesdropping,
- Authentication — to make sure the server the client is talking to is indeed the server they say they are,
- Integrity — to ensure that the data sent between the client and the server is not modified by someone else along the way.
However, over time security researchers identified a number of security issues in SSL. Therefore SSL was superseded by TLS (Transport Layer Security protocol). While the under the hood differences between SSL and TLS are drastic, the purpose of TLS remains largely the same.
NOTE: you may frequently see SSL being used to refer to TLS. SSL is a legacy protocol and is no longer safe to use. However, due to its popularity many still use SSL as an acronym, but they mean TLS.
What is HTTPS?
HTTPS, or Hypertext Transfer Protocol Secure is a secure version of the HTTP protocol. HTTPS relies on Transport Layer Security (TLS), an improved and more secure protocol than the formerly used one, Secure Socket Layer (SSL). TLS provides encryption, authentication and integrity to HTTPS requests and responses.
You can think of HTTPS as HTTP (that’s the plaintext version of the protocol) requests and responses passing through a TLS tunnel. The technical term for this is encapsulation. It’s pertinent to note that TLS may be used to encapsulate other protocols, not just HTTP.
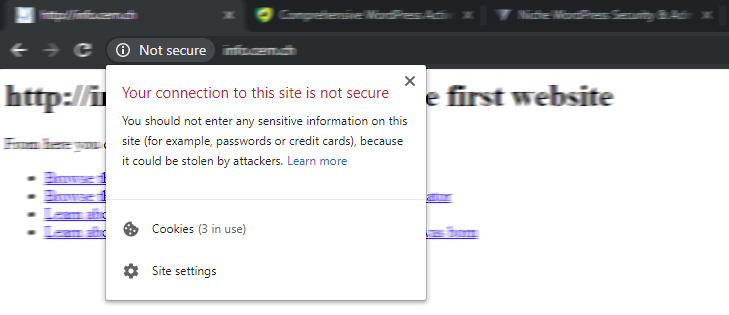
You can spot websites that use HTTPS by either looking at the beginning of the URL (starts with HTTPS) in the browser navigation bar or by the green padlock. If you are browsing a website on HTTP the browsers marks it as Not Secure.

How does HTTPS work?
When you request a web page using HTTPS, your browser and the web server start a process called TLS handshake. The TLS handshake is a way for the client and server to decide if and how they should communicate. During the course of the TLS handshake, the client and server do the following:
- decide on the version of the TLS protocol to use (TLS 1.0, 1.2, 1.3…),
- agree on which cipher suites (a set of encryption algorithms used to establish secure communications) to use,
- authenticate the identity of the server,
- generate encryption keys to use after the handshake is complete, in order to communicate securely.
The TLS handshake
During the TLS handshake, the server sends the client it’s certificate in order for the client to verify that they can authenticate the server. A certificate is similar to a passport — it’s issued by a trusted central authority called a Certificate Authority (CA) which independently establishes the website’s identity it may be proved to your browser.
The public and private keys (the keypair)
The TLS certificate (often referred to as SSL certificate) that the web server sends to the client contains the public key. The public key is one of two special keys called keypair. A keypair consists of two keys; the public key and the private key. While the public key is shared with the clients, the private key is kept secret on the server and is never disclosed. The keypair are forged together.
The public and private key pair have a particularly interesting relationship — without knowing the server’s private key (this is secret and only the server should know it), a client can encrypt data using the server’s public key which the server may decrypt using it’s private key.
If this sounds confusing, think of this as though the “server” sent your “browser” an open suitcase (public key) protected with a padlock — once you place something in the suitcase and lock the padlock, only the “server” with the key to the padlock (private key) can see what’s inside.
Do I really need HTTPS on my WordPress website?
Yes. No matter what kind of traffic your website is serving (be it personally identifiable information (PII), card holder data ,or cat pictures) there is absolutely no reason why you should not be serving your website over HTTPS.
First of all, when you run your website on HTTP hackers can easily steal your WordPress passwords and credentials and hack into your website. They can do all this using freely available tools.
Aside from the security benefits and a better user experience, the new HTTP/2 protocol, which offers several performance benefits can not be used without TLS within web browsers. Furthermore, HTTPS also has Search Engine Optimization (SEO) benefits and is part of Google’s search ranking algorithm.
Getting a HTTPS TLS certificate (aka SSL certificate)
To setup HTTPS you will need a TLS certificate if you are setting everything yourself. While you will see dozens of paid TLS certificate offerings, you can get a free TLS certificate from a non-profit Certificate Authority called Let’s Encrypt. There is absolutely nothing different between a certificate you get from Let’s Encrypt for free and one you pay for.
HTTPS on shared and managed WordPress hosting
Please note that for managed or shared hosting solutions, your hosting provider may or may not charge for adding HTTPS — if this is the case, before shelling out money for a certificate, ask their customer support if you can use a Let’s Encrypt certificate with their service instead. The Let’s Encrypt community forums are also a great resource that may help you.
Configuring WordPress HTTPS (enforcing TLS across your WordPress site)
There are a few ways to enforce TLS across your WordPress website depending on your set up. In most cases, you would either configure your web server to redirect all HTTP traffic to HTTPS (refer to Mozilla’s SSL configuration generator.
You also need to configure WordPress to listen on HTTPS. You can do so with plugins such as Really Simple SSL or WP force SSL. In this example, we’ll see how to do this without using any additional plugins.
Configuring the web server
Heads up
- Be careful when copy/pasting web server configurations and ensure you know exactly what they are doing by consulting your web server’s documentation
- You may find many examples online using either %{HTTP_HOST} (Apache HTTP Server), or $http_host (Nginx) — both of these could make your website susceptible to HTTP host header attacks — instead, type out your hostname in your configuration as seen below.
If you are using Nginx, you can configure the following:
server {
  listen 80;
  server_name example.com www.example.com;
  return 301 https://example.com$request_uri;
}
Alternatively, if you are using Apache HTTP Server, you can configure the following:
<IfModule mod_rewrite.c>
  RewriteEngine On
  RewriteCond %{HTTPS} off
  RewriteRule ^(.*)$ https://www.example.com%{REQUEST_URI} [L,R=301]
<IfModule>
Configuring the WordPress URL to HTTPS
Once you enable HTTPS on your web server, you’ll also need to set up WordPress. In theory you can do this manually: simply change the WordPress Address and Site Address in the WordPress general settings. You also need to do a search and replace in the database to change all your website links from HTTP to HTTPS.
[SCREENSHOT]
So most probably it is much easier to use a plugin to switch your WordPress website to HTTPS. You can use a popular plugin like Really Simple SSL to help you through the process.
Enforcing TLS on the WordPress dashboard
TLS is only useful if it’s being used. As such, you want to make sure that your WordPress site not only supports TLS, but also enforces it. Since the WordPress dashboard must always be accessed over HTTPS, WordPress includes the special configuration option FORCE_SSL_ADMIN, which can be set to true in wp-config.php.
define('FORCE_SSL_ADMIN', true);
Heads up
- Depending on your website setup and configuration (specifically, if you are using a reverse-proxy), this may cause requests to your WordPress dashboard to enter into an infinite redirect loop. For further information on how to fix this consult the WordPress documentation and always test your changes in a staging environment before rolling them out to production.
- Additionally, ensure you already have TLS configured and working correctly before setting FORCE_SSL_ADMIN to true.
BONUS TIP 1: Adding HTTP Strict Transport Security (HSTS)
While redirecting all your traffic to HTTPS is a great move, unfortunately, attackers may still have a few tricks up their sleeve. An attack known as SSL strip would allow an attacker to trick the browser to browse the site in HTTP instead of the secure HTTPS, effectively defeating your hard work altogether.
For more (highly technical) details on SSL strip attacks, watch the talk by Moxie Marlinspike below.
As a result, browsers now implement HTTP Strict Transport Security, or HSTS. HSTS is nothing but a simple HTTP header which tells the browser that this particular website should never be accessed over HTTP, defeating any SSL strip attacks.
Configuring HSTS on the web server
Heads up
- Do not enable HSTS until you’re confident with HTTPS — any visitors who receive this HTTP header will only be able to view your site over HTTPS
- Always set the max-age attribute — optionally, you may opt to set a low value the first time you deploy HSTS (to limit any potential issues) and increase it when you are more confident using HSTS
If you are using Nginx, you can configure the following within the server block listening on port 443:
# HSTS (ngx_http_headers_module is required) (63072000 seconds)
add_header Strict-Transport-Security "max-age=63072000" always;
Alternatively, if you are using Apache HTTP Server, you can configure the following within your VirtualHost listening on port 443:
# HTTP Strict Transport Security (mod_headers is required)
(63072000 seconds)
Header always set Strict-Transport-Security "max-age=63072000"
Bonus Tip 2: Configuring TLS Ciphers
To ensure that transfer of data between the browser and the server is secure, both parties agree to make use of what is known as a cipher suite — a combination of authentication, encryption, and message authentication code (MAC) algorithms — to negotiate security settings, as well as to transfer data securely.
Unfortunately, many legacy ciphers have security vulnerabilities and are not particularly safe to use any longer. While deciding which ciphers to use is a tricky business, the Mozilla SSL Configuration Generator makes it a piece of cake to pick a TLS cipher suite that suits your needs. Where possible, try and go with the modern or intermediate profiles, however, depending on your use case, especially if you need to support legacy browsers or meet regulatory and compliance requirements, you may need to use slightly different cipher suite configurations.
If you are using Nginx, you can configure the following TLS ciphers (based on the Mozilla SSL Configuration Generator intermediate profile):
 # intermediate configuration
ssl_protocols TLSv1.2 TLSv1.3;
ssl_ciphers ECDHE-ECDSA-AES128-GCM-SHA256:ECDHE-RSA-AES128-GCM-SHA256:ECDHE-ECDSA-AES25
6-GCM-SHA384:ECDHE-RSA-AES256-GCM-SHA384:ECDHE-ECDSA-CHACHA20-POLY1305:ECDH
E-RSA-CHACHA20-POLY1305:DHE-RSA-AES128-GCM-SHA256:DHE-RSA-AES256-GCM-SHA384;
ssl_prefer_server_ciphers off;
Alternatively, if you are using Apache HTTP Server, you configure the following TLS ciphers (based on the Mozilla SSL Configuration Generator intermediate profile):
# intermediate configuration
SSLProtocol all -SSLv3 -TLSv1 -TLSv1.1
SSLCipherSuite ECDHE-ECDSA-AES128-GCM-SHA256:ECDHE-RSA-AES128-GCM-SHA256:ECDHE-ECDSA-AES256-GCM-SHA384:ECDHE-RSA-AES256-GCM-SHA384:ECDHE-ECDSA-CHACHA20-POLY1305:ECDHE-RSA-CHACHA20-POLY1305:DHE-RSA-AES128-GCM-SHA256:DHE-RSA-AES256-GCM-SHA384
SSLHonorCipherOrder off
SSLSessionTickets off
You can also test your website’s TLS configuration score using a free tool called SSLabs for even more technical insight.
My WordPress runs on HTTPS, is it secure?

Green padlock icons and the words “secure” next to your browser’s address bar may have led you to believe that HTTPS is some magic wand that solves all website security woes. Unfortunately, it does not.
HTTPS is only a small part of WordPress security: it allows visitors to browse your website over a secure connection. However it does not protect your website like a WordPress firewall, or make it more secure. It does not mean that it is more secure than a website running on HTTP either. Like any other security defenses, HTTPS helps solve part of the problem.
In other words, while you certainly should implement and enforce HTTPS, it does not mean you can rest easy and never worry about security again. You should still:
- Add two-factor authentication
- Install a file integrity monitoring plugin
- Enforce strong WordPress password policies
- Keep a WordPress activity log as a record of all changes that happen on your website
- Use a good firewall.


Hello, Although this post is strictly related to WordPress security but after reading your I stumbled upon a question which is: Does having EV certificate improves your ranking in any way compared to DV certificate offered by Let’s Encrypt?
Interesting question Mehroz. No, it does not help in anyway your ranking or security for that matter.