Updated on 14 July, 2026
Getting started with the WP 2FA plugin
Thank you for choosing WP 2FA to add an extra layer of security to your WordPress website. This guide walks you through everything you need to get up and running.
The whole process takes just a few minutes. Once the plugin is installed, a friendly setup wizard guides you through configuring two-factor authentication (2FA) for yourself and the other users on your site.
Note: WP 2FA comes in a free edition and a Premium edition. The free edition covers the essentials, while Premium/Enterprise unlocks additional 2FA methods, per-role policies, white labeling, and more. Some options in this guide are Premium only and are marked accordingly.
Table of contents
Click to accept marketing cookies and enable this content

Step 1: Install and Activate WP 2FA
Choose the path below that matches your situation, then continue to the setup wizard in Step 2.
Path 1 – Installing WP 2FA free edition
Install directly from your WordPress dashboard:
- In your WordPress admin area, go to Plugins > Add New Plugin.
- Search for WP 2FA in the search box.
- Click Install Now next to WP 2FA – Two-factor authentication (2FA) by Melapress, then click Activate.
Prefer to install manually? Download from the WP 2FA page on WordPress.org and upload via Plugins > Add New Plugin > Upload Plugin.
As soon as the plugin is activated, the setup wizard starts automatically. Continue to Step 2.
Path 2 – Installing WP 2FA premium or enterprise
Whether you are upgrading from the free edition or starting fresh with Premium, the installation steps are the same.
Note: The free and Premium editions share the same database. All of your existing WP 2FA configuration – your policies, 2FA methods, enforcement rules, grace period, and per-user 2FA setups – carry over automatically when you move to Premium. There is nothing to reconfigure, and your users do not need to set up 2FA again.
- Download the WP 2FA Premium ZIP file from your purchase confirmation email or your My Account page. Make a note of your license key.
- In WordPress, go to Plugins > Add New Plugin > Upload Plugin, choose the ZIP file, click Install Now, then Activate. If upgrading, installing Premium over the free edition is perfectly safe – the free version deactivates automatically, and all your data stays in place.
- You’ll be redirected to the Activate License dialog. Paste your key and click Activate License.
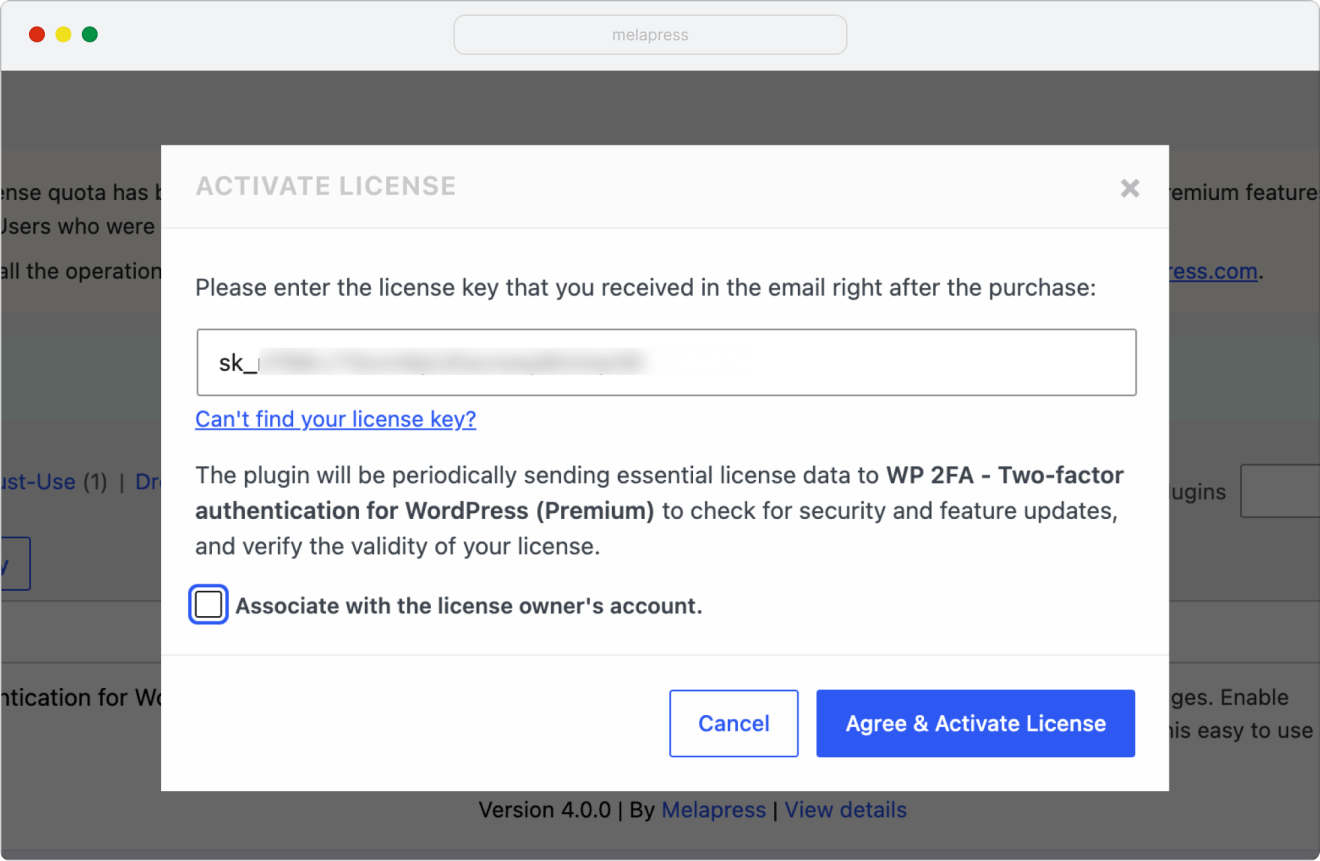
Note: There are alternative ways to activate the license key.
- From the Plugins page: Go to Plugins, find WP 2FA Premium, and click Activate License underneath it.
- From the License tab: Go to WP 2FA > License, click Activate License, paste your key, then click Activate License again.
Can’t find your license key? Your key is in your purchase confirmation email (check your spam folder) and on your My Account page. You can also open a support ticket, and our team will help.
Once your license is active, all Premium features are unlocked instantly, and all your previous settings remain in place. The setup wizard starts automatically – continue to Step 2.
Step 2: The Setup Wizard
When WP 2FA is activated, a quick setup wizard launches automatically to help you configure 2FA for everyone on your site. Click Let’s get started! to begin.
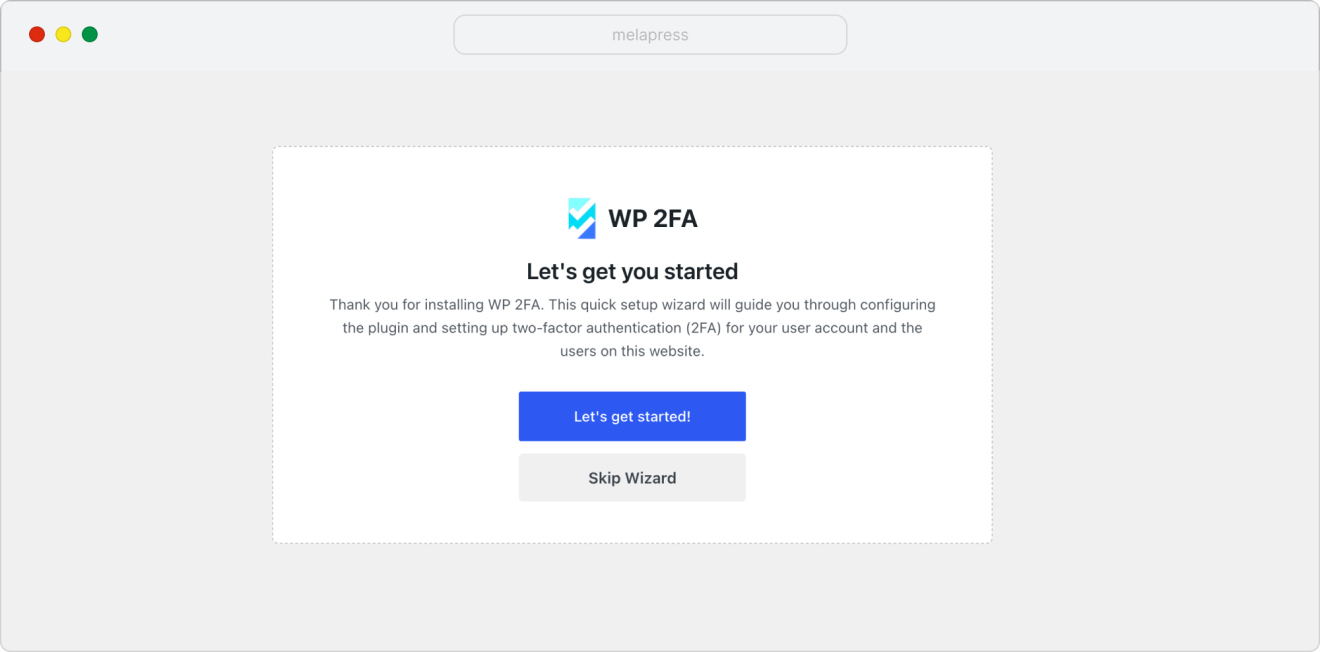
Already closed the wizard? The wizard runs only once. If you closed it or finished it, it will not reappear. That is perfectly fine: every setting covered below is available at any time from WP 2FA > 2FA Policies. The exact location within that page is noted in each section below, so you can still follow along even if you’ve already closed the wizard.
Step 2.1: Choose your 2FA methods
On the first screen, choose which two-factor methods your users will be able to use. The two most popular options are enabled by default:
- One-time code via 2FA app (TOTP) – users generate a login code with an authenticator app such as Google Authenticator, Microsoft Authenticator, or Authy.
- One-time code via email – users receive their code by email. Make sure your site can reliably send emails before relying on this method.
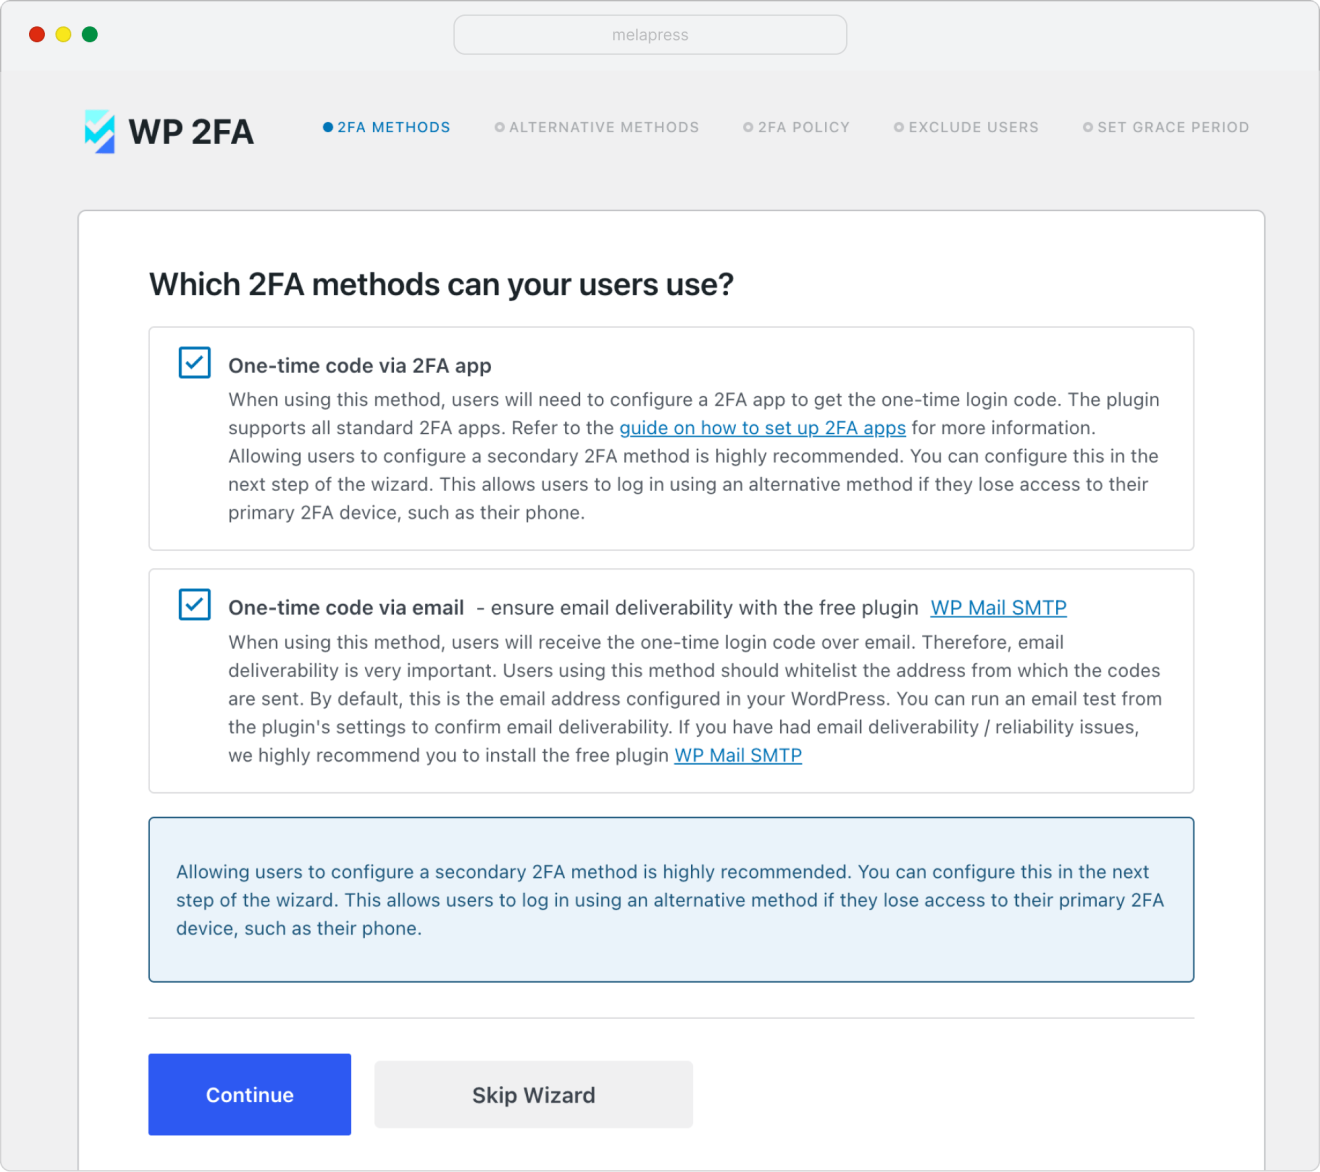
Where to change this after the wizard:
Go to WP 2FA > Sitewide 2FA Policies and find the 2FA methods section. Tick or untick the methods you want to offer users.
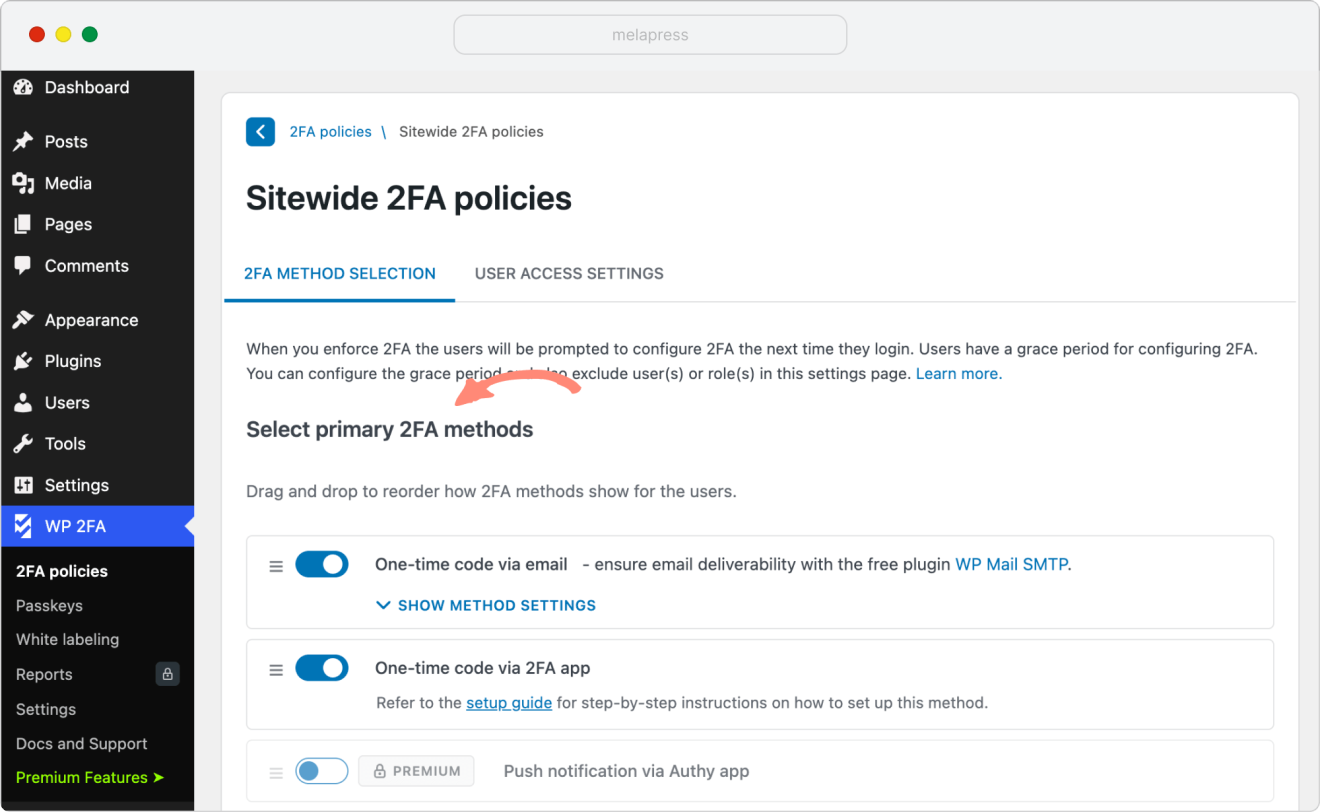
WP 2FA Premium supports several additional methods you can enable from 2FA Policies, including zero-setup email 2FA, hardware keys (YubiKey), SMS, and one-click login links.
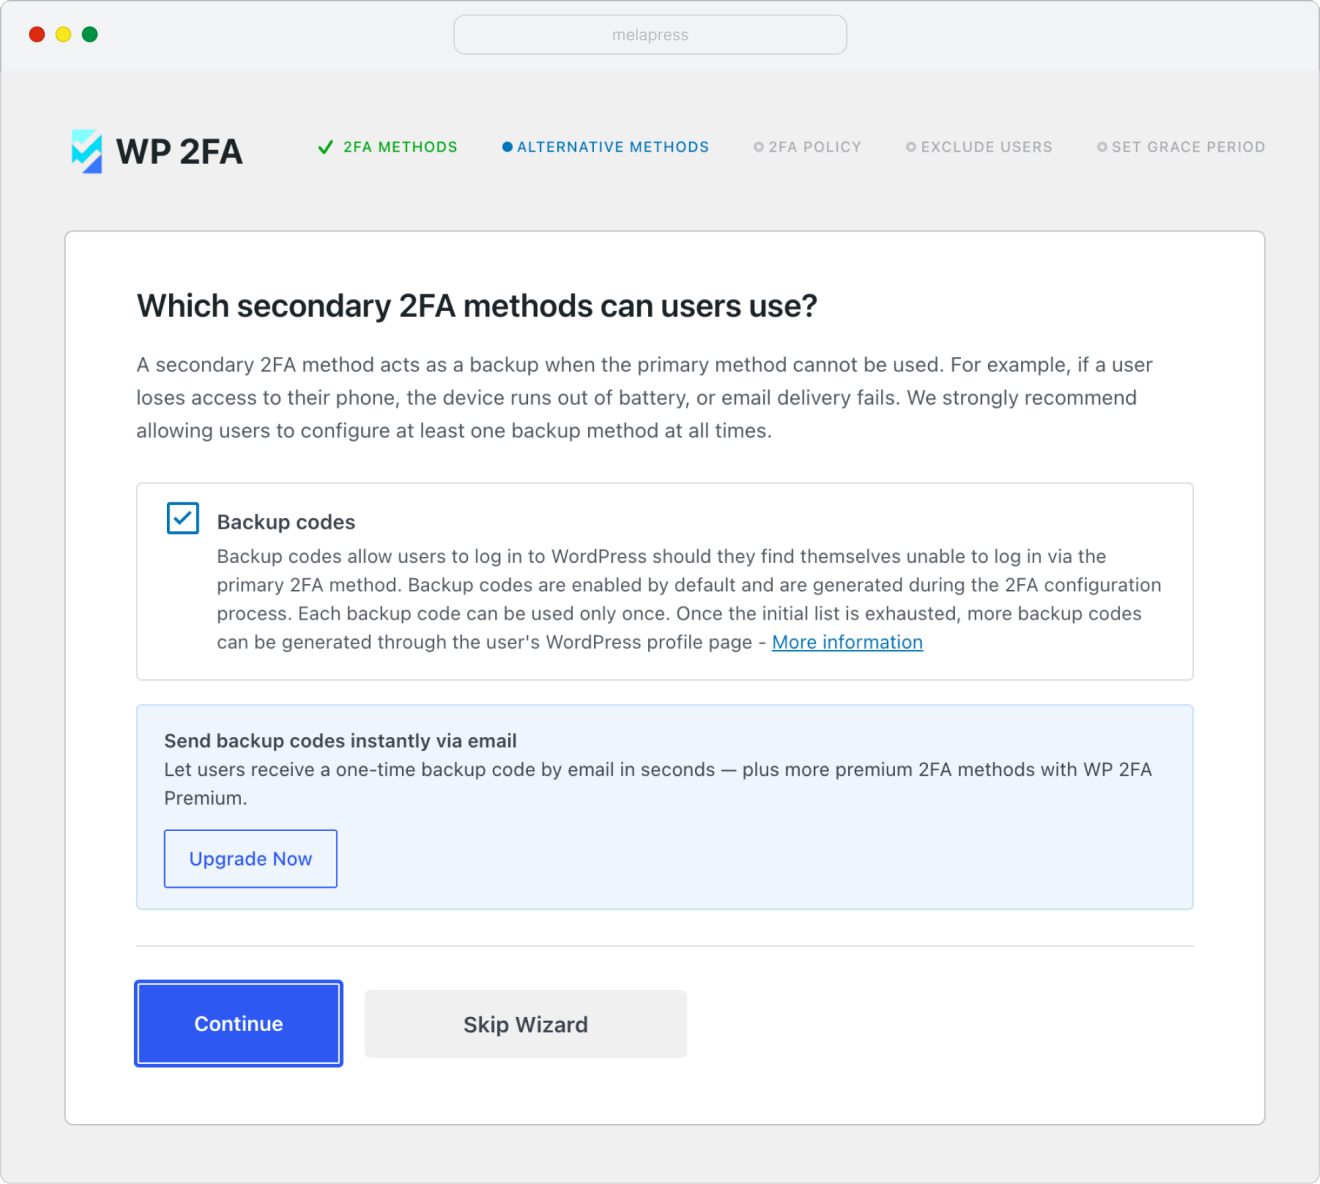
Step 2.2: Choose your backup (secondary) methods
A backup method acts as a safety net when the primary method is unavailable – for example, if a user loses their phone or email delivery fails. We strongly recommend enabling at least one to avoid unnecessary lockout.
- Backup codes – one-time-use codes generated in bulk. Each code works only once. (Free)
- One-time code via email – lets users request a code by email from the login screen. (Premium)
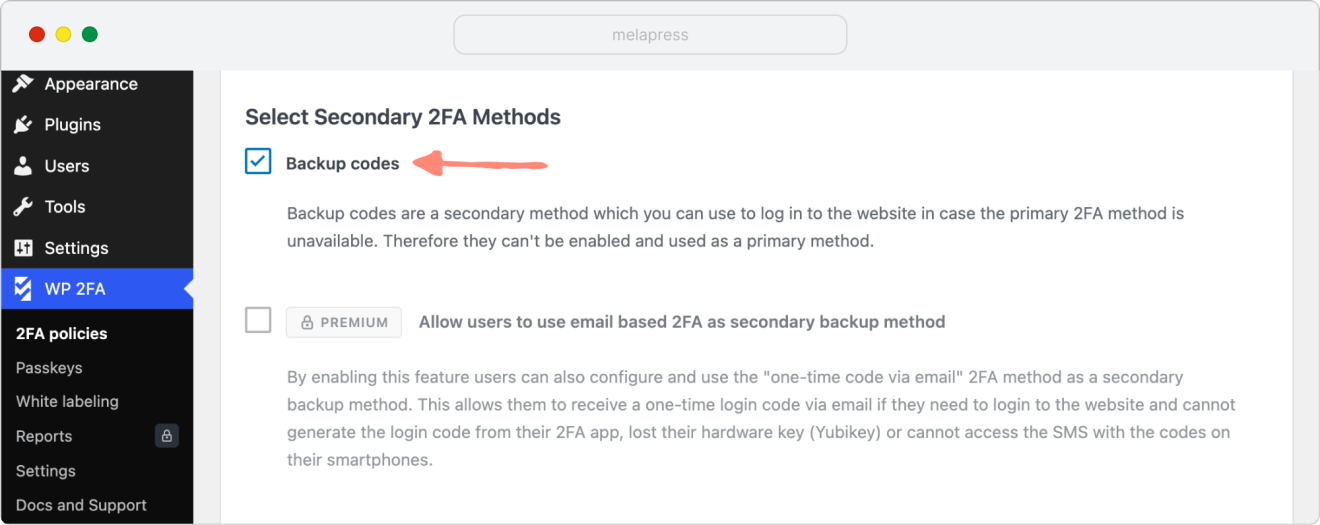
Where to change this after the wizard:
Go to WP 2FA > Sitewide 2FA Policies and find the Backup methods section. Enable or disable backup options there.
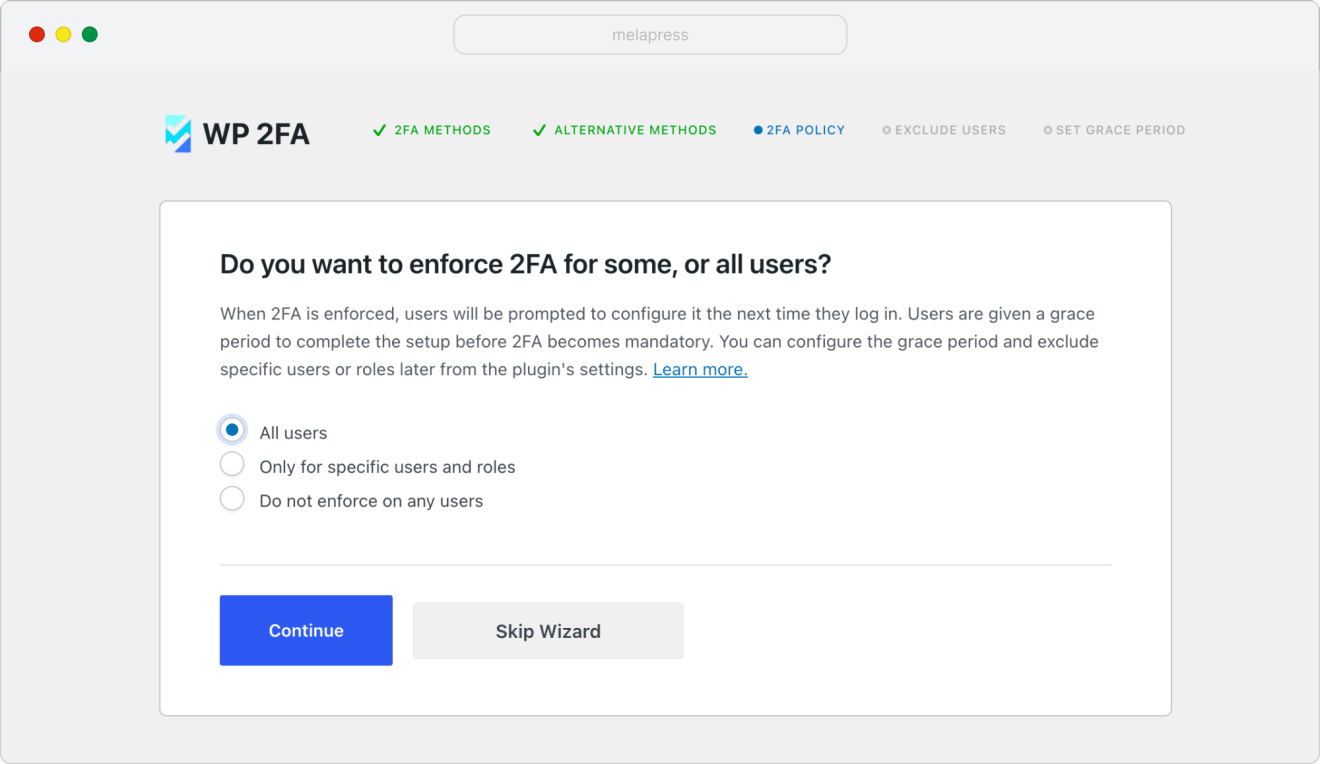
Step 2.3: Decide who needs 2FA
Choose whether 2FA is required (enforced) and for whom. If you enforce it, users are prompted to set up 2FA the next time they log in.
- All users – require 2FA for everyone.
- Only for specific users and roles – require it for the users or roles you choose.
- Do not enforce on any users – leave 2FA optional (users can still choose to enable it themselves).
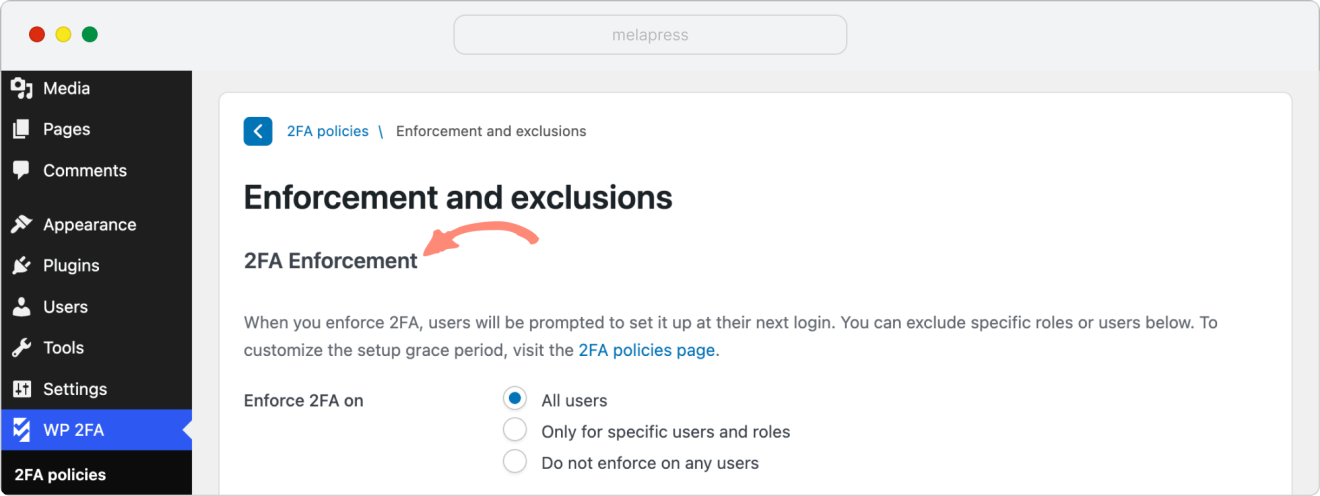
Where to change this after the wizard:
Go to WP 2FA > 2FA Policies > Enforcement and exclusions > 2FA Enforcement. The enforcement scope (all users, specific roles, or no one) is at the top of that section.
Choosing Do not enforce on any users does not switch 2FA off – it simply makes it optional. Users can still enable 2FA themselves from their profile page.
If you want to prevent specific users or roles from using 2FA at all, that is what the exclusion option is for (see section 2.4 below). Excluded users cannot set up 2FA even if they want to. For more, check our guide Configure policies & enforce 2FA.
Step 2.4: Exclude users or roles (optional)
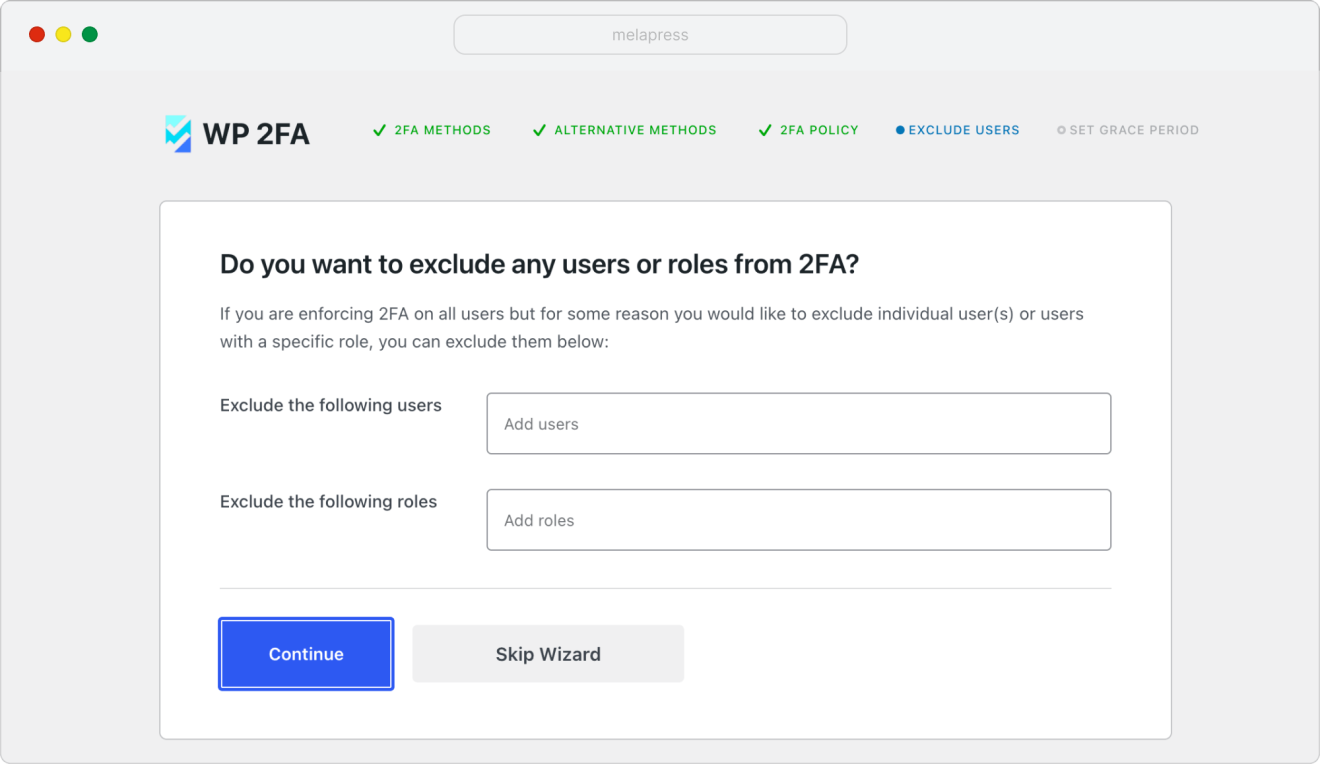
If you are enforcing 2FA but need to leave out a particular user or role, list them here. Anyone excluded will not be able to set up 2FA. Leave the fields empty if this does not apply to you. This step appears only when 2FA is being enforced.
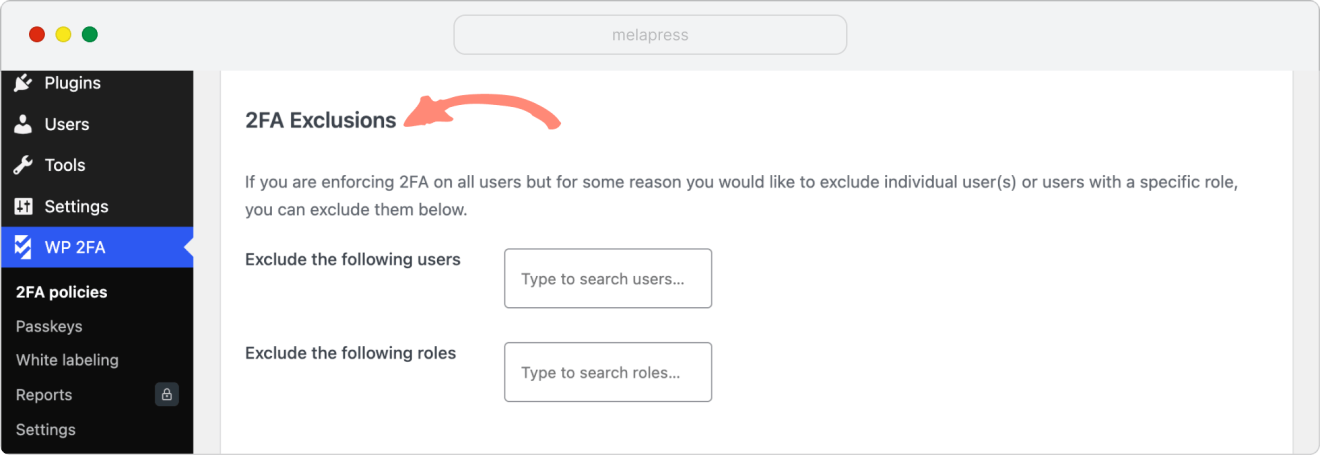
Where to change this after the wizard:
Go to WP 2FA > 2FA Policies > Enforcement and exclusions > 2FA Exclusions. The excluded users and roles fields can be found there.
Step 2.5: Set a grace period
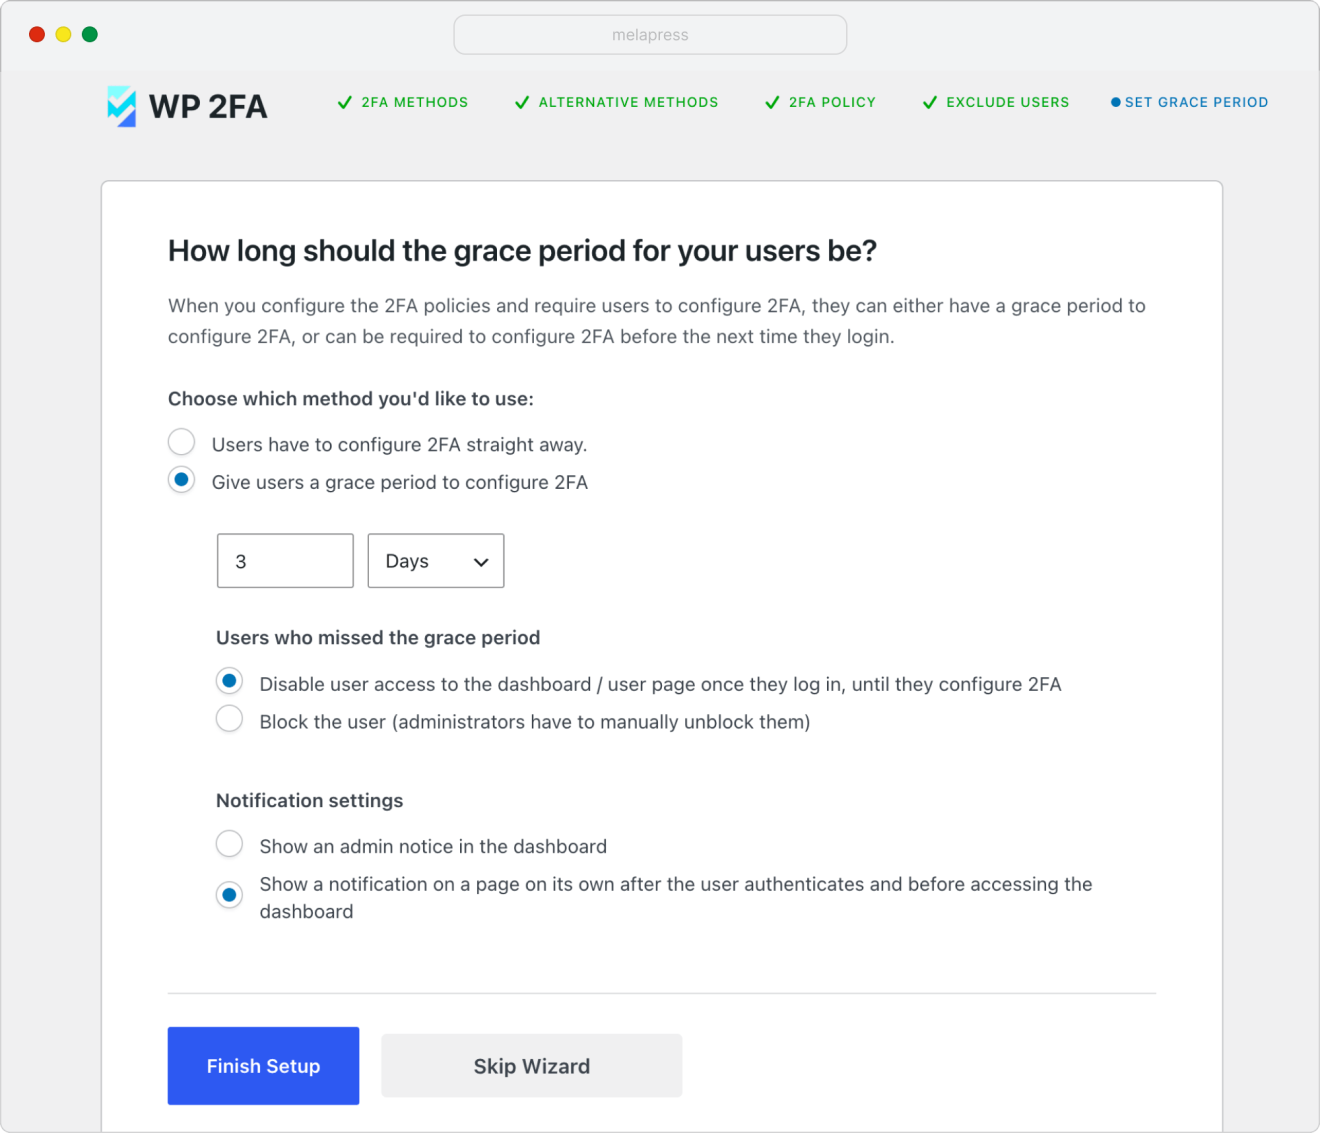
If you are enforcing 2FA, decide how much time users have to set it up:
- Users must configure 2FA straight away – no grace period.
- Give users a grace period – for example, 3 days before 2FA becomes mandatory.
You can also choose what happens when the grace period ends (restrict dashboard access until they comply, or block the account), and how users are reminded in the meantime.
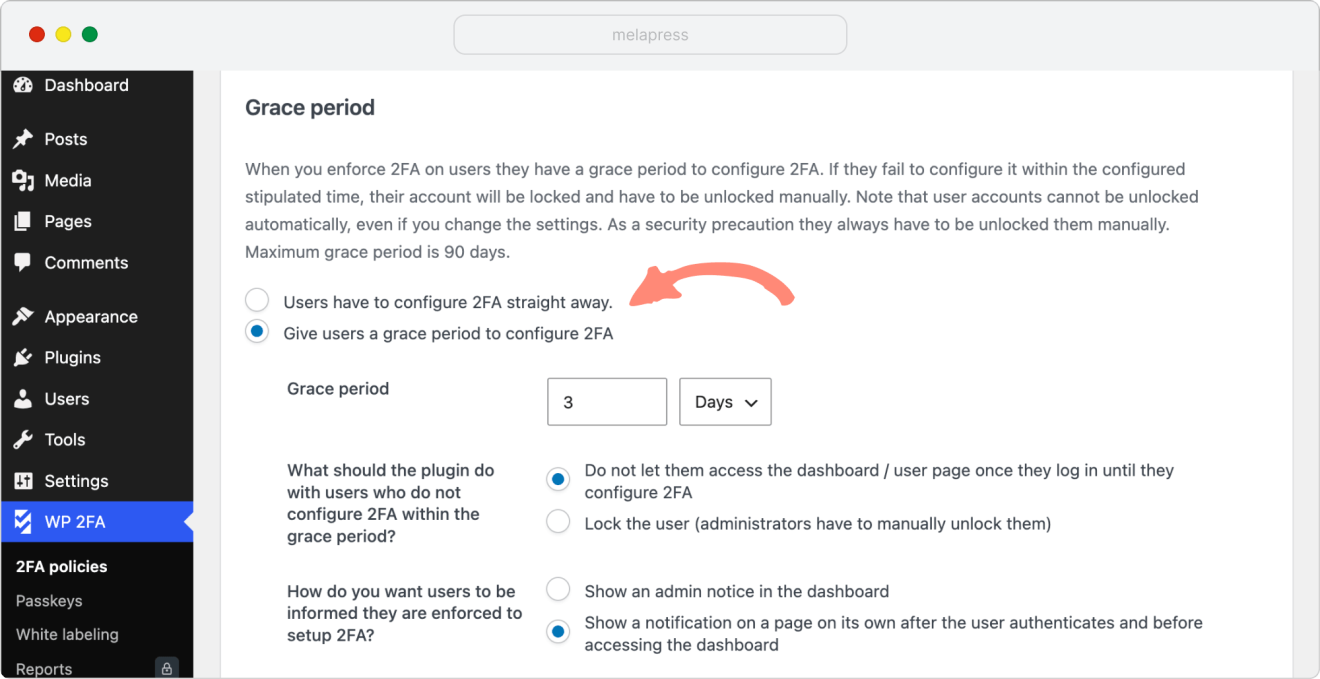
Where to change this after the wizard:
Go to WP 2FA > Sitewide 2FA Policies > User access settings. The grace period duration, expiry behavior, and email reminder options are all in that section.
When you are happy with your choices, click Finish Setup.
Step 3: Set Up 2FA for Your Own Account
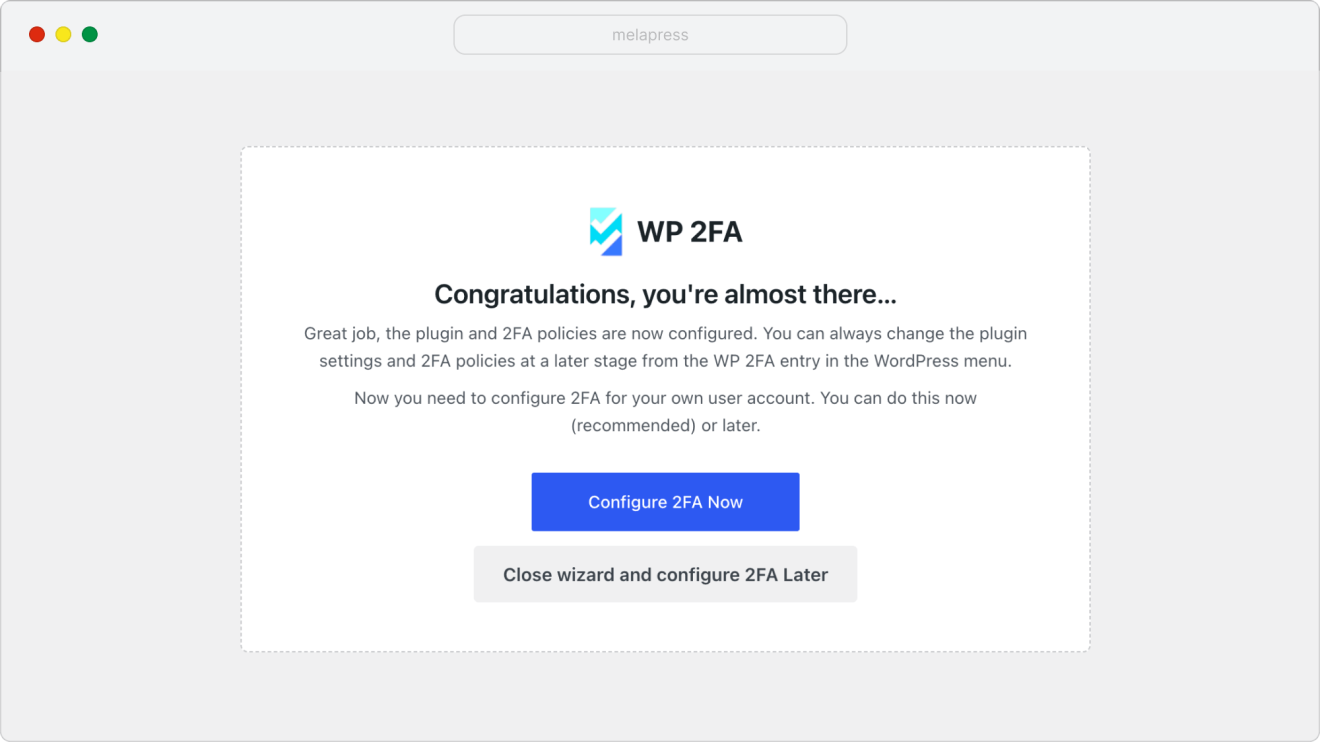
That’s the site-wide configuration done! The final wizard screen invites you to set up 2FA for your own user account. We recommend doing this now so your own login is protected right away, but you can also choose Close wizard and configure 2FA later.
For a step-by-step walkthrough of setting up 2FA for a user account, see how to configure 2FA for your WordPress user account.
Next Steps
The setup wizard gets the essentials set up in minutes, but WP 2FA can do much more. When you are ready to explore further:
- Customize the 2FA user experience (white labeling) – match the look and feel to your brand.
- Fine-tune your 2FA policies – per-role rules and full enforcement options.
Need a hand? If anything is unclear or you run into a snag, our team is happy to help – simply open a support ticket. Thank you for trusting WP 2FA with your website’s security!